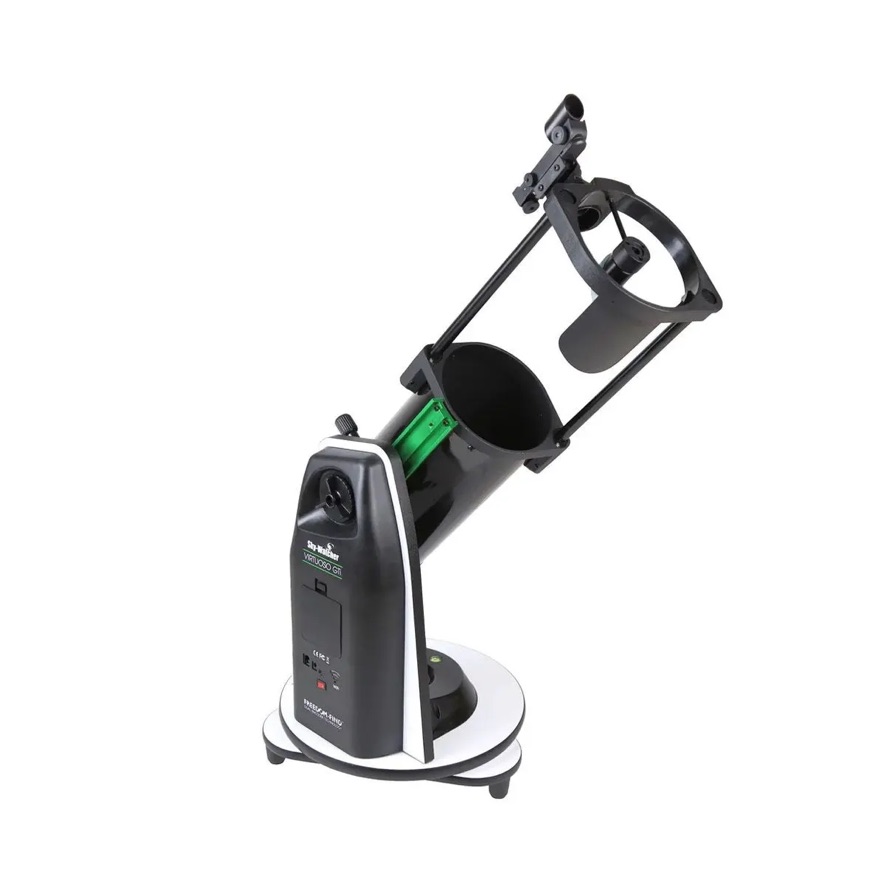
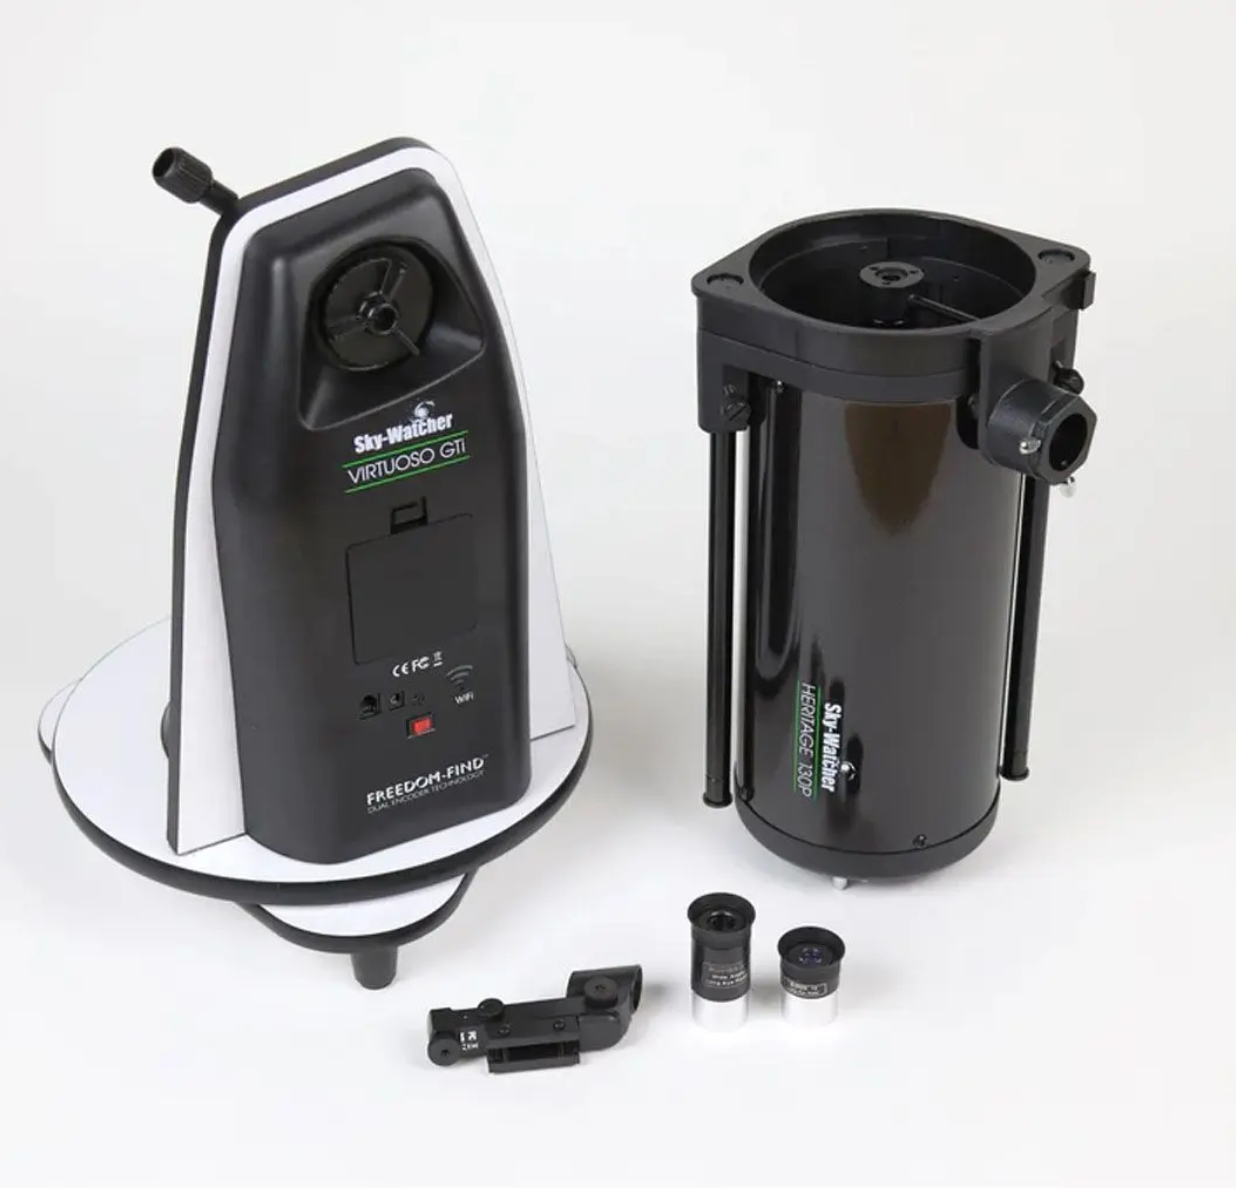
I just saw the following advertisement this weekend (March 29th 2026) and it caught my attention. A 130mm GoTo portable Dobsonian for $495 which includes two eyepieces and a red dot finder. This could make for a great beginner telescope, as the GoTo mount makes finding deep-objects really easy. And the collapsable design makes it very convenient when transporting the telescope.
This telescope would also be excellent for the most advanced, and with many telescopes, due to the size and portability.
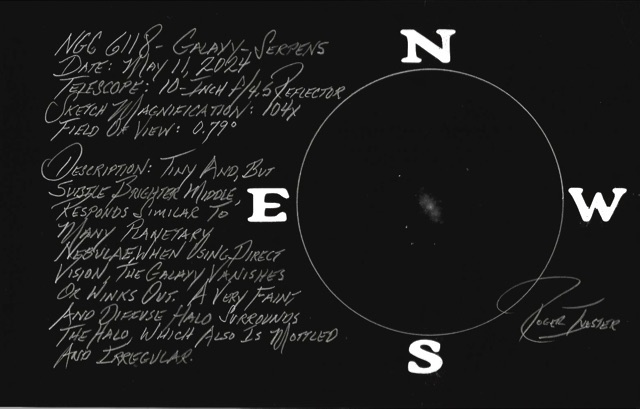
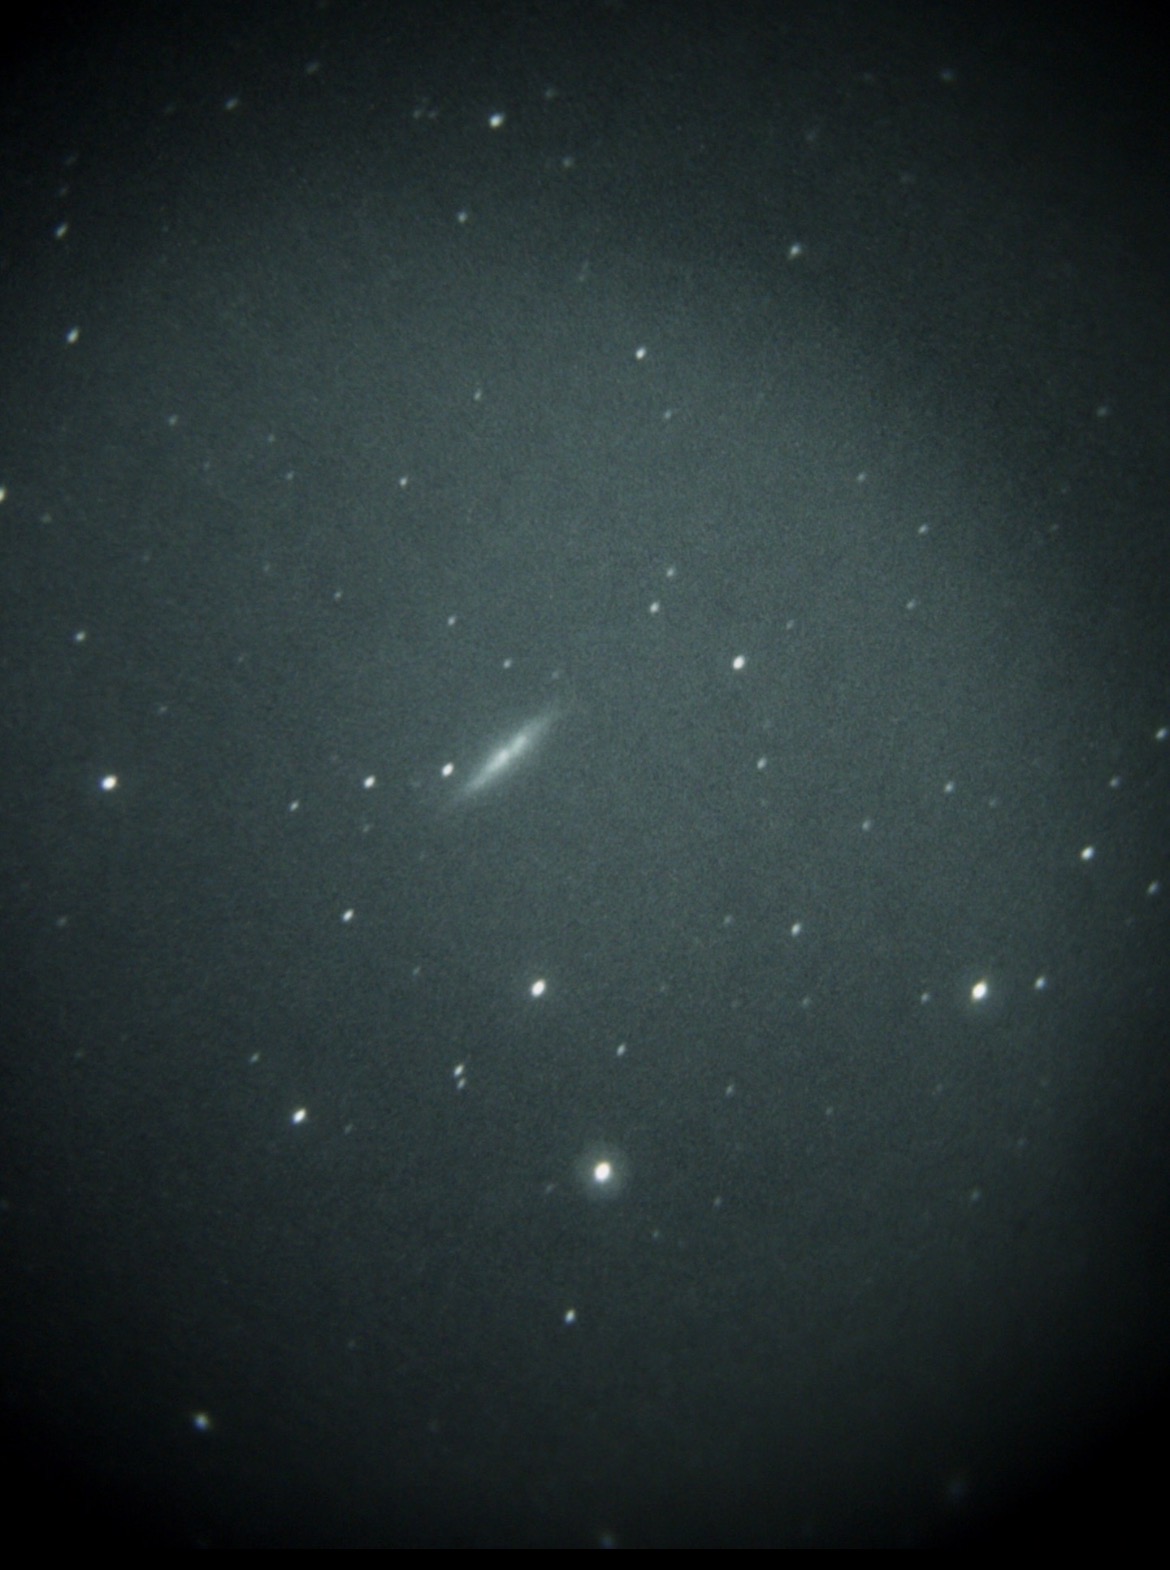
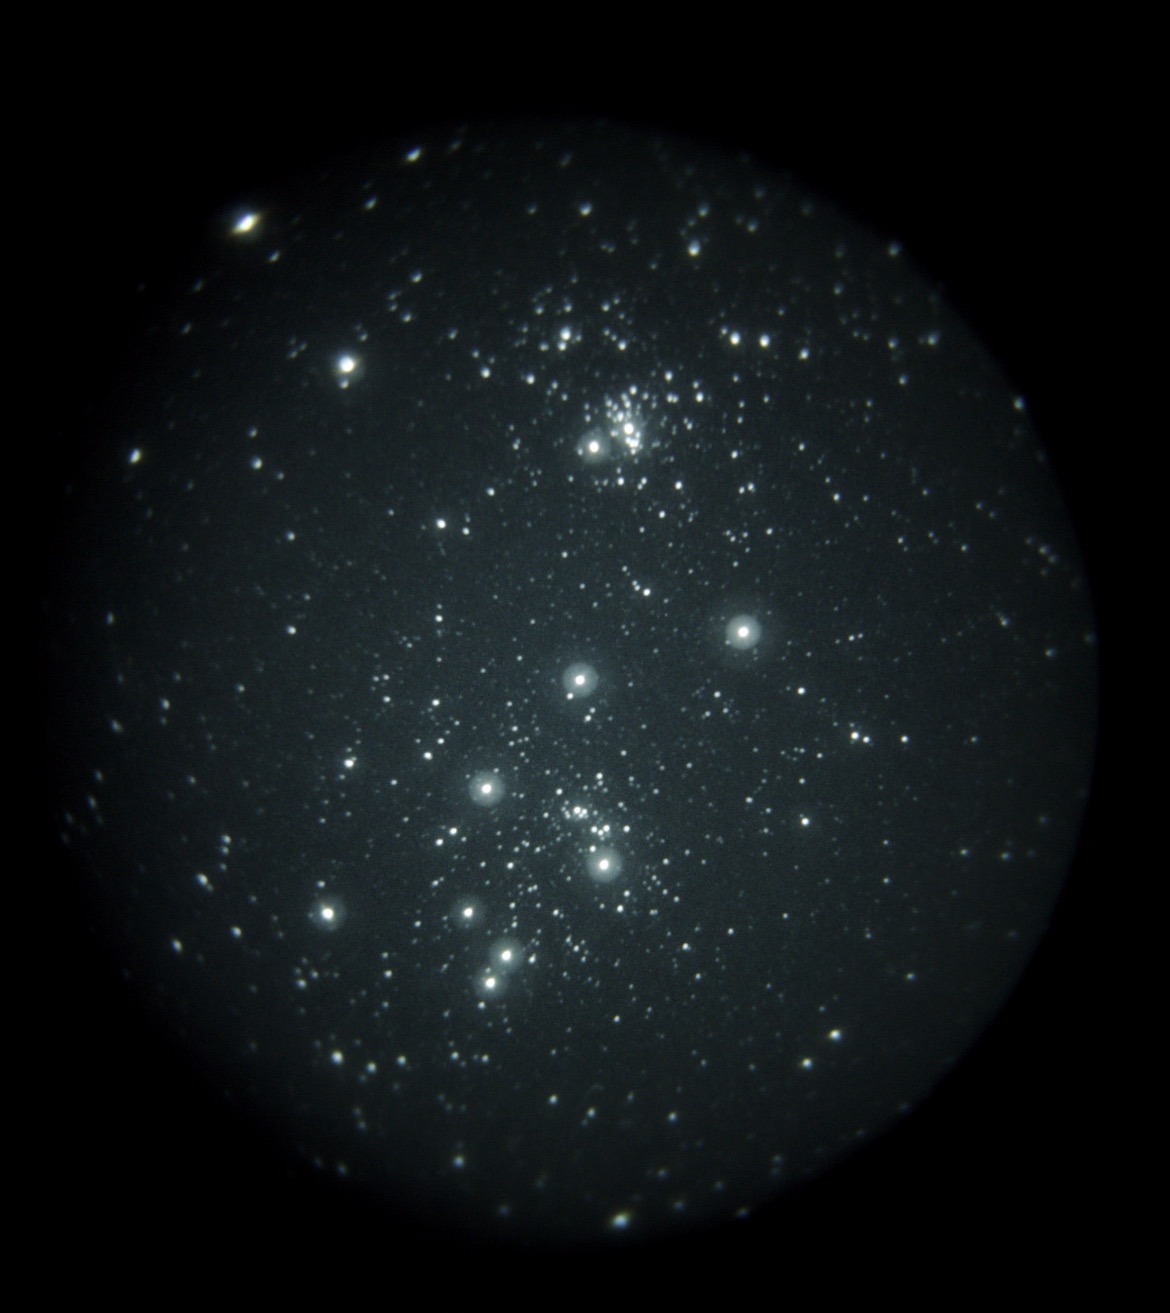
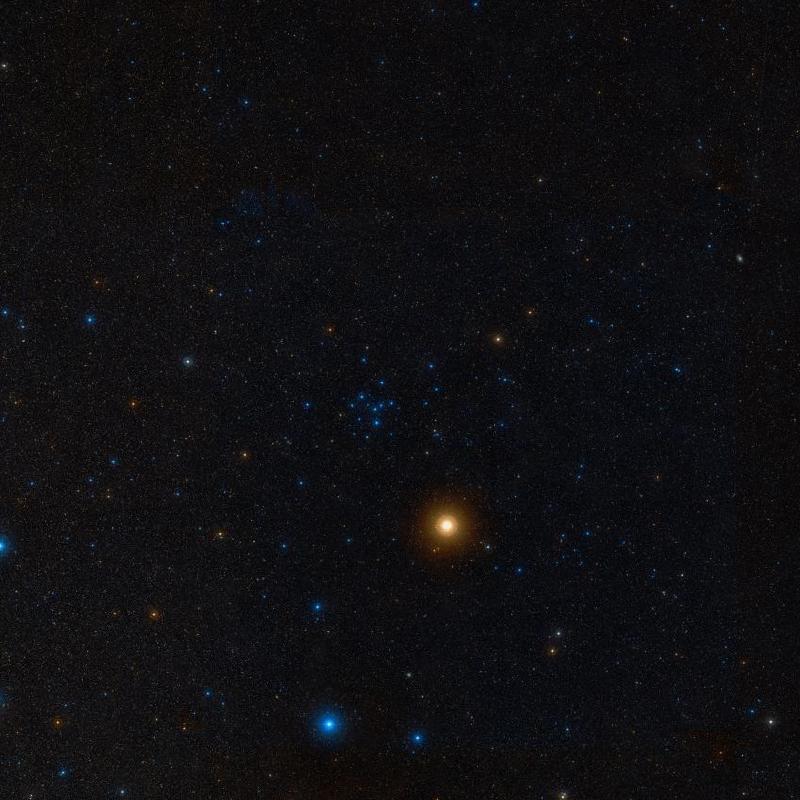
Galaxy NGC 6118 (Serpens) and open cluster NGC 6540 (Sagittarius).
If you are considering taking on the Herschel-400 list: If can see these two objects, it’s very likely you will be able to see all of the other 398 objects. This is contingent on having an unobstructed sky, and with a minimum of light pollution
During the winter of 1994, I began my effort to see as many of the H-400 objects as possible from my suburban backyard. Due to light pollution, trees and obstructions, I knew it would be impossible for me to see the entire list. I started in earnest and dedicated “the majority of my observing time” for about two years to the list. Many of the small open clusters gave me a problem and were difficult to identify. I called many of these clusters “non-existent” in my notes.
I made notes of all the ~250 objects, and sometimes with a pencil sketch of those worthy of a sketch. However, due to trees, houses and light pollution over two year period, I called it quits.
My story of seeing NGC 6118, which was very difficult from my suburban backyard using a 10-inch f/4.5 EQ Newtonian. I never attempted open cluster NGC 6540, due to its more southerly sky position with severe light pollution.
…I attempted two very early morning observing sessions in March and April of 2024 from my suburban backyard, but again without success.A dark site is really needed to observe any low-surface-brightness galaxy, especially one as dim and faint as NGC 6118.
However, traveling to a dark-site has been over for me now for many years. The disassembly of a heavy equatorial mount and handling a large solid-tube Newtonian, loading, driving, unloading, reassembly, and then having to do it all again, became just too much. I will continue to do my best from the backyard.
Many years ago, I assembled light-block system, made of heavy-duty automotive-marine fabric. This simple, but effective structure has helped me on many occasions over the years to see difficult and faint deep-sky objects. The light-block system is especially helpful in some areas of the southern sky, where light pollution is significant.It’s easy to set up and take down. When the fabric is removed and folded for storage, the steel post and plastic-coated wires remain and are hardly noticeable.
I attribute my ability to finally see NGC 6118 was due to blocking a very bright LED carport light less than 1/8 mile away. This light was shining directly toward my backyard, and brightening up the area of my telescope and observing location significantly. Due to the light pollution in my southern sky…I never even considered open cluster NGC 6540.
Saturday morning; May 11th 2024 @ 1:00 AM, with a 5.0 NELM overhead, but far less in the sky near NGC 6118, due to overlooking the town of Boiling Springs.
With a bit of difficulty and after almost an hour of careful observing, I was finally able to see the galaxy. My portable “make-shift” observatory was the answer to finally seeing this faint and difficult object from my suburban backyard.
I really don’t think this galaxy would be that difficult from a dark-site, and with my 10-inch Newtonian. However, as I’ve mentioned previously, my days of traveling with a telescope have been over for a few years now. I just love the convenience of my backyard and seeing a galaxy this faint, proves that a suburban backyard can still allow effective deep-sky observing.
Description: A tiny and subtle brighter middle, which resembles that of a planetary nebula. And like so many planetary nebulae, when using direct vision, vanishes or winks out. I now know why NGC 6118 is known as “The Blinking Galaxy.” The galaxy has a very faint and diffuse halo with mottling, which is oriented NE-SW.
Roger Ivester
The following are some excerpts from an article by Jay Reynolds Freeman concerning his success in seeing all of the H-400 objects using a Vixen 55 mm f/8 fluorite refractor. Yes…a 55mm refractor!
“Seduced by exquisite optics and compact size, I bought a used Vixen 55 mm f/8 refractor, whose objective used the optical material fluorite, in April, 1998. To replace by attitude what it lacked in size, I repainted the tube, and named the telescope Refractor Red, for its new, fluorescent color. I mounted it on an altazimuth mounting from an 80 mm refractor, then set out in pursuit of all the Messier objects. I anticipated the search would not be difficult, for three of my previous Messier surveys had been with less aperture. So I decided to try something harder, too — the Astronomical League’s “Herschel 400″ list. That modern selection from the brighter objects discovered by Sir William Herschel, would be challenging.”
“…As word of my project got around, curious fellow observers asked whether I had tried their favorite difficult Herschel-400 targets. I kept hearing about NGC 6118 and NGC 6540. The former is an obliquely viewed low surface brightness spiral galaxy in eastern Serpens Caput,the latter a little cluster in Sagittarius. One June night, I looked for both from Fremont Peak State Park, a popular observing site near San Juan Bautista, California.”
“Uncommonly good transparency and an incomplete fog layer on the coastal plain below made the high sky quite dark. The North American Nebula was easy with the naked eye: I could detect the “Gulf of Mexico”within it. I looked for NGC 6118 with two eyepieces, alternating between my 12 mm Brandon and a 20 mm Meade Research Grade Erfle, which gave 22x and a 2.5 mm exit pupil.”
“With each eyepiece, I saw a faint, diffuse, and not very centrally concentrated glow, popping in and out at the limit of averted vision, at the charted position. Jiggling the telescope, or moving it slightly with the slow motions, helped a bit. The glow was detectable only ten or twenty percent of the time, but it kept reappearing at the same place. Since I did not see similar fluctuations of intensity at random places in the field, I logged it. That was the toughest object in my Herschel-400 survey with Refractor Red.”
“Its difficulty might stem from not having nearly as large or bright a center as most other galaxies. A bright core seems to draw the eye, and to give the brain a reference point for locating the fainter, outer periphery of the object. Since I had an equally good view at 22x and 37x, I suspect that a magnification between those values might have best suited NGC 6118 that night.”
“Unfortunately, I had not brought a suitable eyepiece. Herschel described NGC 6540 as a faint, sparse, relatively small open cluster, yet what _Millennium_Star_Atlas_ plots is a ten arc-minute globular. Using the 12 mm Brandon, I saw a six or seven arc-minute unresolved circular glow, just barely brighter than the background of the Sagittarius Milky Way, with a smaller, brighter core superimposed.”
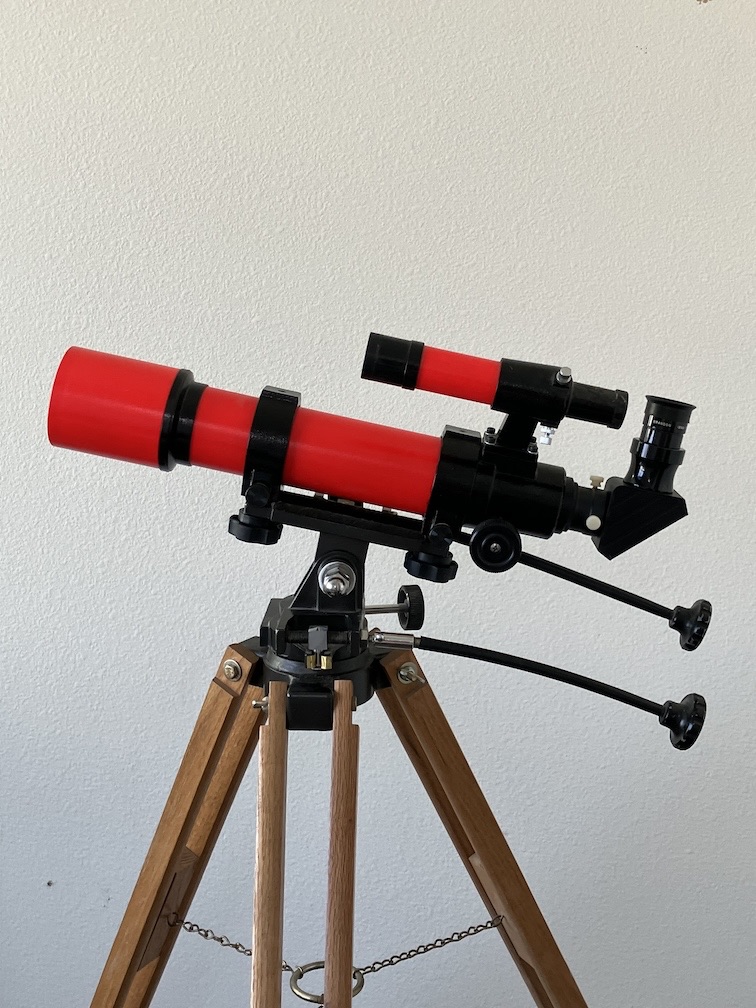
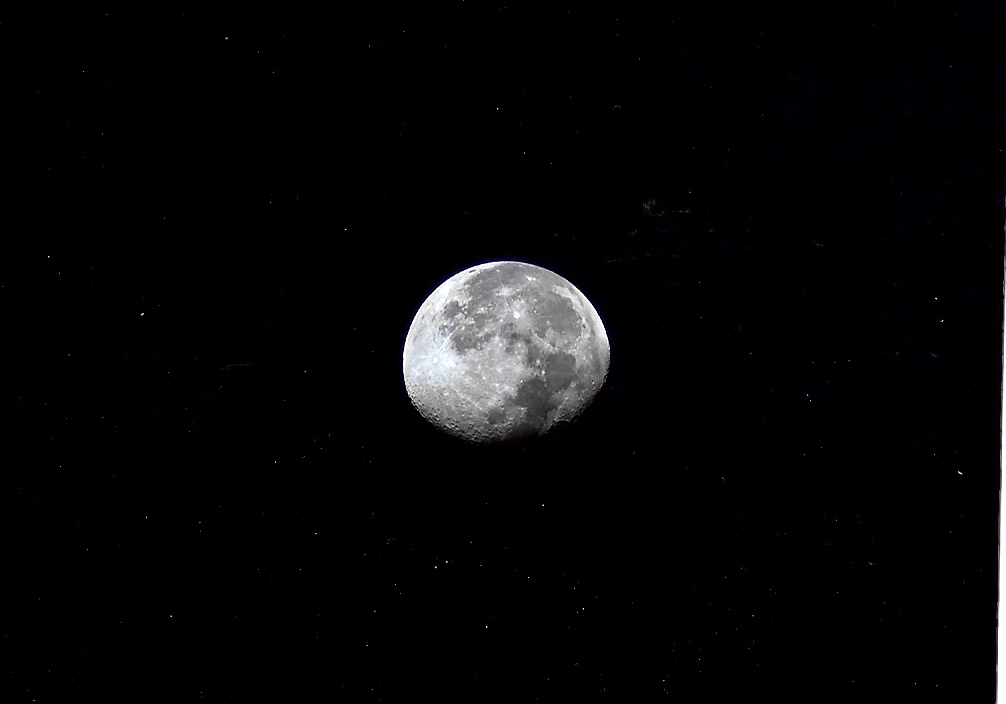
I used an Orion 80mm f/5 refractor telescope and a Nikon D3300 camera for my very first photo of the moon:
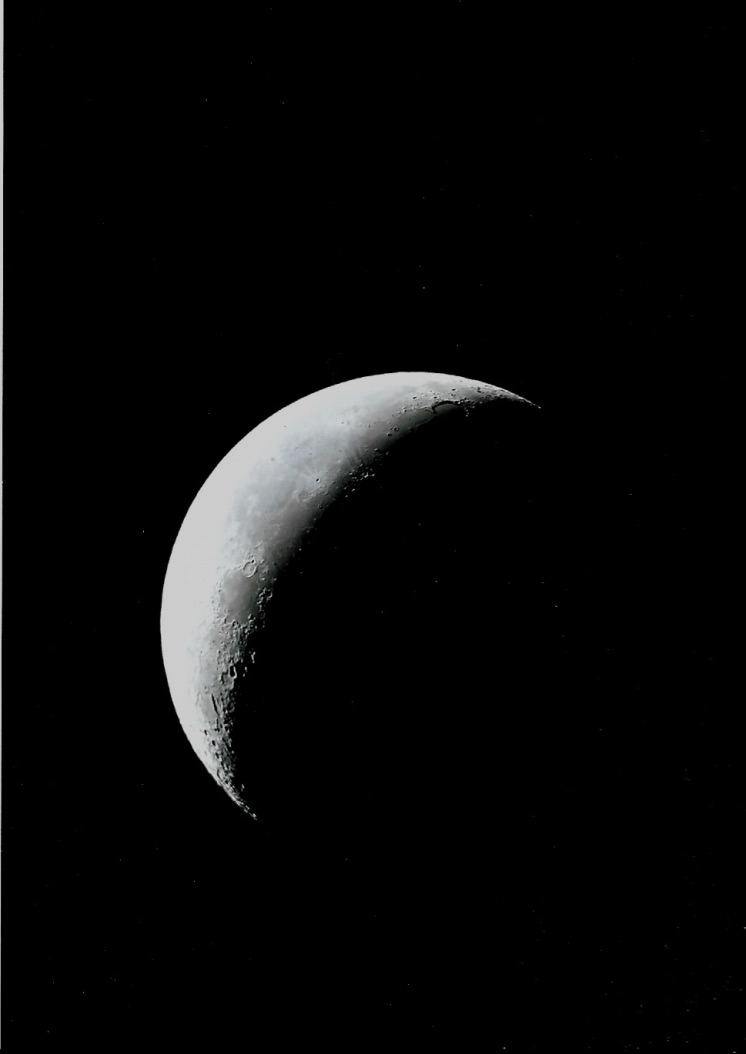
Other attempts of the moon:
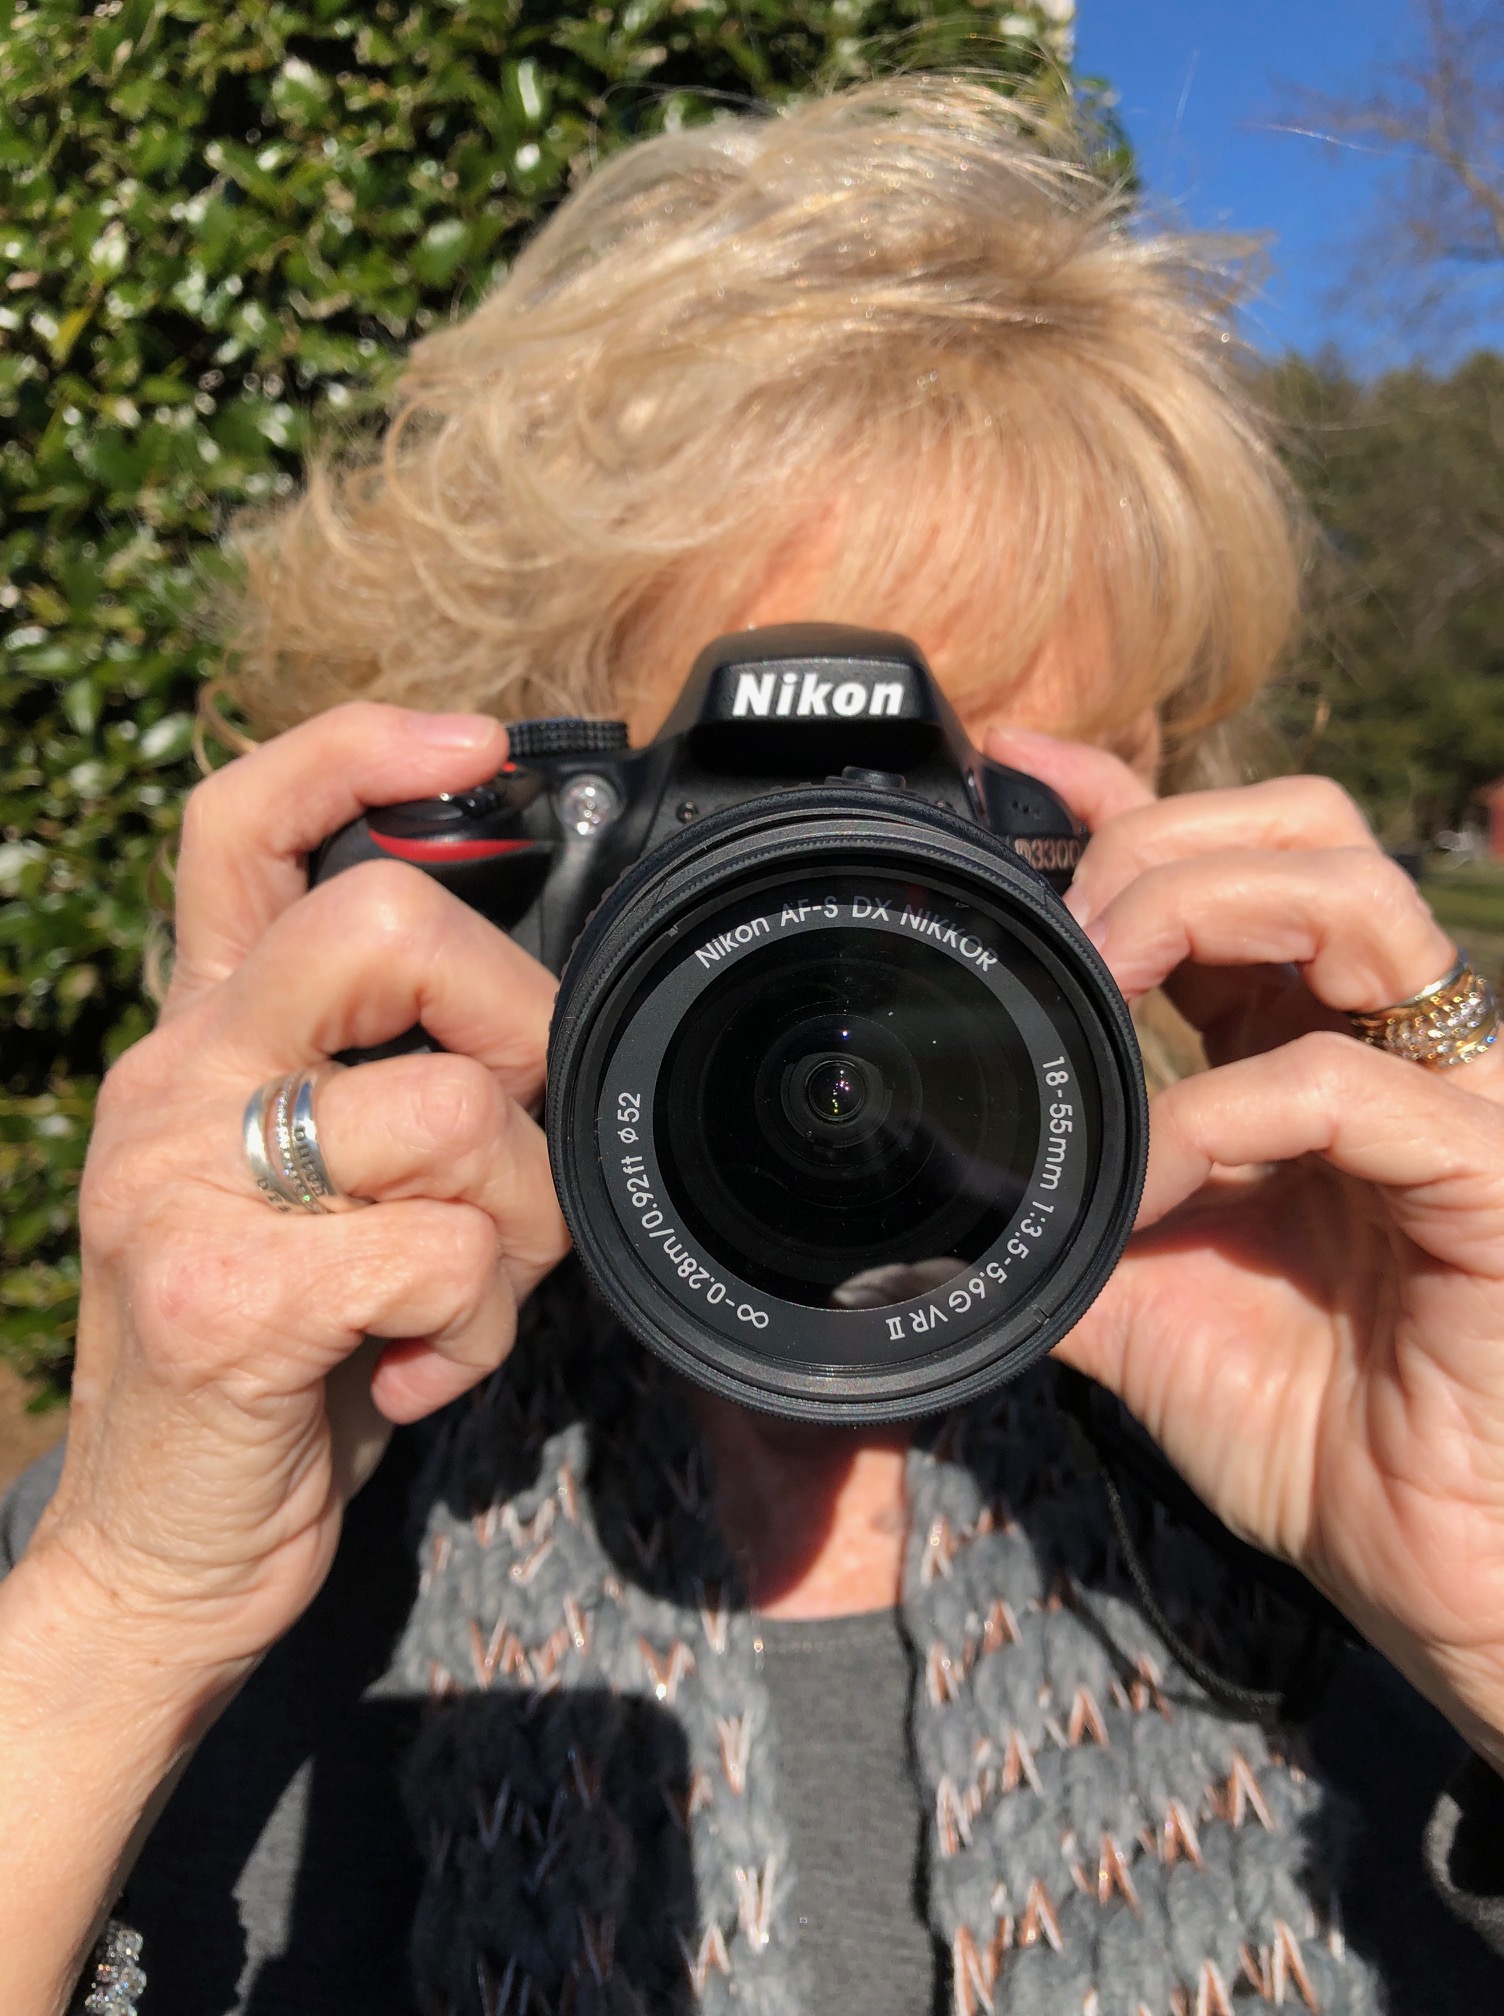
Easy enough to attach the camera to the telescope:
I changed the “single-screw” attachment ring on the back of the telescope, to a more secure “carbon-fiber” ring with two-screws to more securely hold the camera: Debbie
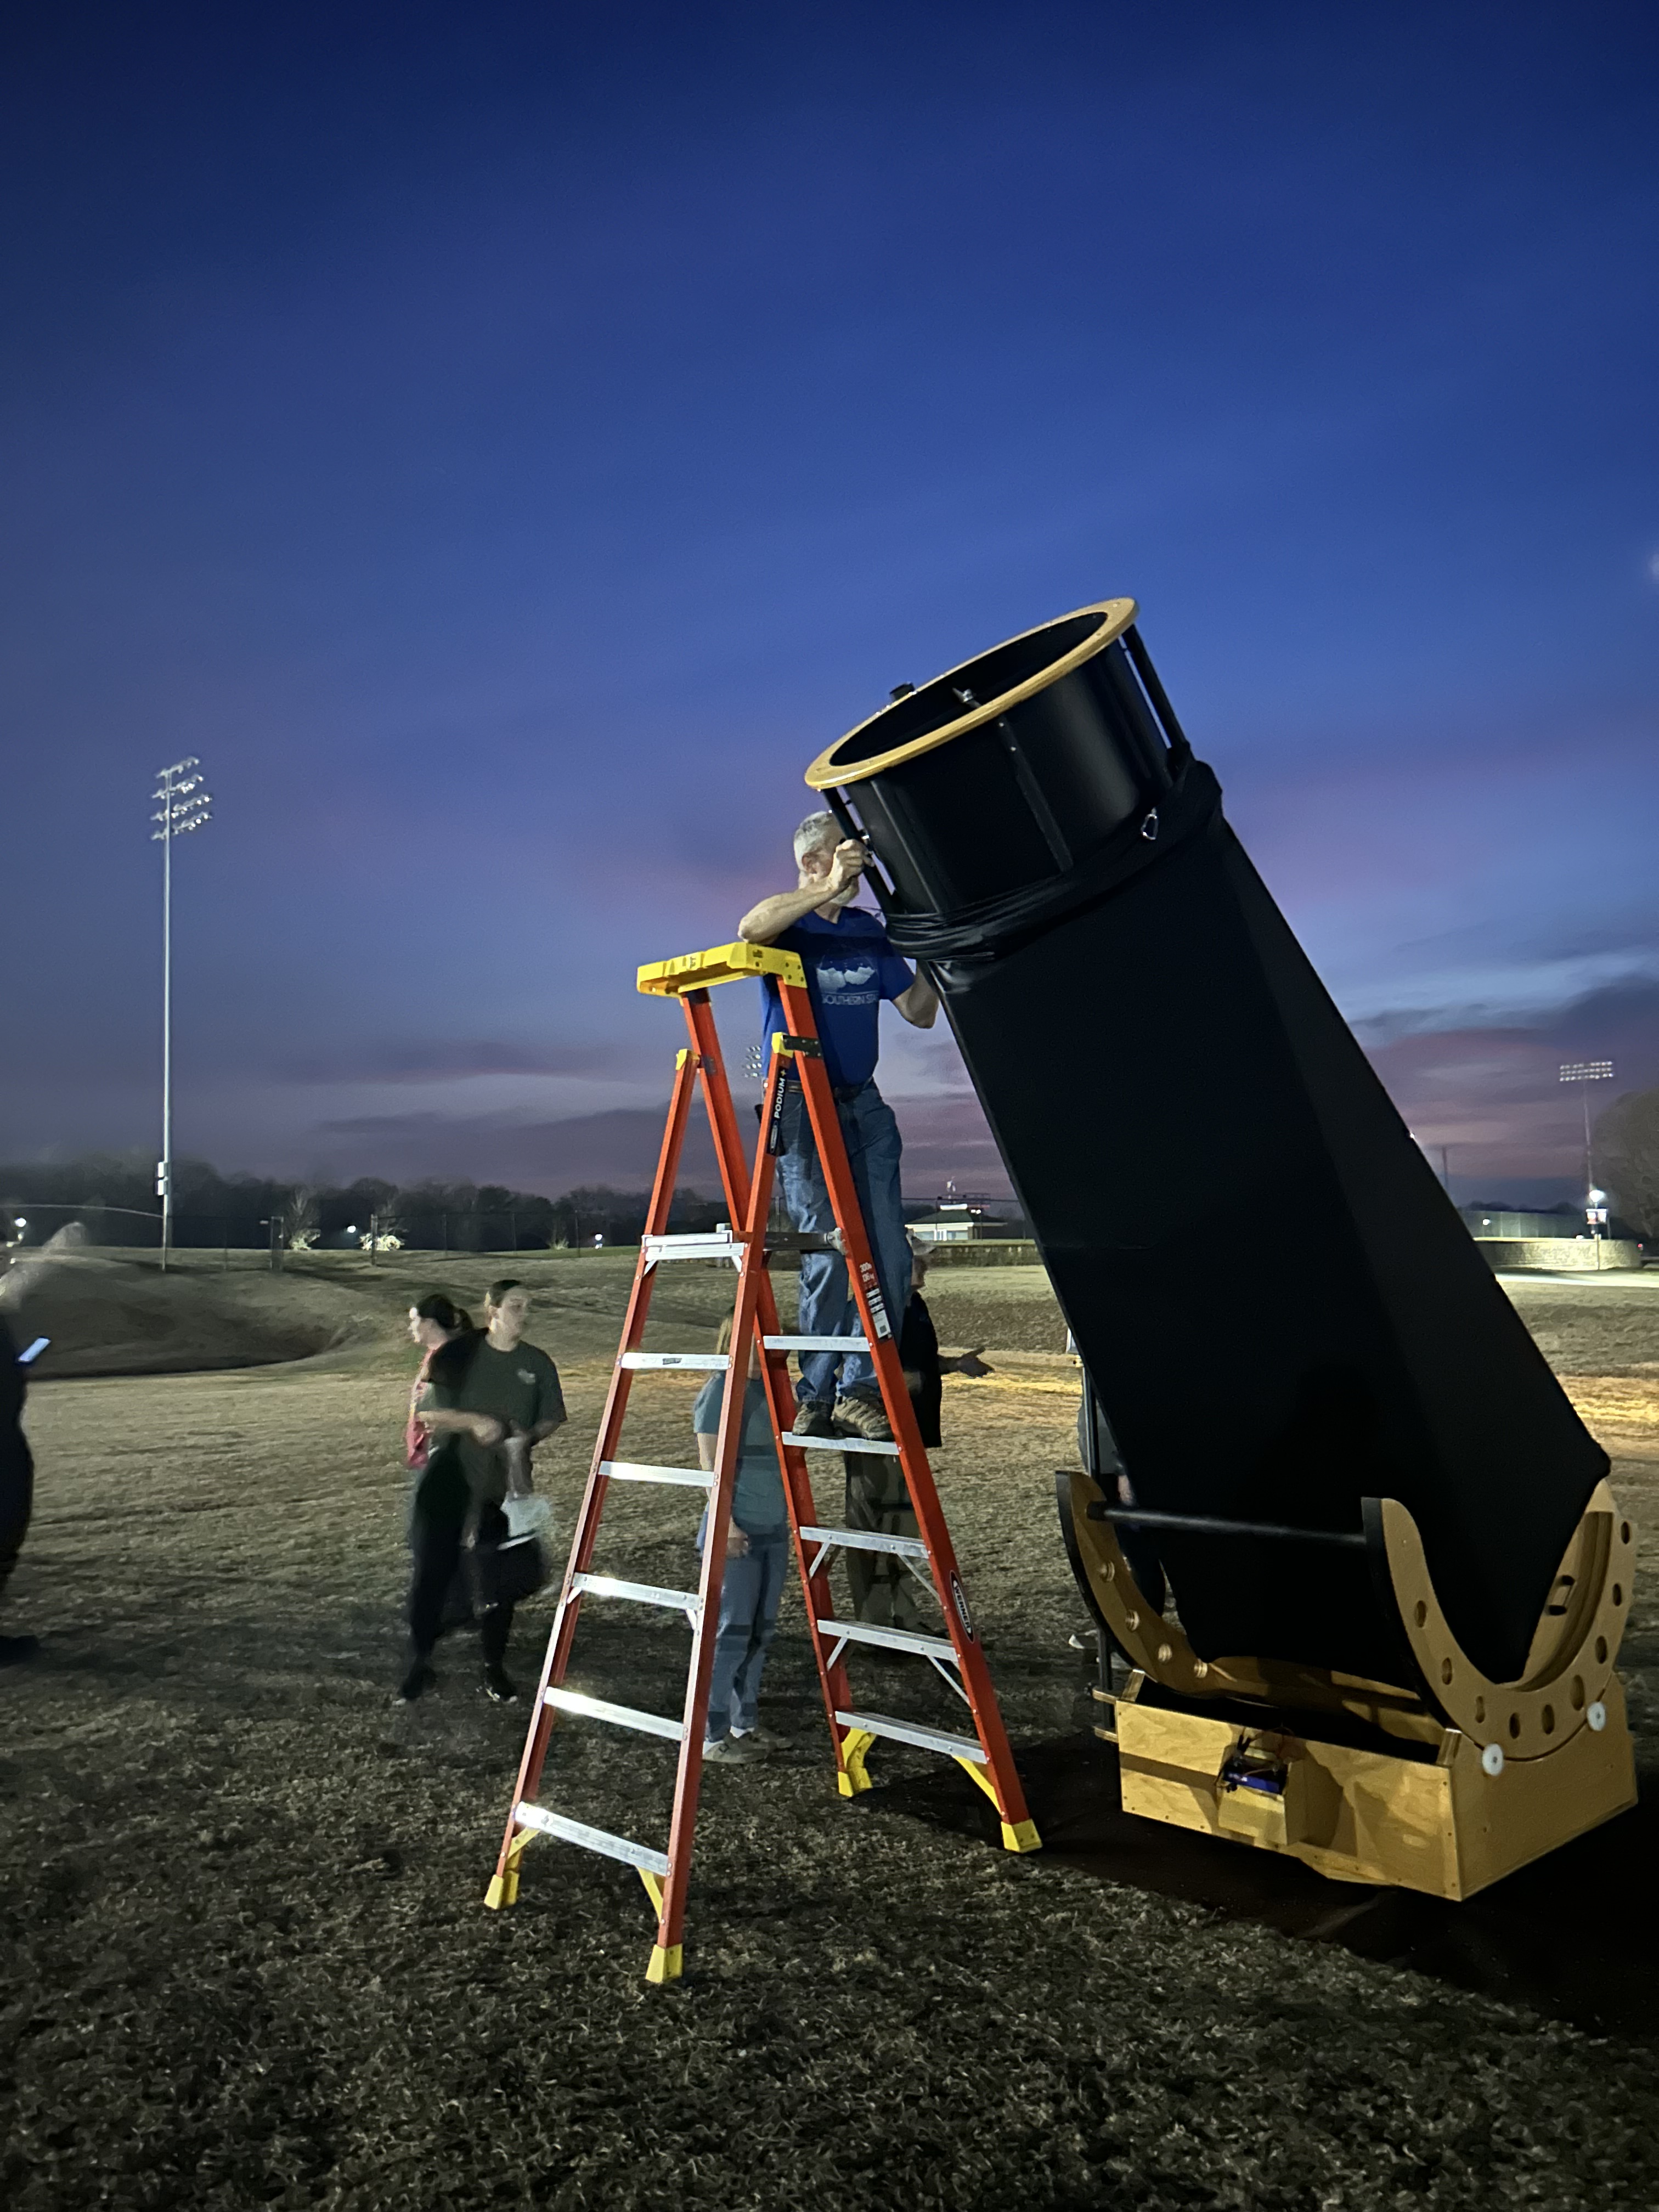
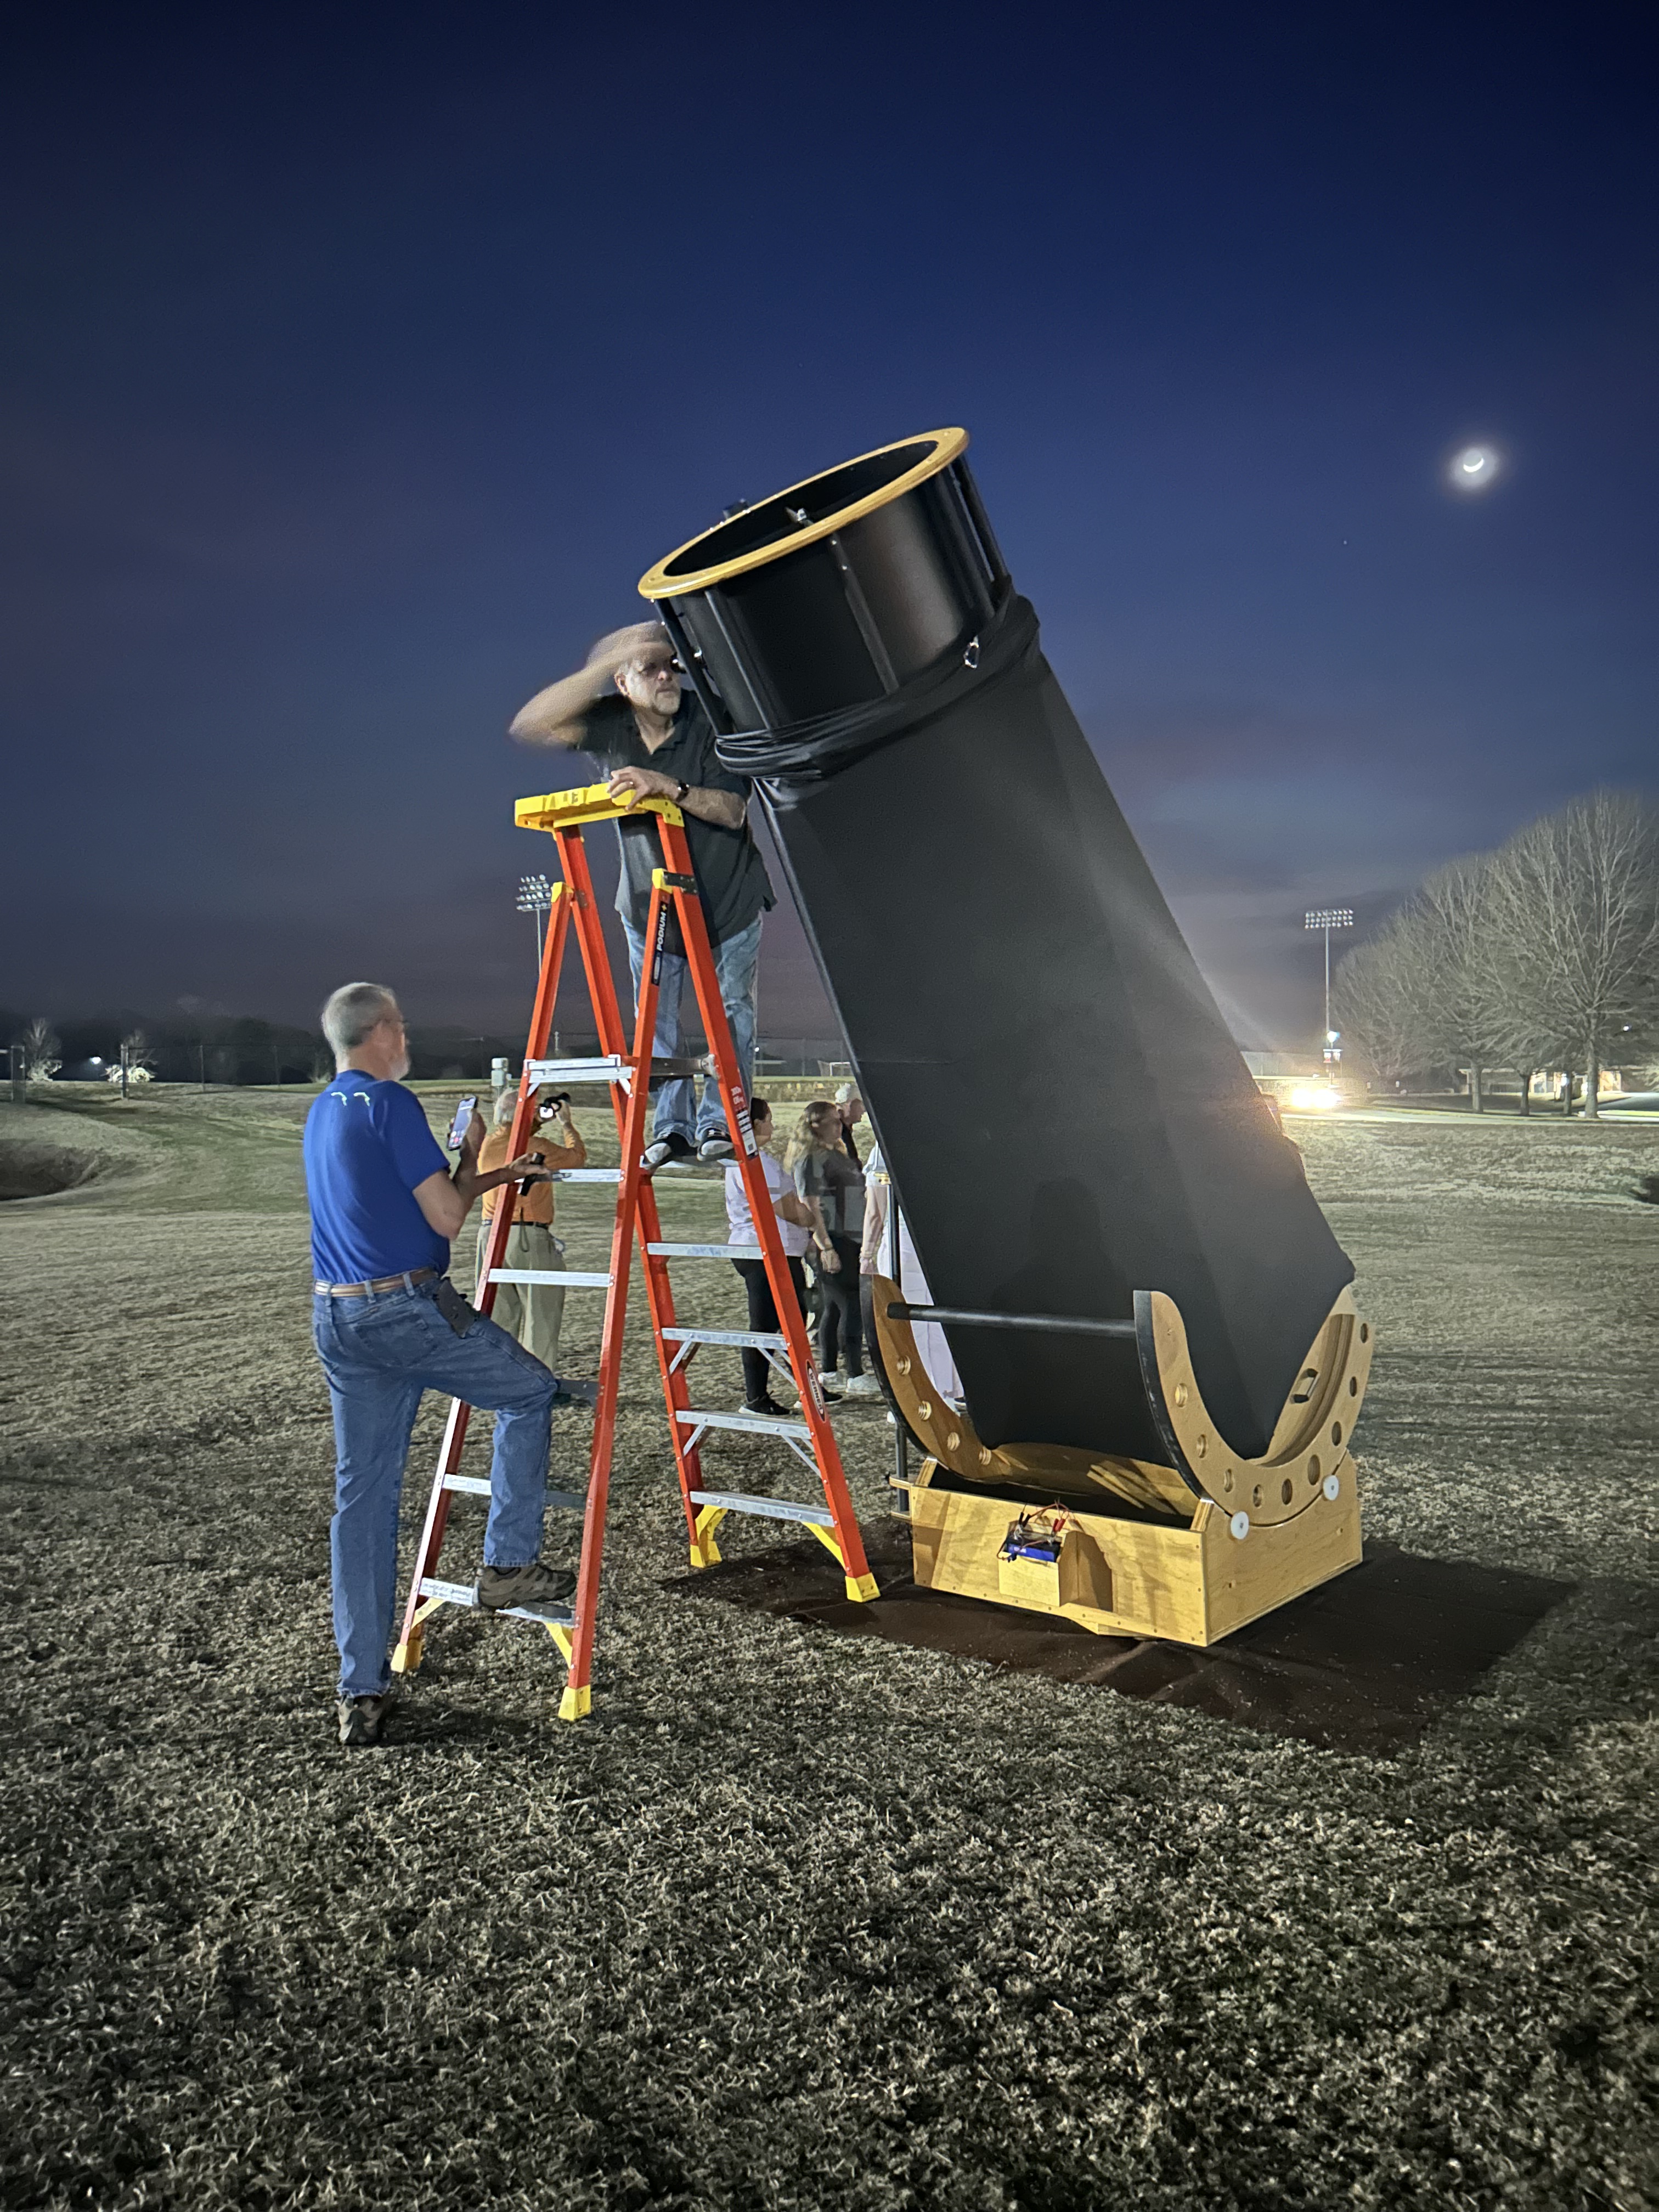
An observing event was held last night (February 19th 2026) on the campus of Gardner-Webb University in Boiling Springs, NC, featuring a custom made 29-inch telescope by Don Brooks. Don has been active in amateur astronomy for many years, and is currently the President of the Cleveland County Astronomical Society.
It should also be noted: Longtime CCAS member, Steve Davis also attended the event last night. Steve works at the “Bare Dark Sky Observatory at Mayland Earth to Sky Park” and is an operator of the 34-inch telescope. The facility is located in Burnsville, NC and the 34-inch telescope is one of the largest public telescopes in the southeastern US.
I’ve been friends with both Don and Steve for more than 30 years.
The telescope:
It has a 29-inch mirror which was produced by Coulter Optics in California during the 80’s. No one seems to know “definitively” how many 29-inch mirrors were produced. Don is aware of “possibly” eight to ten. However, I communicated with an amateur on (February 20th 2026) living in Minnesota who has one in storage, which would add to the count.
Don built everything (other than the mirror and the focuser) which was an extraordinary task. A mirror this size has incredible weight and the mirror cell must be built strong enough to properly hold and secure without causing stress to the mirror. Building only the mirror cell is an engineering feat in itself.
I can’t properly convey just how difficult building a telescope this size would be, and the mechanical skills required.
Below: Don gets the telescope ready for the evening.
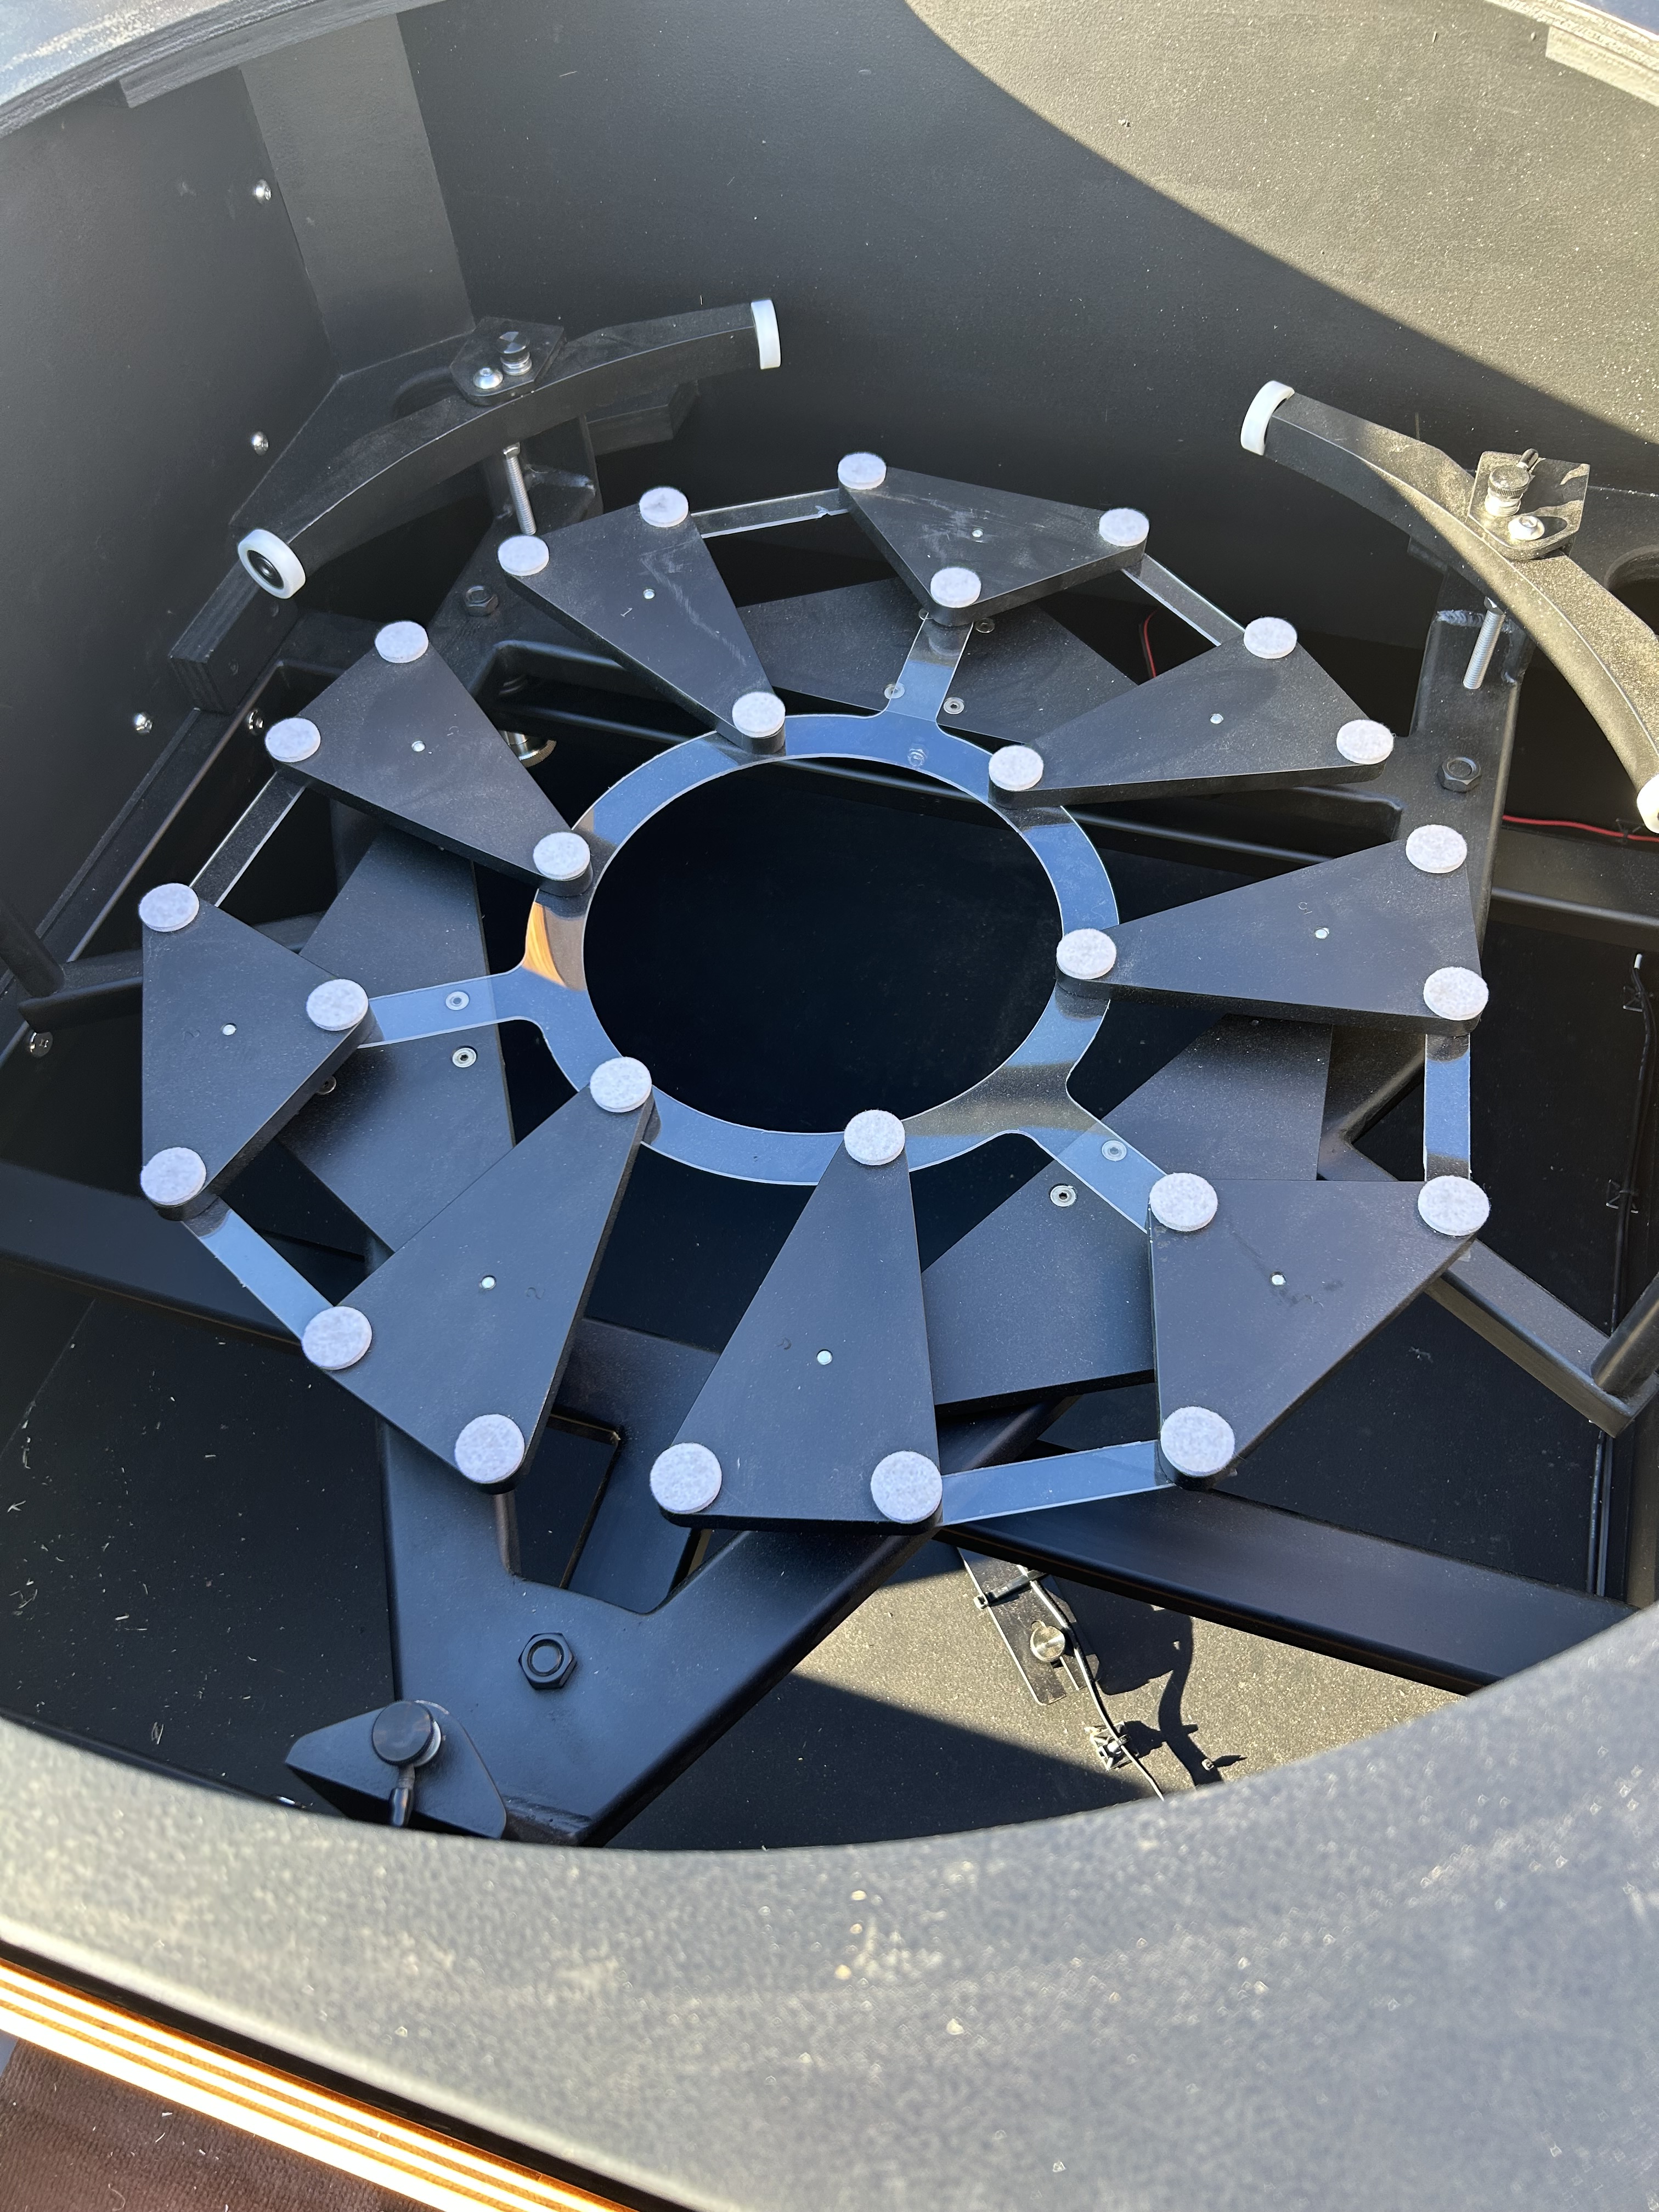
The mirror cell designed and build by Don, is both beautiful and strong with 27-points of support.
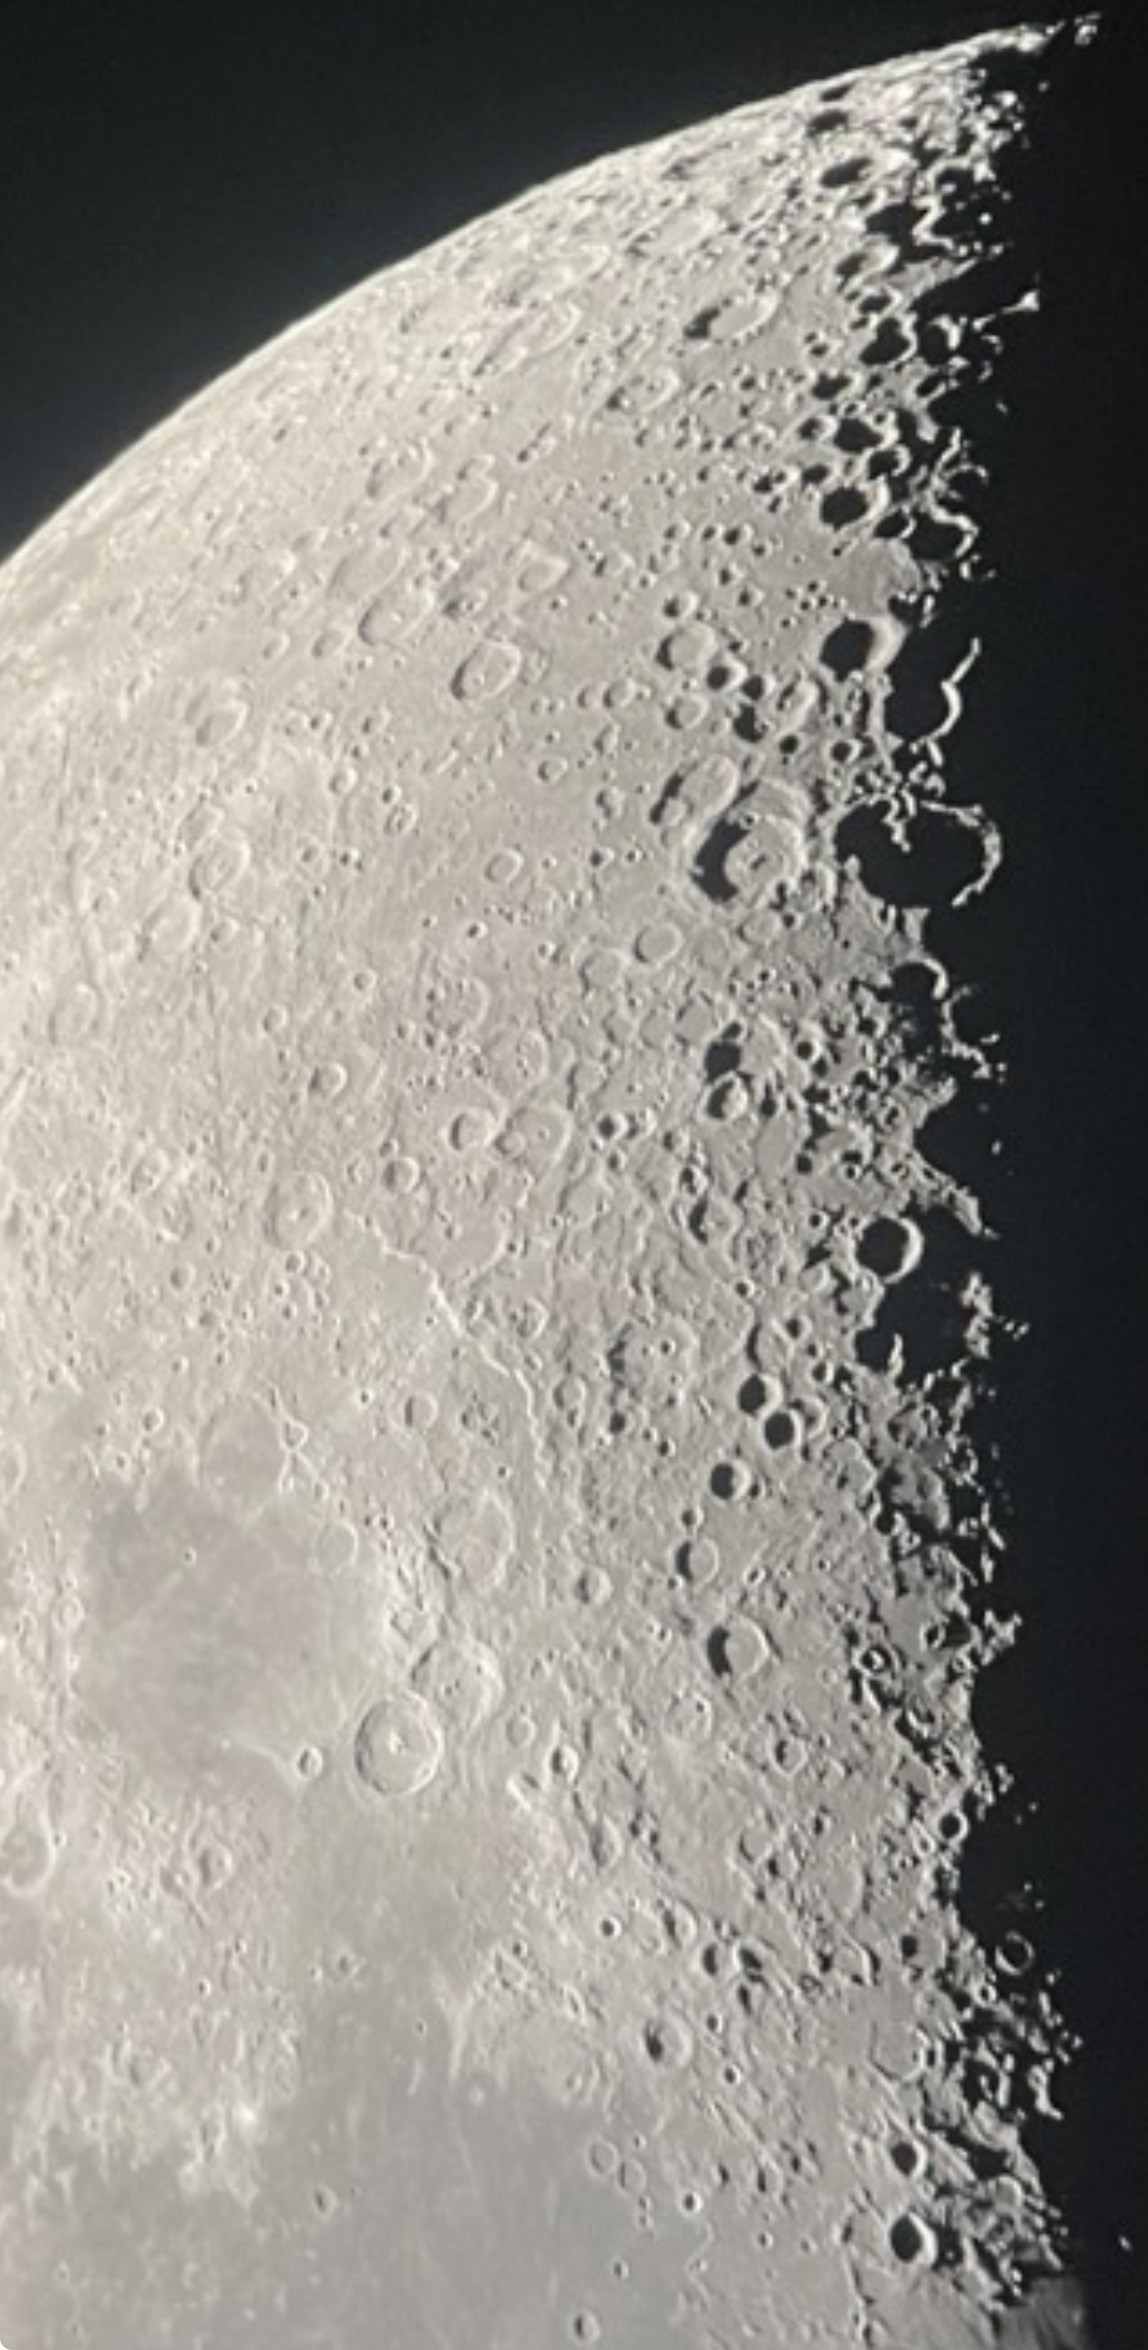
Photo of the moon through the telescope using a cellphone:
Screenshot
Custom Focuser:
Rocker Box:
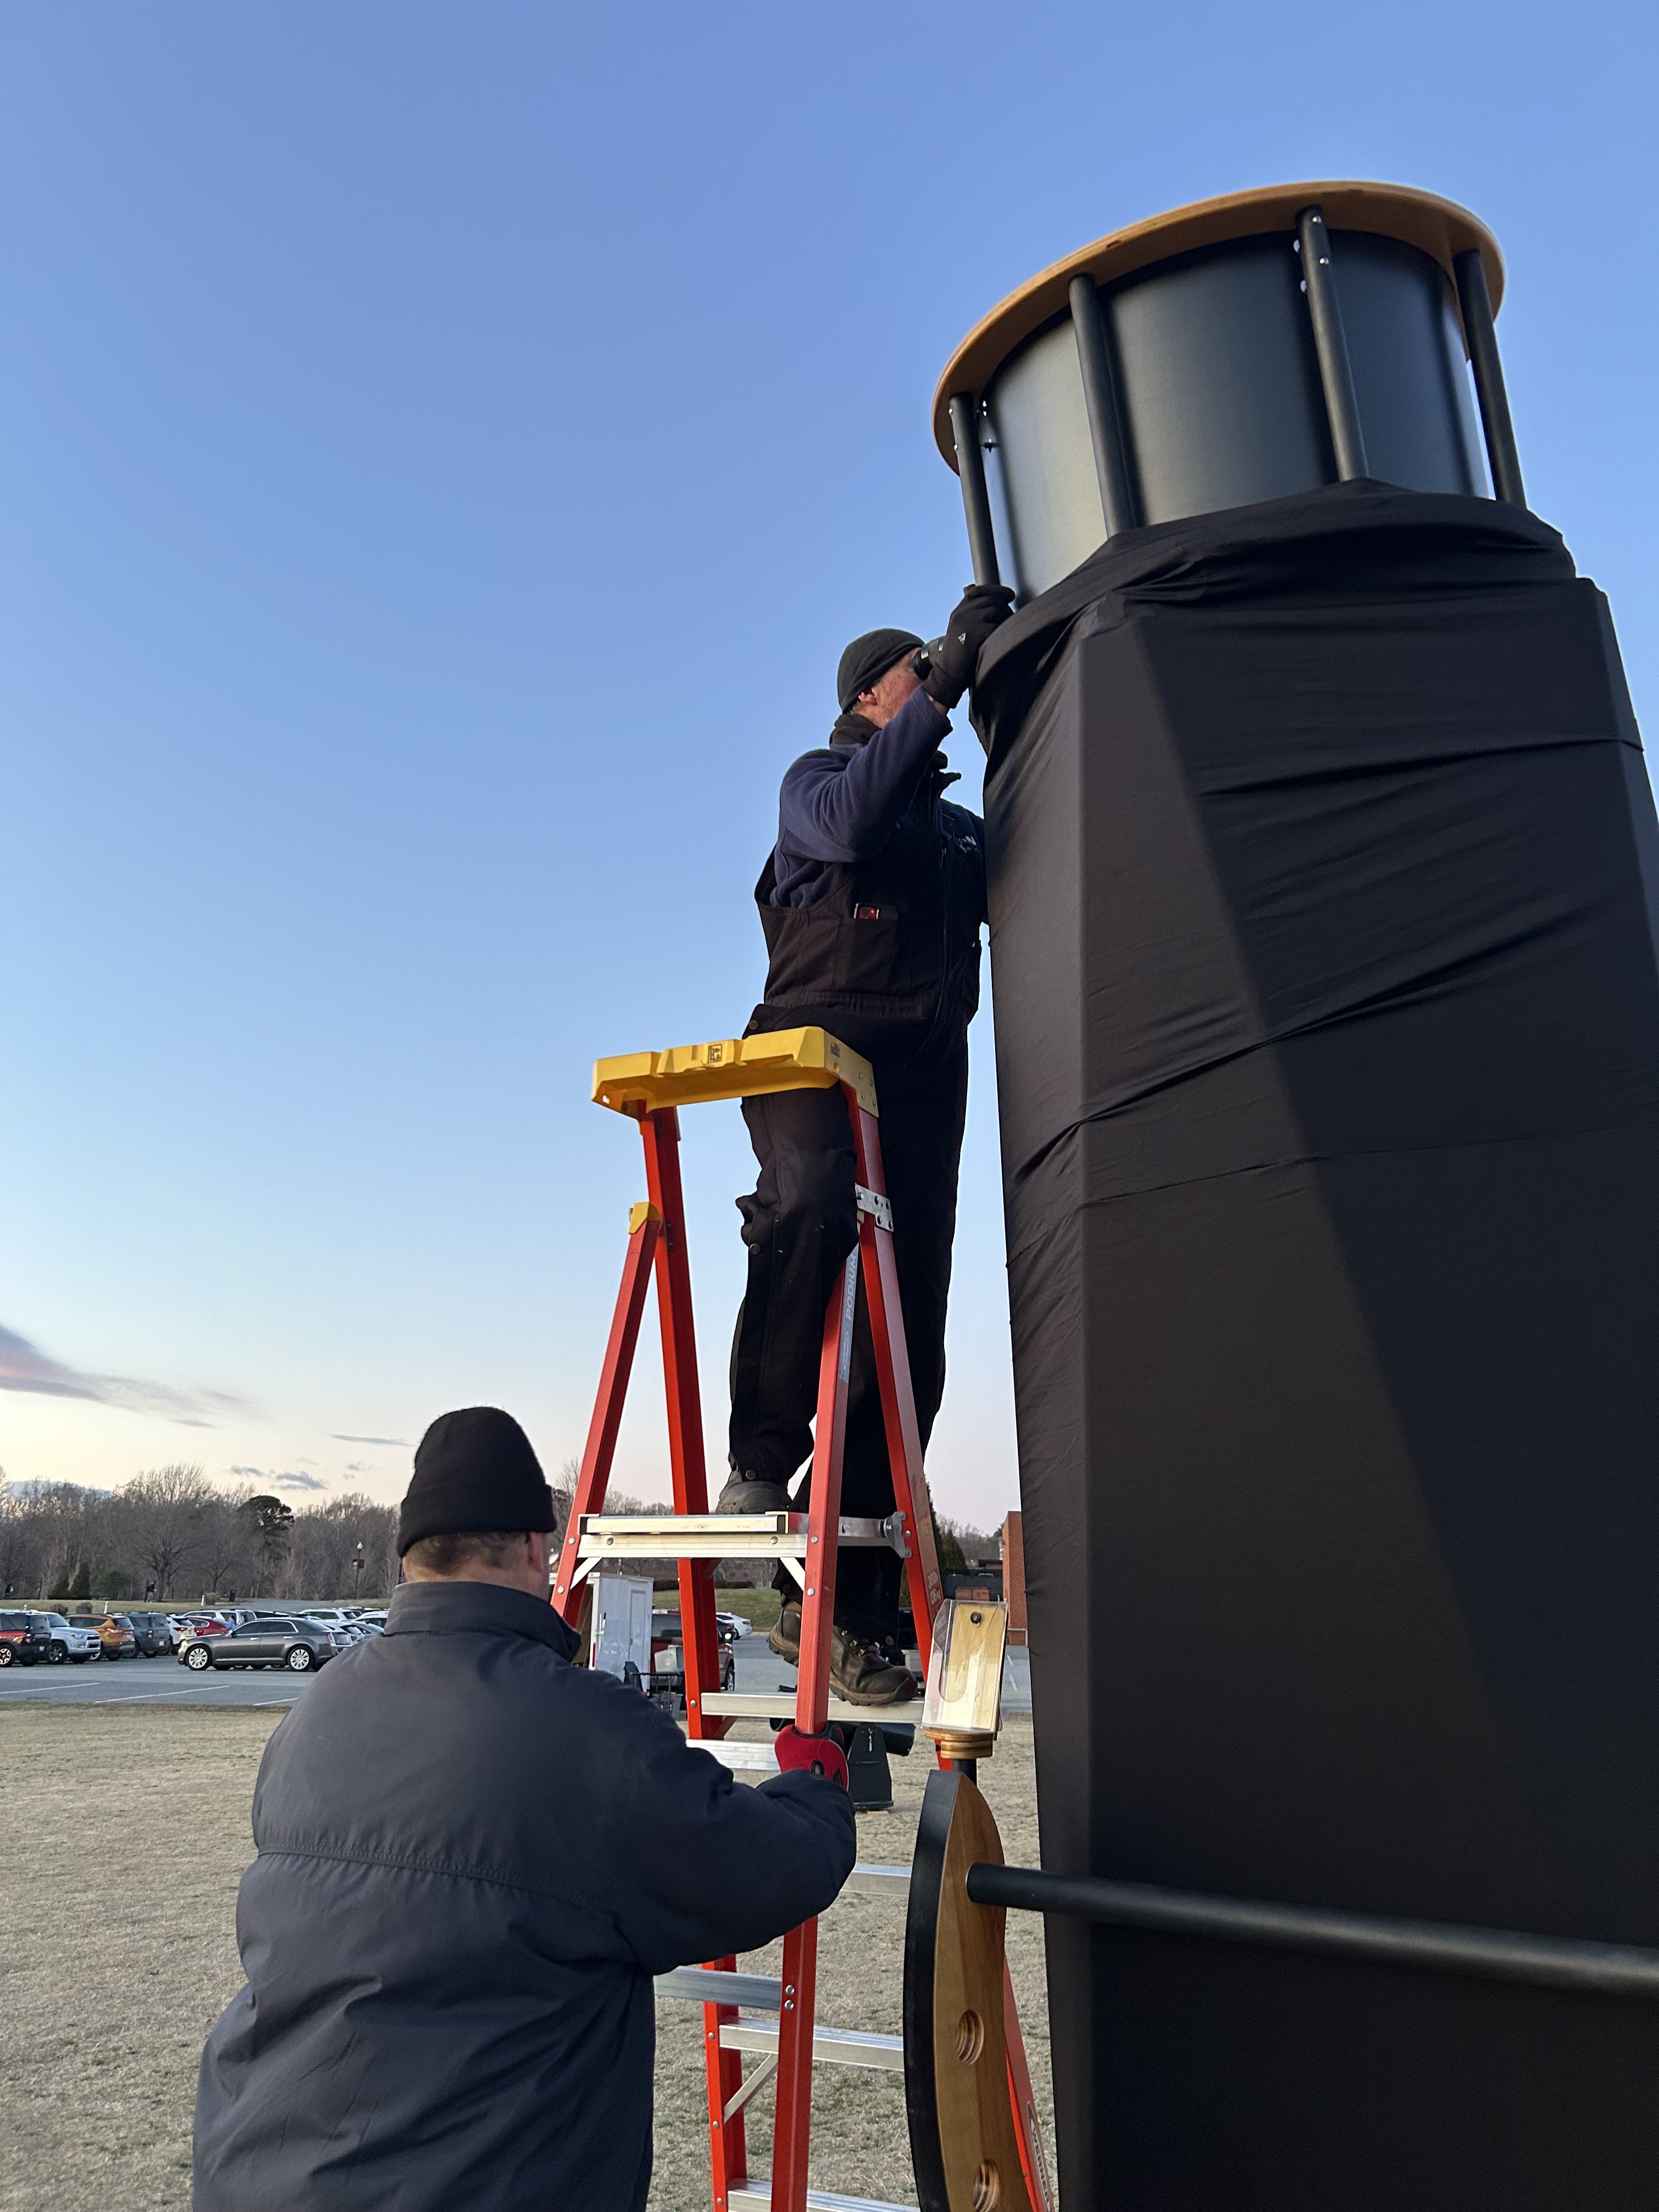
The following photos are from Monday, February 23rd 2026. The temperature was below freezing….not too bad, but with a @ 15-20 mph NW wind!
Don Brooks and Billy Fisher setting up the telescope. It became too cold for me, and had to leave shortly after sunset.
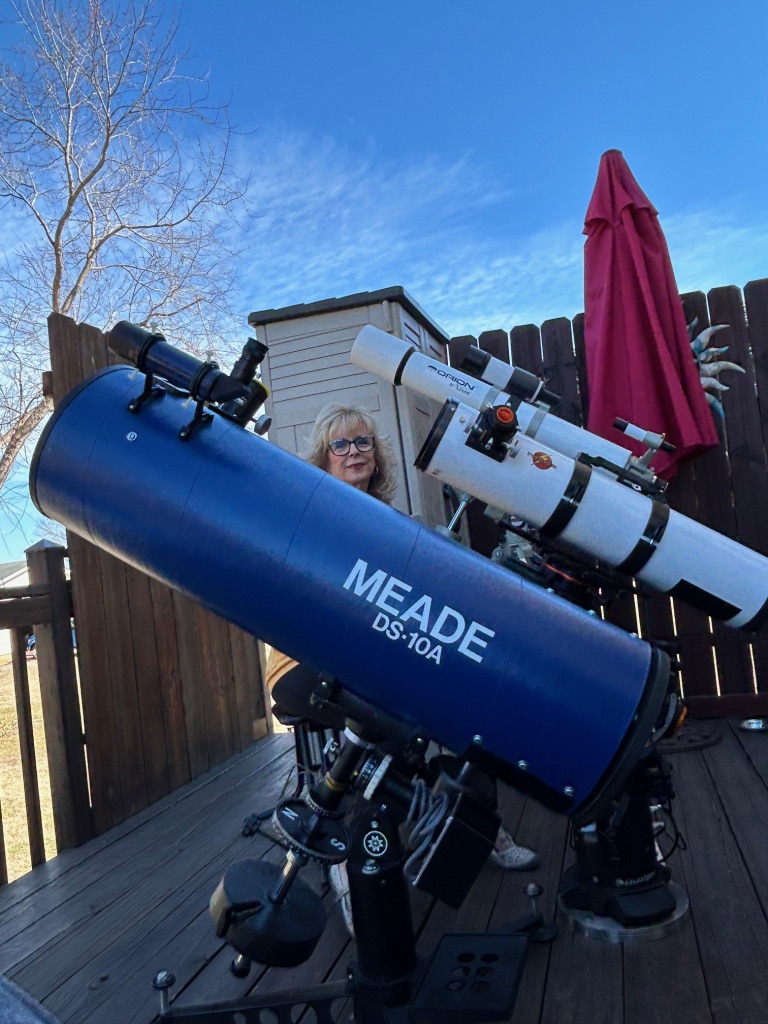
In about 1991, I began looking for something larger than my 4.5-inch reflector which I was using at that time. The Meade Deep-Space series Newtonian’s consisted of two telescopes: A 10-inch and 16-inch f/4.5 with equatorial mounts.
This was at a time when Meade was building their serious Newtonian’s in their Costa Mesa, facility, which included grinding and polishing mirrors. All of the hardware, bolts and Allen heads on these telescopes and mounts are SAE, not metric, which goes back to days past.
Astronomy Magazine tested a 10-inch DS-10A (The 10A was an updated version with a 2-inch focuser, setting circles, and RA drive) with the magazine giving the test mirror a rating of a B+.
So, in February 1992, I purchased the 10-inch from Pauli’s Wholesale Optics, in Danbury Connecticut. It was Fred (the owner of Pauli’s) that recommended this telescope. It was a good decision as I have been successful in making more than 1,500 deep-sky pencil sketches and thousands of observing notes.
The low pedestal mount is ideal for use with an astro-chair, when making observing notes and pencil sketches at the eyepiece. As for me, it’s impossible to observe and sketch while standing.
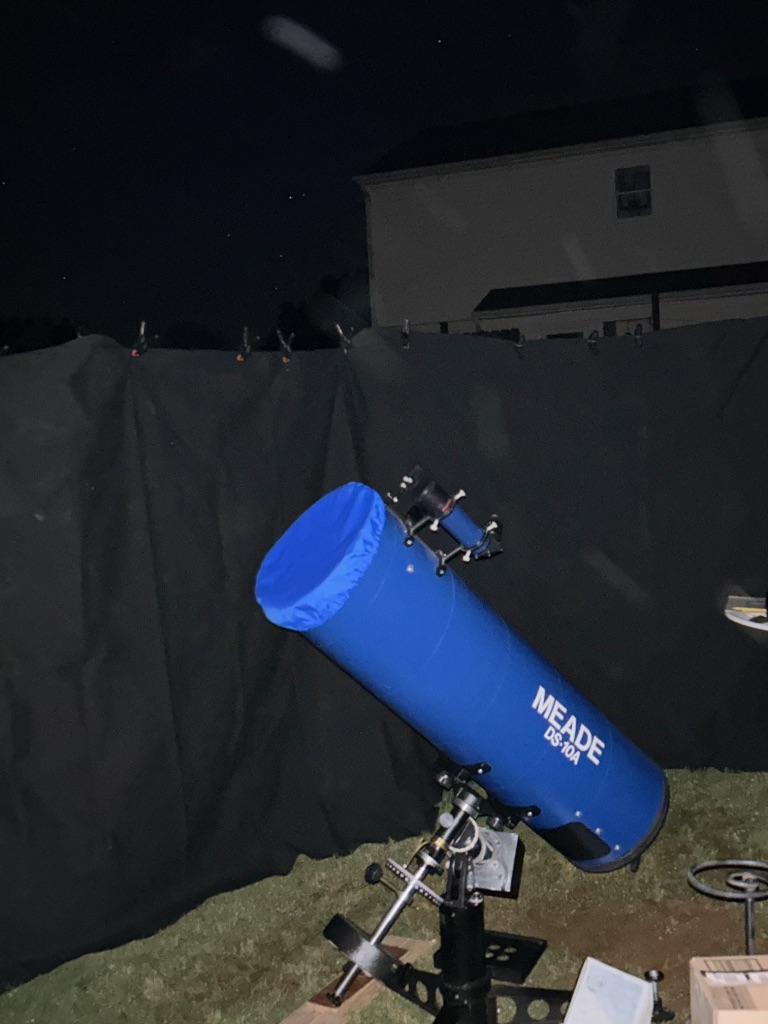
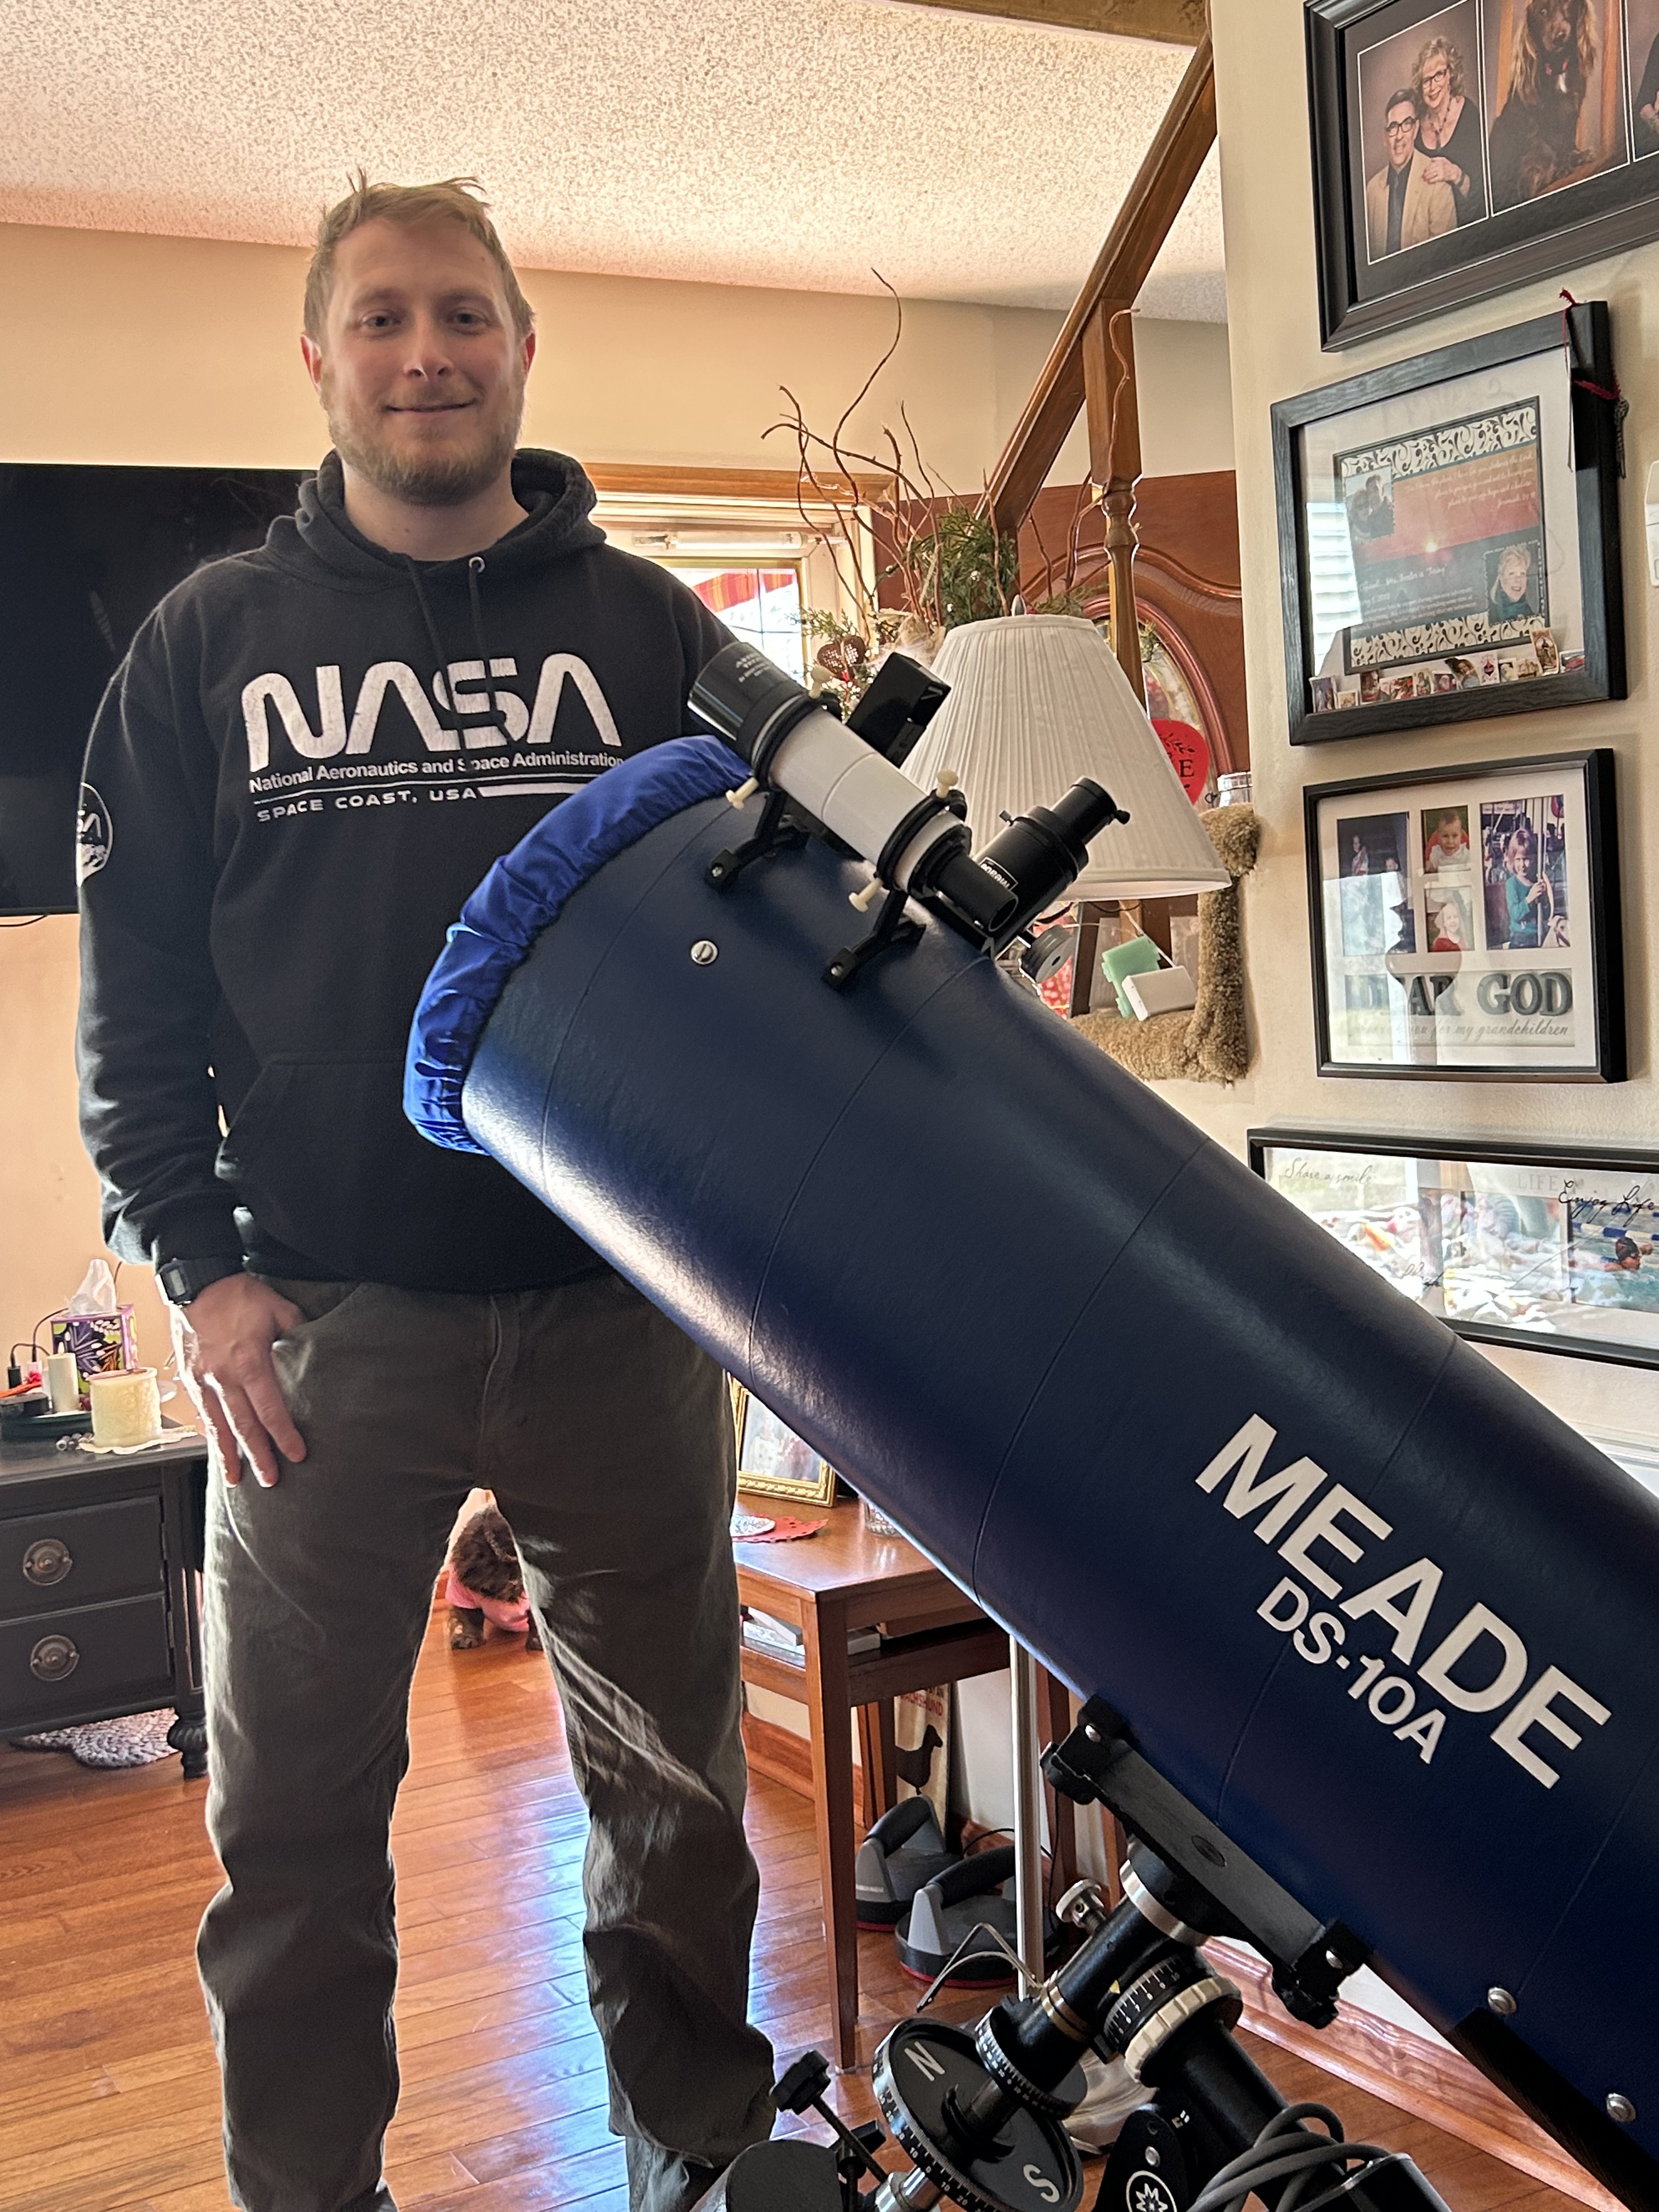
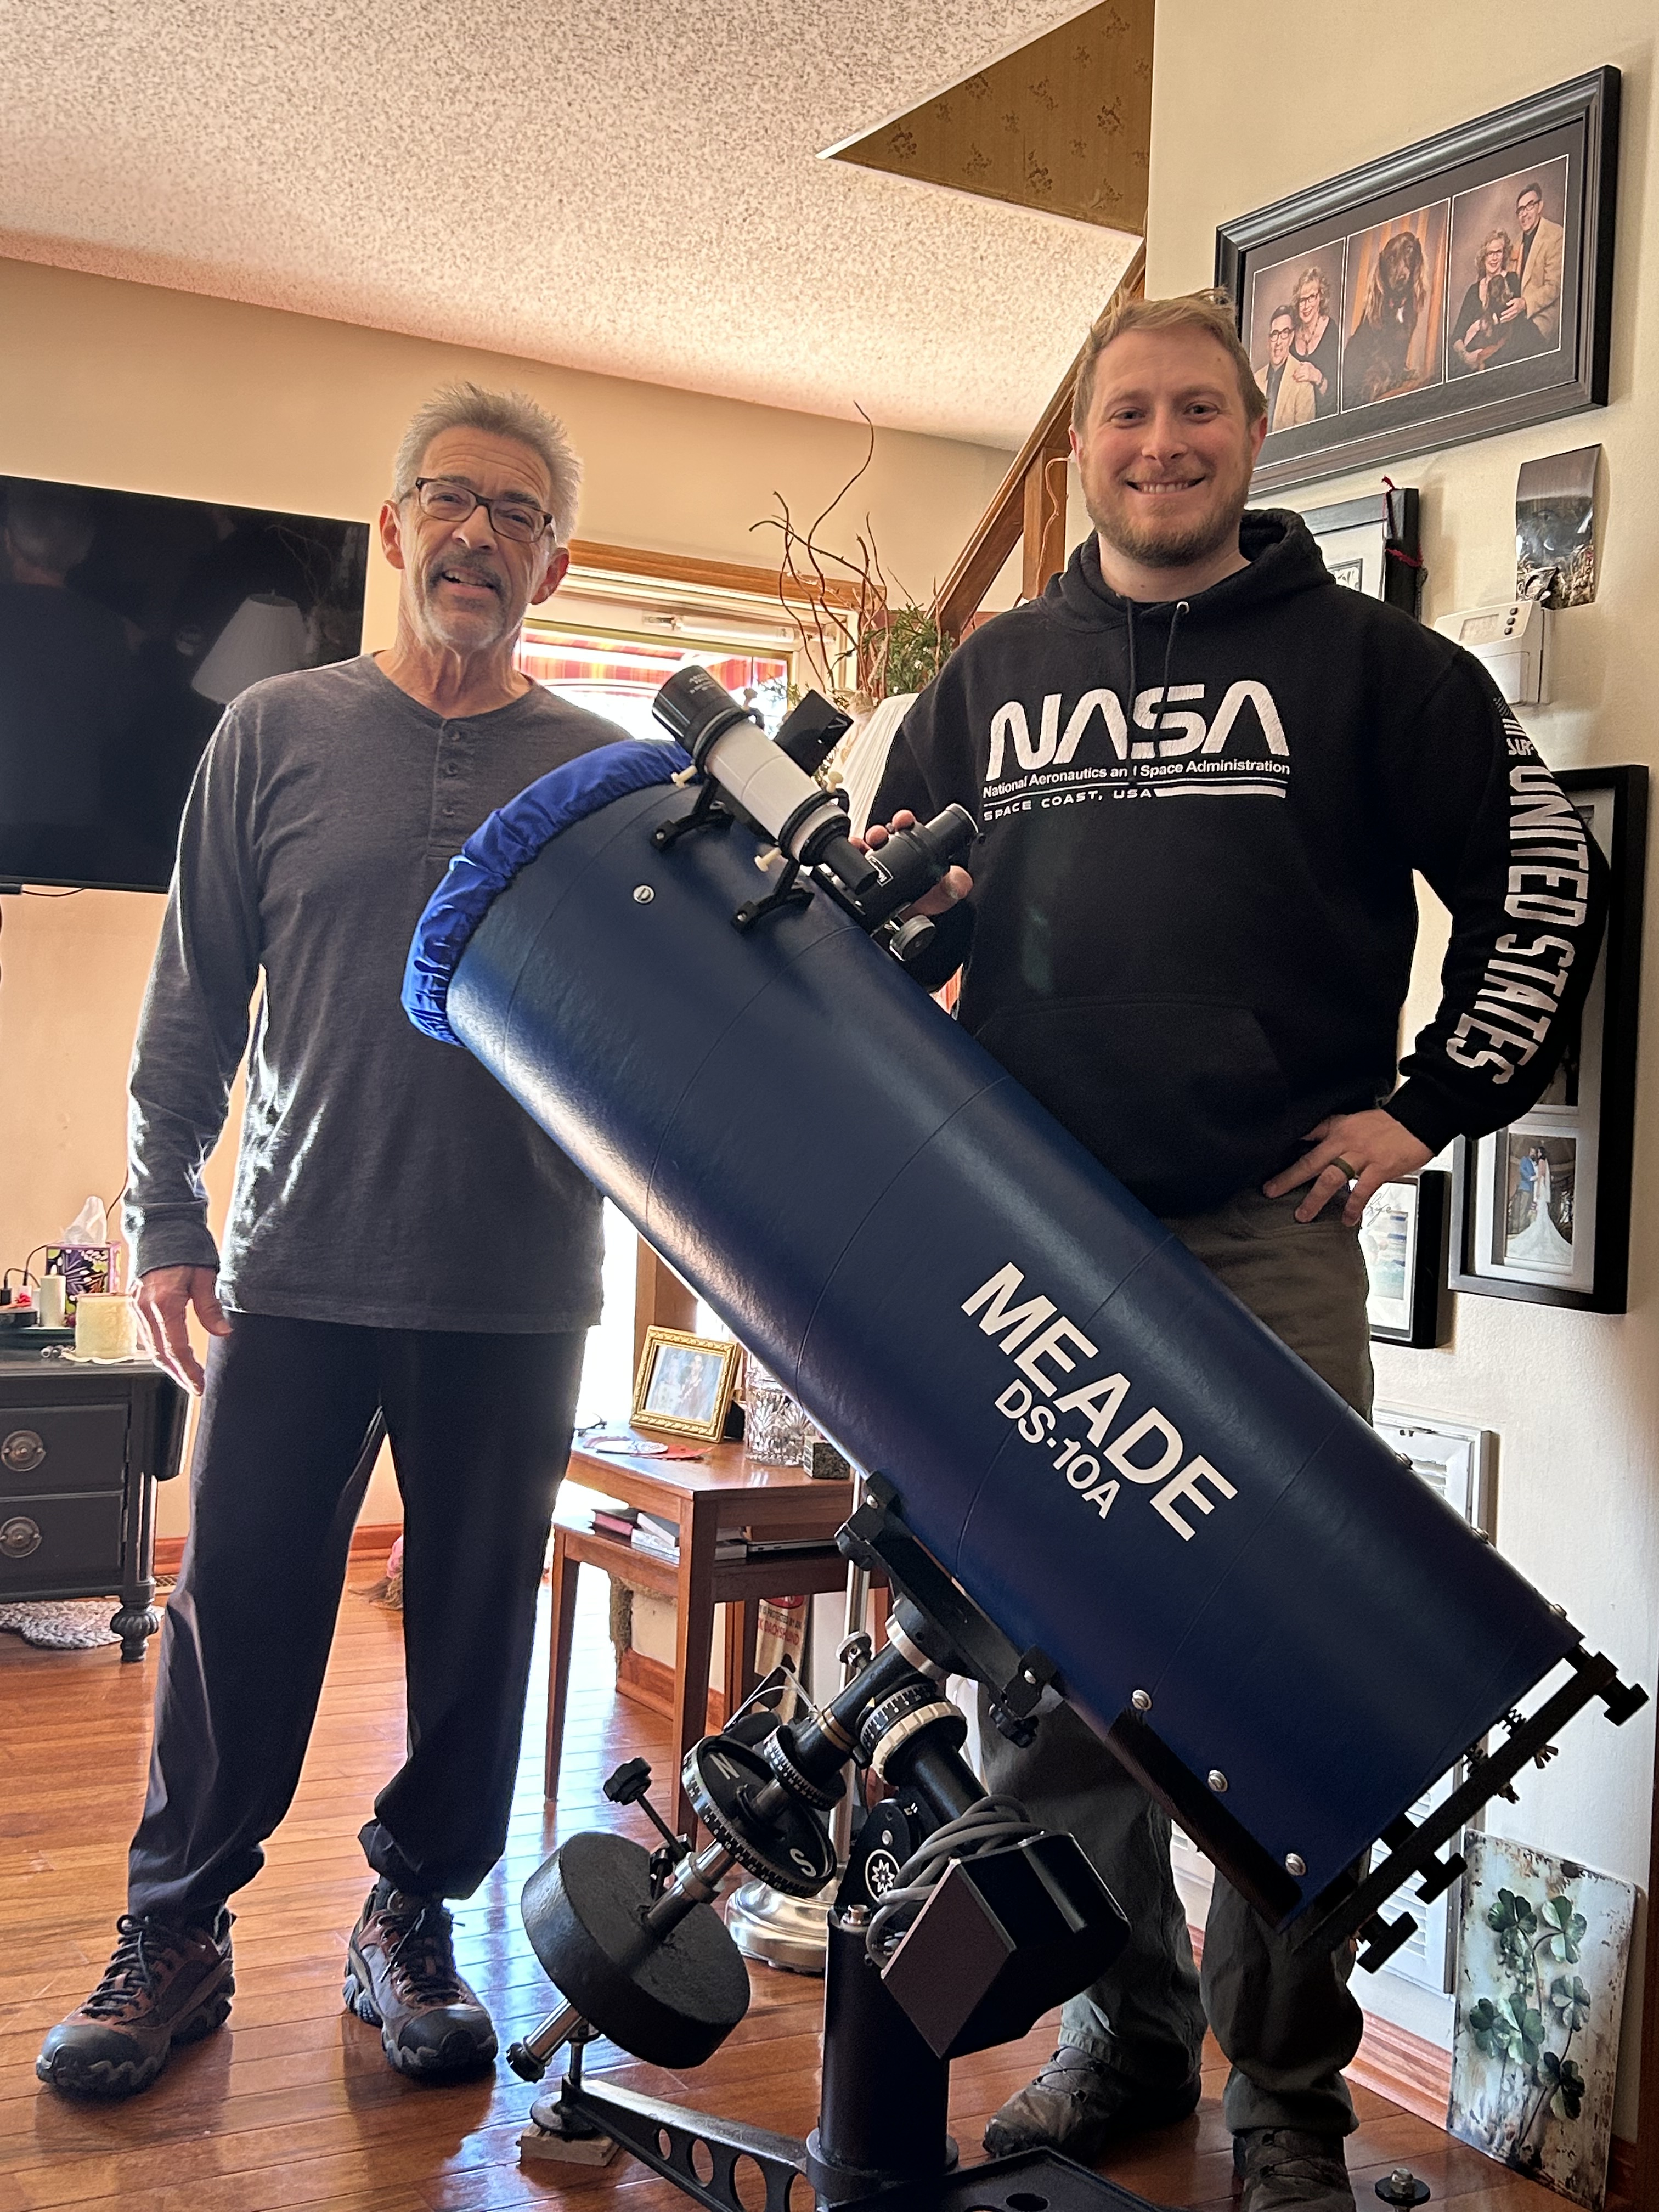
The new owner of this fabulous telescope which served me well for 34 years. I spent over 2,000 hours under a night sky and thousands of pencil sketches of deep-sky objects, and the scope is still in pristine condition. The telescope was always stored inside and in a padded zip-up bag.
It was a sad day, but a happy day as the “perfect amateur” came to take this scope. I’m sure it will allow him at least 34 years of deep-sky observing also.
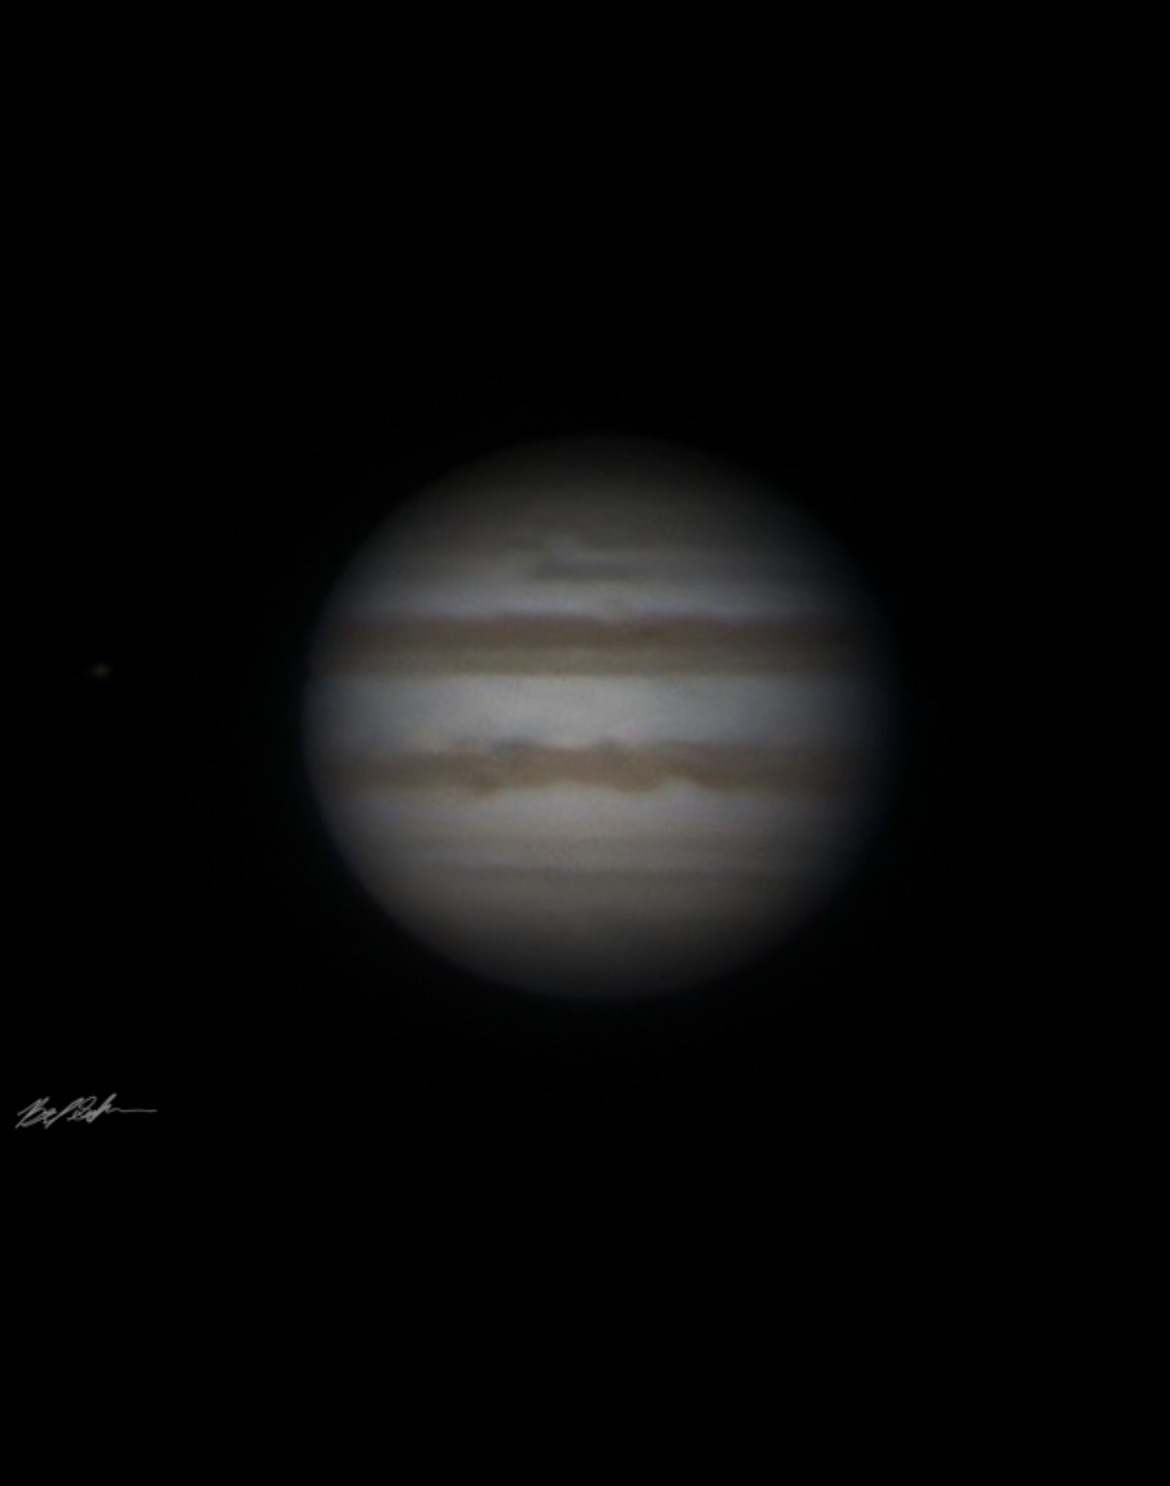
The first night out (Friday February 13th 2026) the new owner has already imaged the Orion Nebula, Jupiter and other deep-sky objects. This is actually an imaging telescope, with the mirror moved up for full illumination, and with an RA drive, which I never used. An extender tube is required for visual observing.
The new owner is a professional high-speed video camera expert for industrial applications and also an experienced amateur astronomer.
Yes….the very first images and on the very first night out! I’d say pretty impressive!
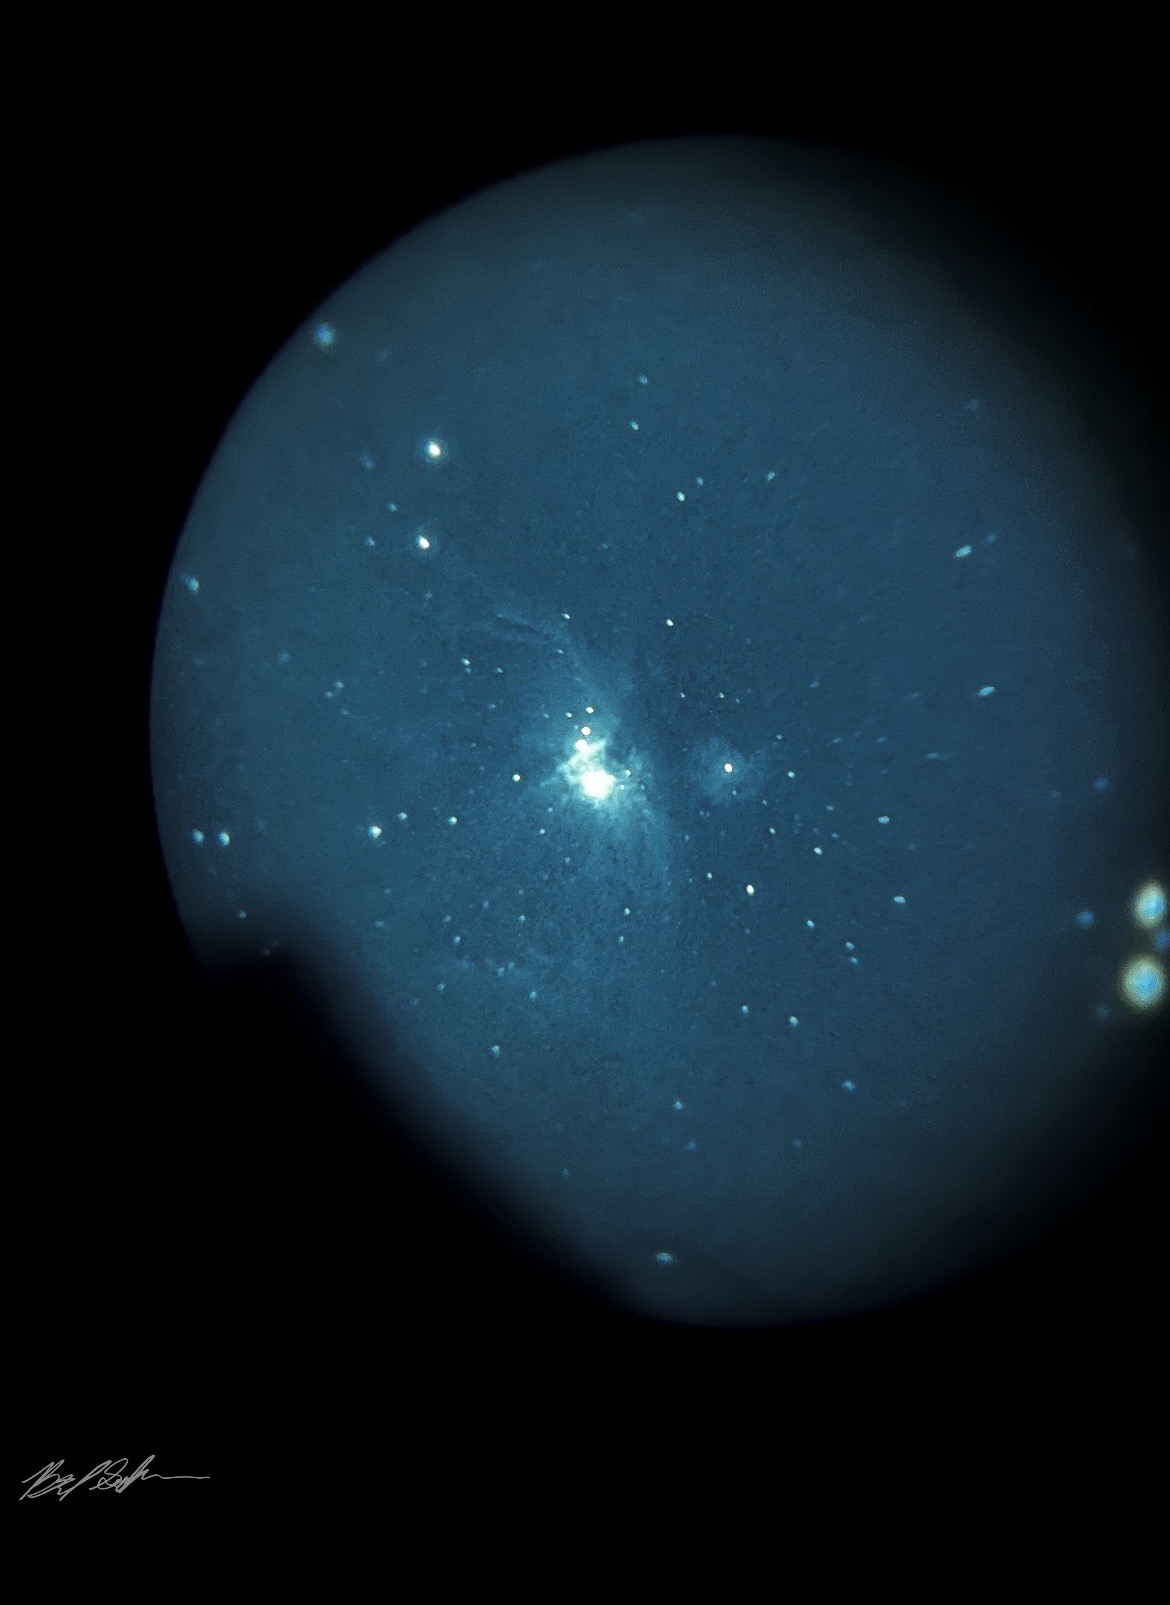
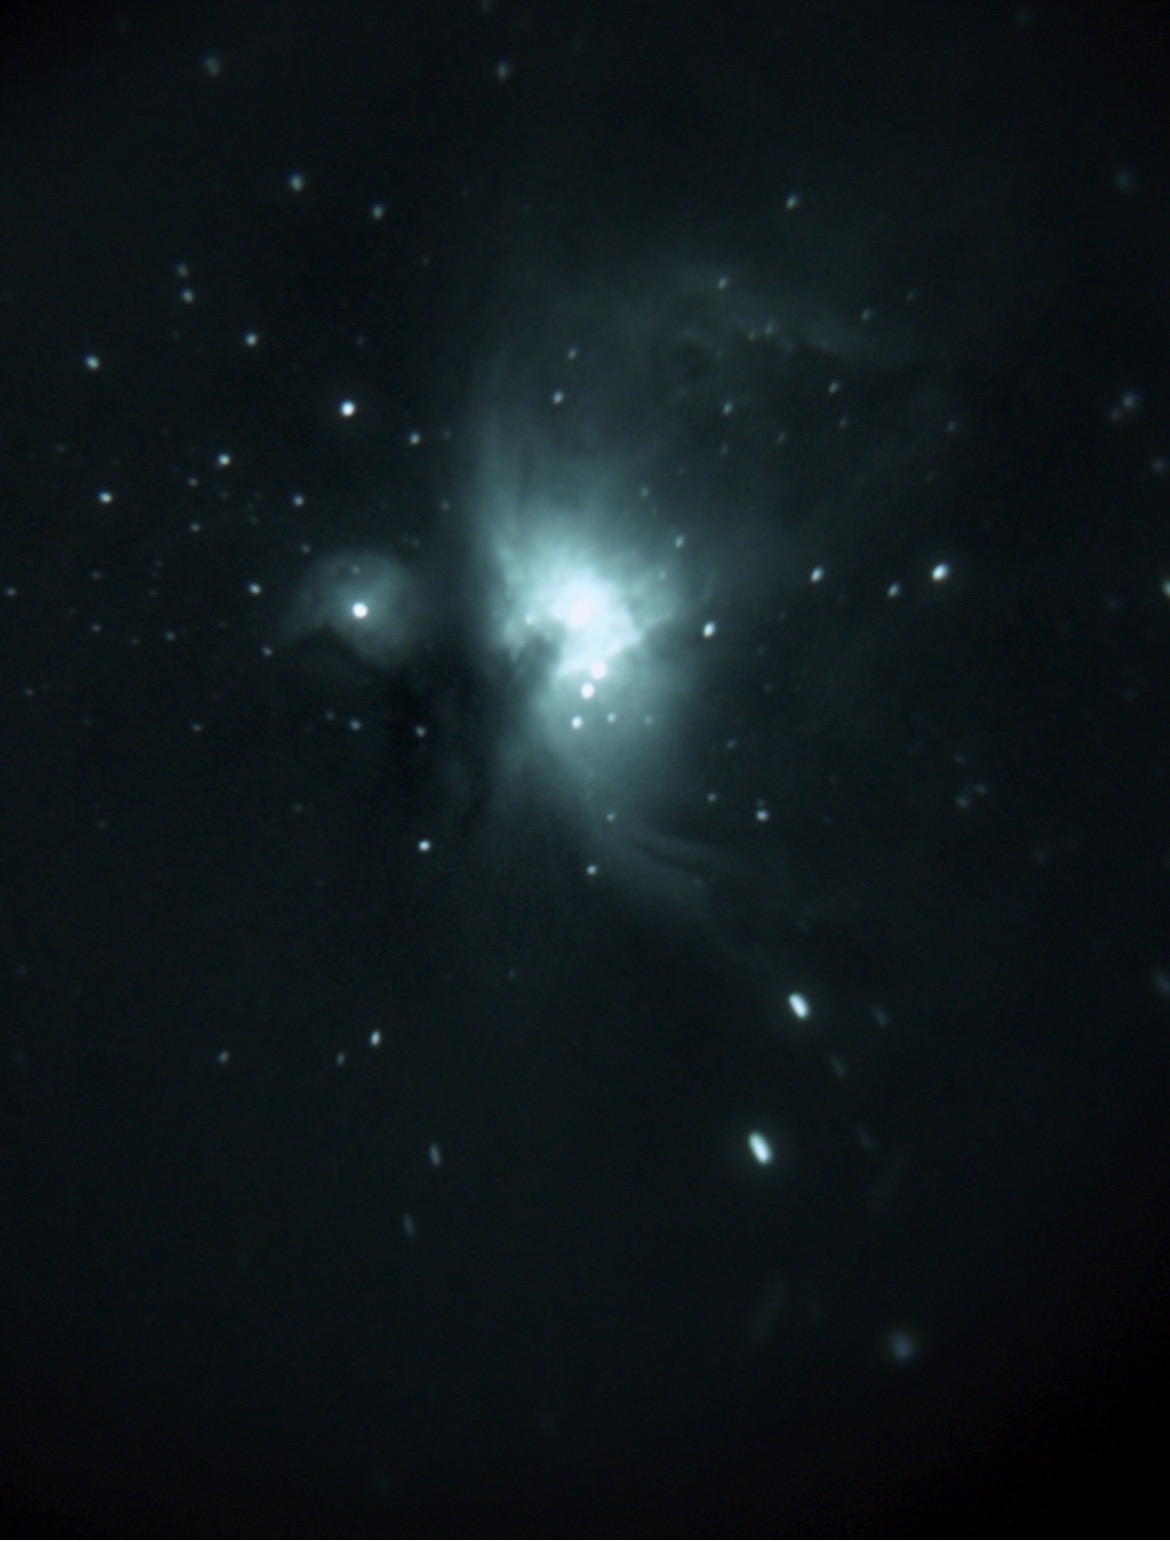
Orion Nebula:
Jupiter
M42 (with night vision) I’d like to encourage more people to get into Night Vision Astro.
From “Deep-Sky Wonders” Walter Scott Houston: selections and commentary by Stephen James O’Meara:
“Many years ago Glen Chaple, Jr., of Townsend, Massachusetts, “discovered” a deep-sky object in Ophiuchus; he found about two dozen stars forming a group which could be glimpsed with the naked eye. He likened the cluster to the Praesepe in Cancer, but was not plotted on his copy of “Norton’s Star Atlas.” The object does, however, have a name. It is IC 4665 and is listed in the “Index Catalogue” to the NGC. In those days of stargazing, serious deep-sky observers soon learned that no single atlas can suit all their needs. Today, of course, IC 4665 is plotted on most modern star charts.” WSH
Now from Sue French “Deep-Sky Wonders” A Tour of the Universe With Sky & Telescope’s Sue French as following:
“The splashy open cluster IC 4665 is barely within the boundary of the Milky Way on the atlas. It’s easy to spot 1.3º north-northest of Beta Ophiuchi, which shares the field of view through binoculars or a finderscope. In my 15×45 image-stabilized binoculars, the cluster’s prominent core spans more sky than the full Moon, and loosely scattered outliers to 70′. Half its 40 stars outline a rough circlet with one star at its center and a stem that leads westward to a slightly wavy line tipped north-northwest. To me, it looks like a simplistic drawing of a flower springing up from a gently undulating patch of the ground. Finish amateur Jaakko Saloranta comes away with a different impression. Through his 80mm refractor, he sees the group as the Fish Spear of Poseidon. ” Sue French
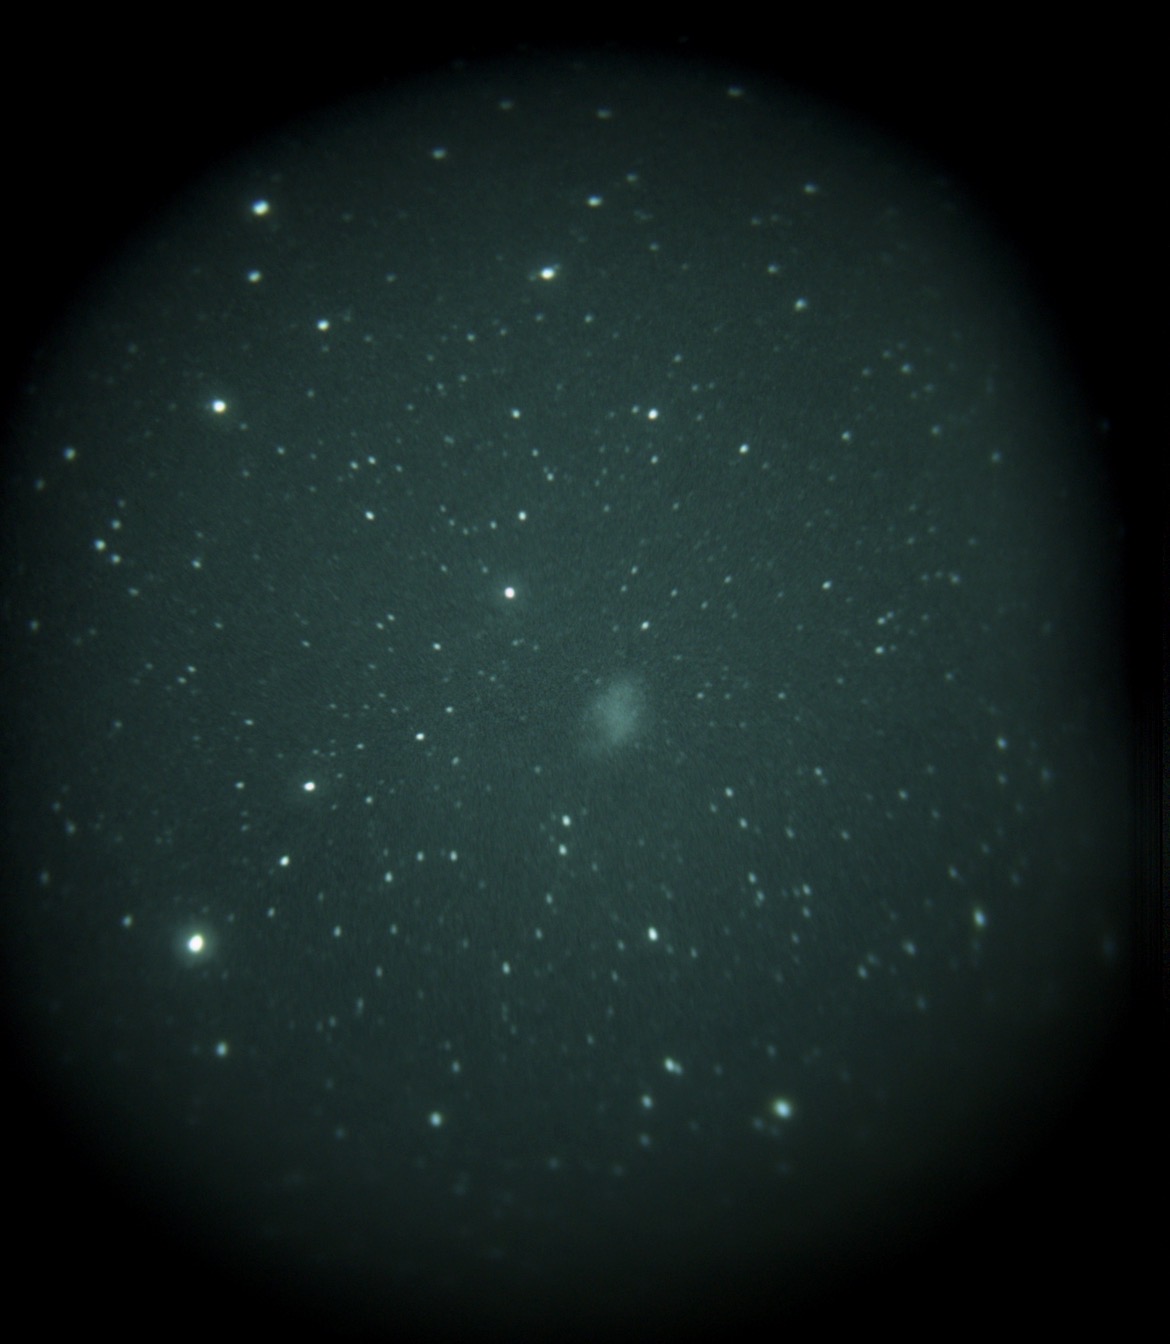
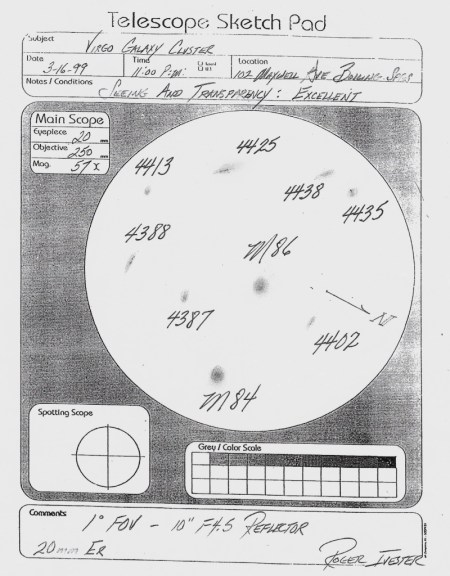
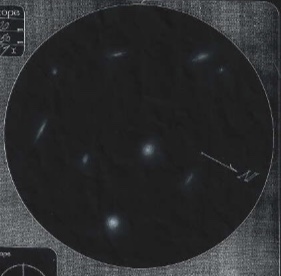
I first found out about the Virgo cluster (nine-galaxies all in a 1º FoV) from Tom Lorenzin, author of “1000+ The Amateur Astronomer’s Field Guide to Deep-Sky Observing” on the evening of the Vernal Equinox 1994.
Tom asked me if I’d ever viewed all nine galaxies within a 1° field of view, when centered on M86. I had not, but was most anxious to give it a try. However, It would be years later, on the night of March 16th 1999, before I was able to observe the galaxy group.
With my 10-inch f/4.5 reflector using a 20mm UO Erfle eyepiece for a magnification of 57x and a 1.1º true field. However, I could not see three of the fainter galaxies at this magnification.
So, I was able to sketch six of the galaxies, then increased to 160x using the 20mm EP and a 2.8x Barlow and spotted the fainter ones. I then sketched the three faint galaxies in theirappropriate positions and tried my best to draw them to scale. Very faint galaxies “most often” require greater magnification, especially if they have a brighter surface brightness and well concentrated.
My notes are as follows from March 16th 1999
M84: Bright, with a brighter more concentrated middle, and a mostly round shape.
M86: Bright, brighter middle, round, very similar to M84 but not as well concentrated.
NGC 4387: A very faint mostly round blur. Difficult at best requiring averted vision.
NGC 4388: Low surface brightness, elongated slash with an E-W orientation.
NGC 4402: Very faint slash, low surface brightness.
NGC 4413: Very faint and dim, small, very diffuse with little concentration, mostly round.
NGC 4425: Very faint, elongated, axis NS, small and dim.
NGC 4435: Fairly bright, mostly round, stellar nucleus, smaller than NGC 4438.
NGC 4438: Bright, elongated, with a brighter middle.
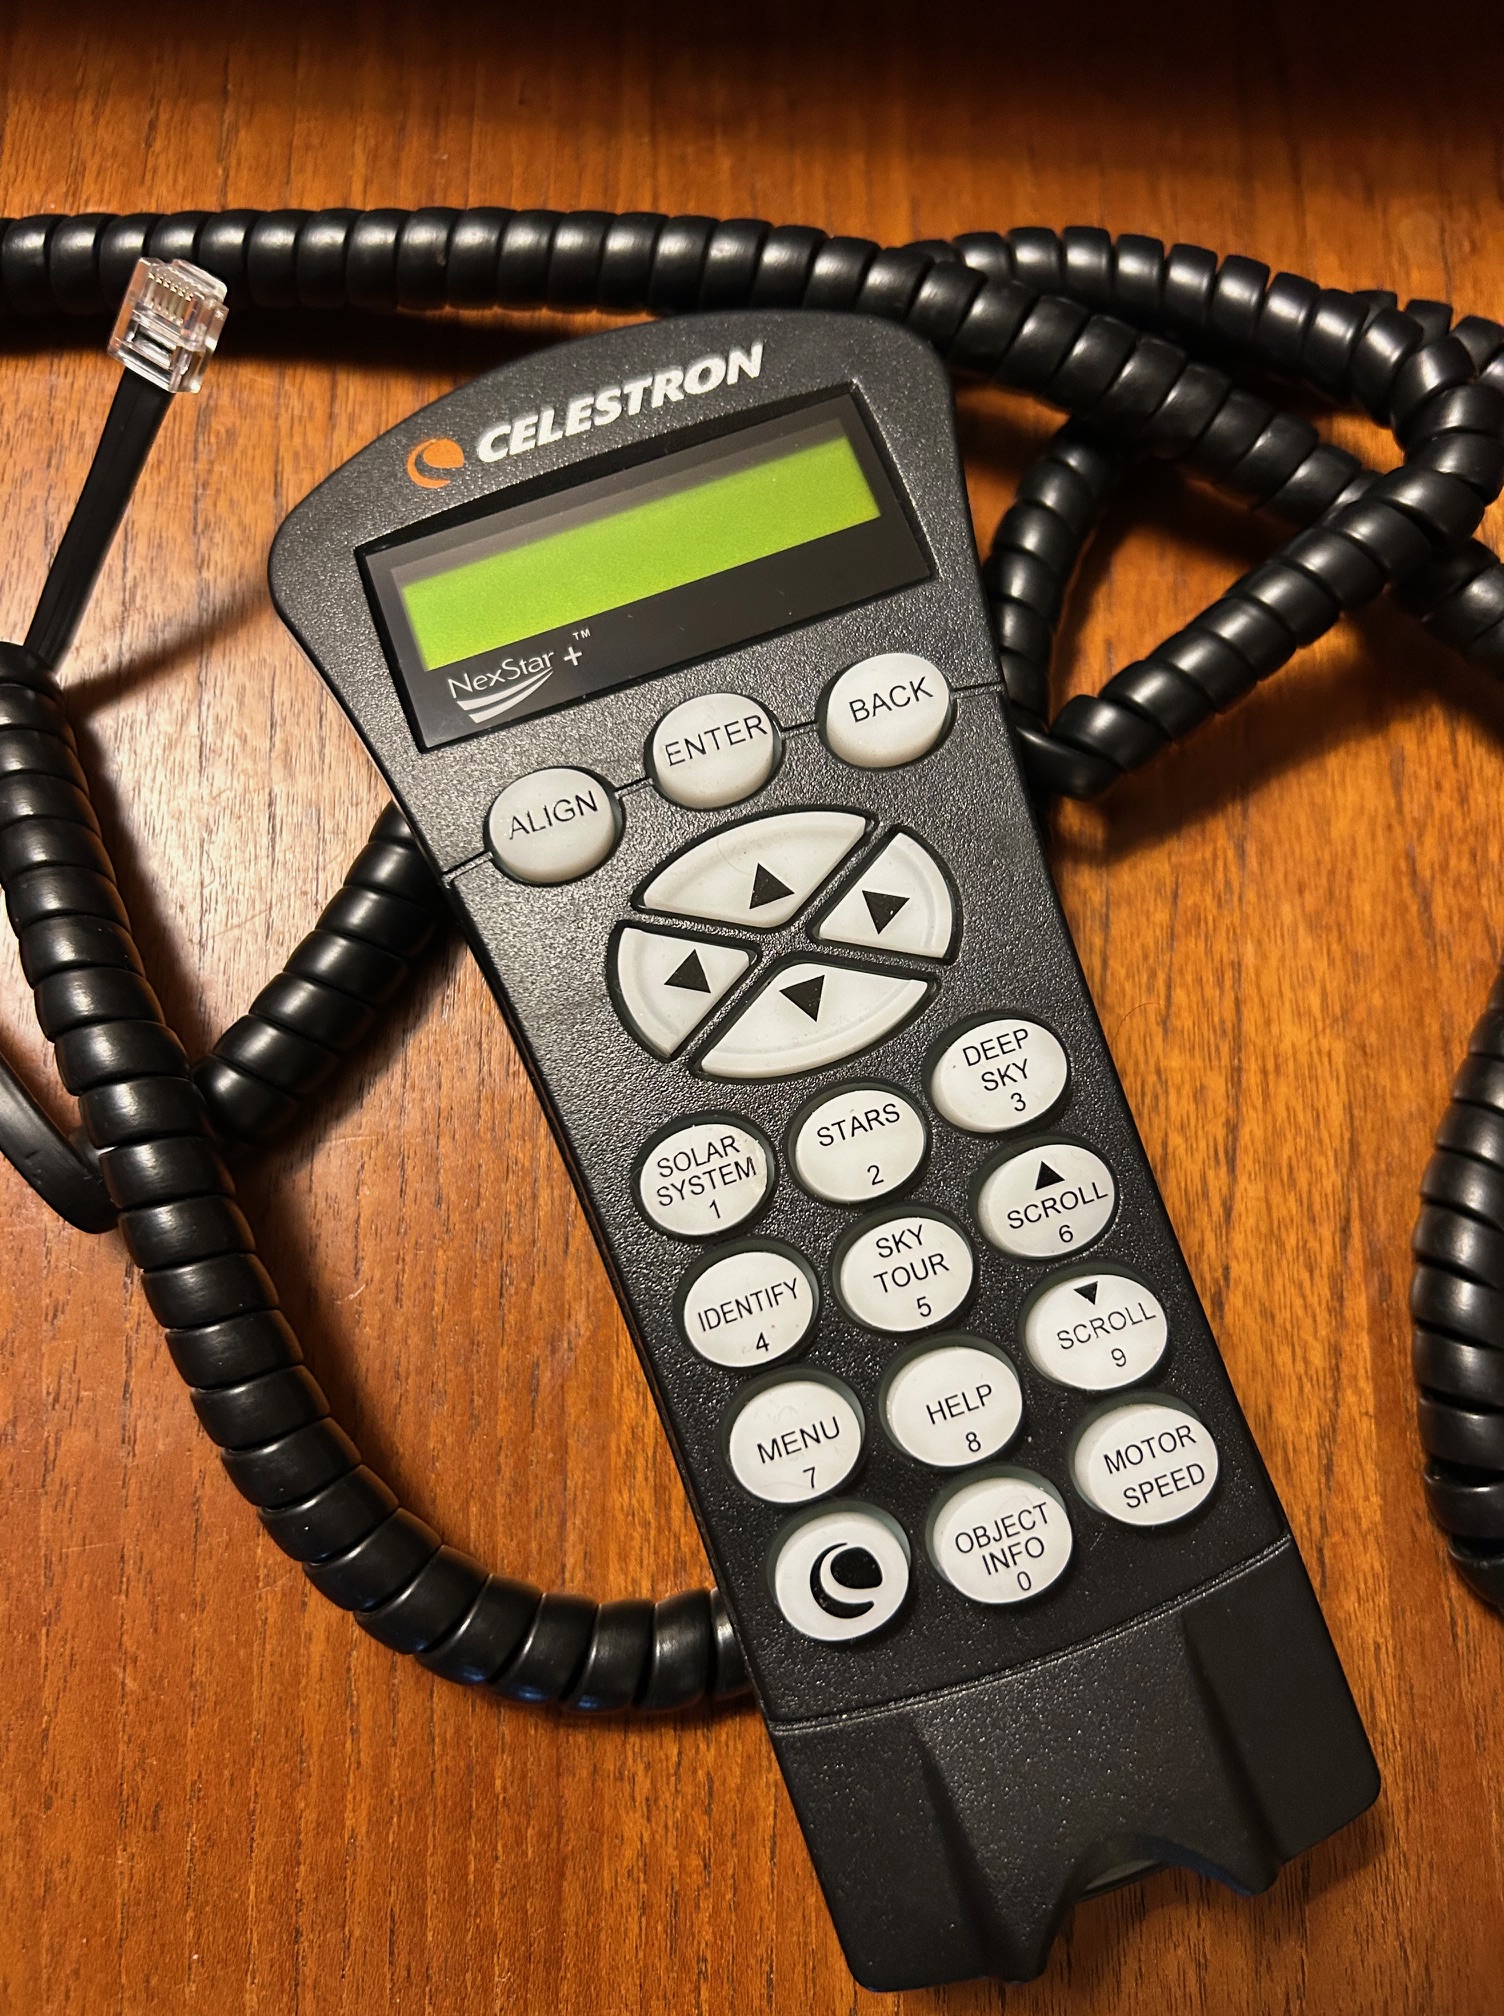
For the past year or more, my Celestron CGE-Pro mount was seemingly having a difficult time centering selected deep-sky objects. The motors also did not sound good at times when moving to the selected objects. I also had to perform a factory reset on the settings every few months.
Rather than updating the firm ware for a 15 year “maybe older” hand controller, my son Brad, surprised me with a new Celestron NexStar+. However, I was concerned if it would be compatible with the older mount, but I’m happy to say…it worked perfectly!
I first updated all my site settings using the new hand controller, which is an easy task using my iPhone compass feature for the time, latitude, and longitude. There are other settings such as DST or Standard, and a few others.
Last night, and with a bright moon, I wanted to verify the mount and hand controller in all functions. I began the sequence of the mount start-up. Then the three-star alignment, which after the first star, were all centered in the telescope field-of-view.
The first thing I noticed was the two motors sounded much smoother. I was actually getting concerned the motors might be having problems. I’d read in an article a jerky motion or sound of the motors was a sign that a motor might be going bad. So, I was now feeling really good, but how would the GoTo function perform when locating deep-sky objects?
My first object was the Andromeda galaxy, and with the sound of both motors, and going in different directions, I anxiously waited for it to stop. I then looked into the eyepiece and the galaxy was perfectly centered! The next object would be planetary nebula M57, far to the west from Andromeda, which would make for a great test. The planetary…like Andromeda was “perfectly centered” in the eyepiece. I then selected about 15 other deep-sky objects, including a few double stars. Everything worked perfectly. I was excited to say the least!
I’m so appreciative to Brad for my new hand controller. Despite not ever using the mount, he always seemed to know much more than me, and all the way from the west coast. 🙂 Electronics and electrical stuff are his thing and occupation...not mine for sure.
The CGE-Pro mount has bronze gears and was the most heavy-duty mount ever sold by Celestron, with a 90 pound payload.
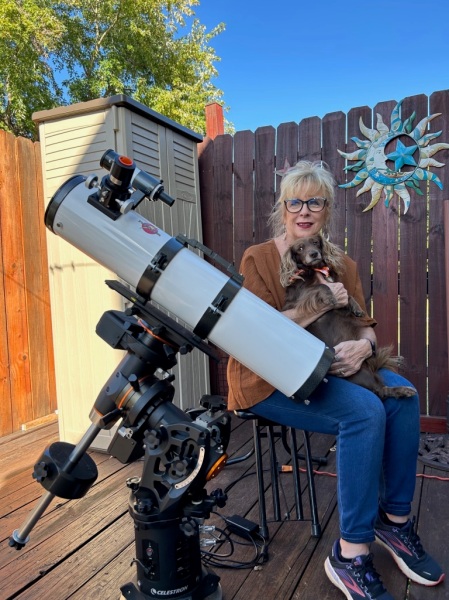
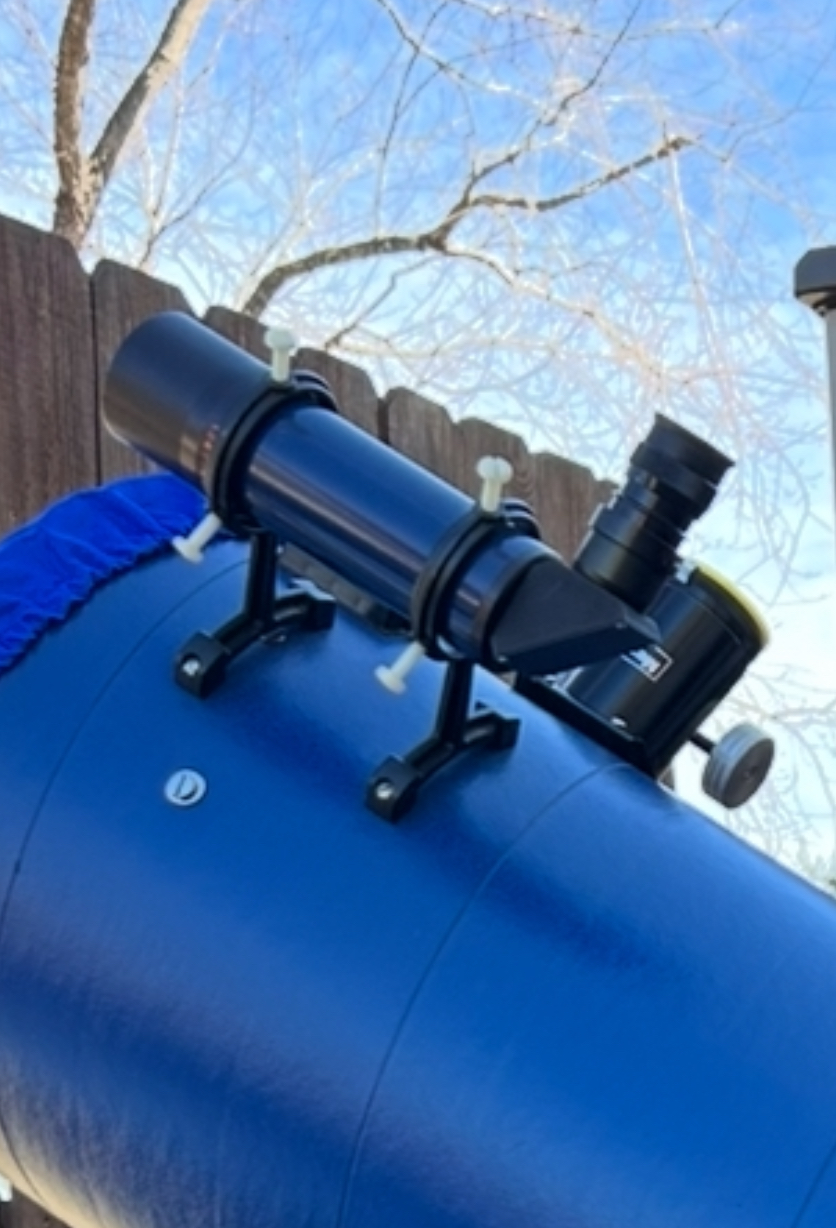
The mount works well with a 6-inch Newtonian also as following:
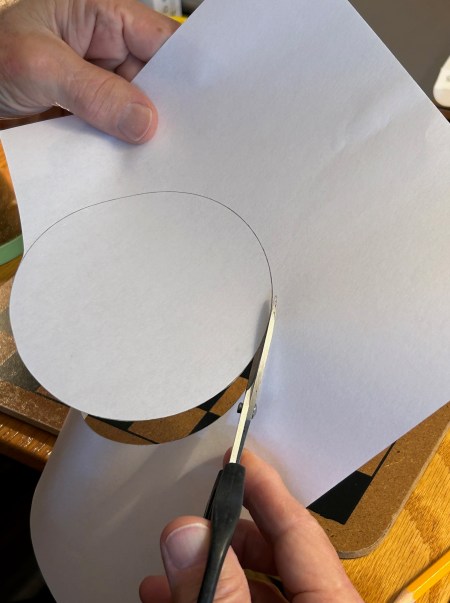
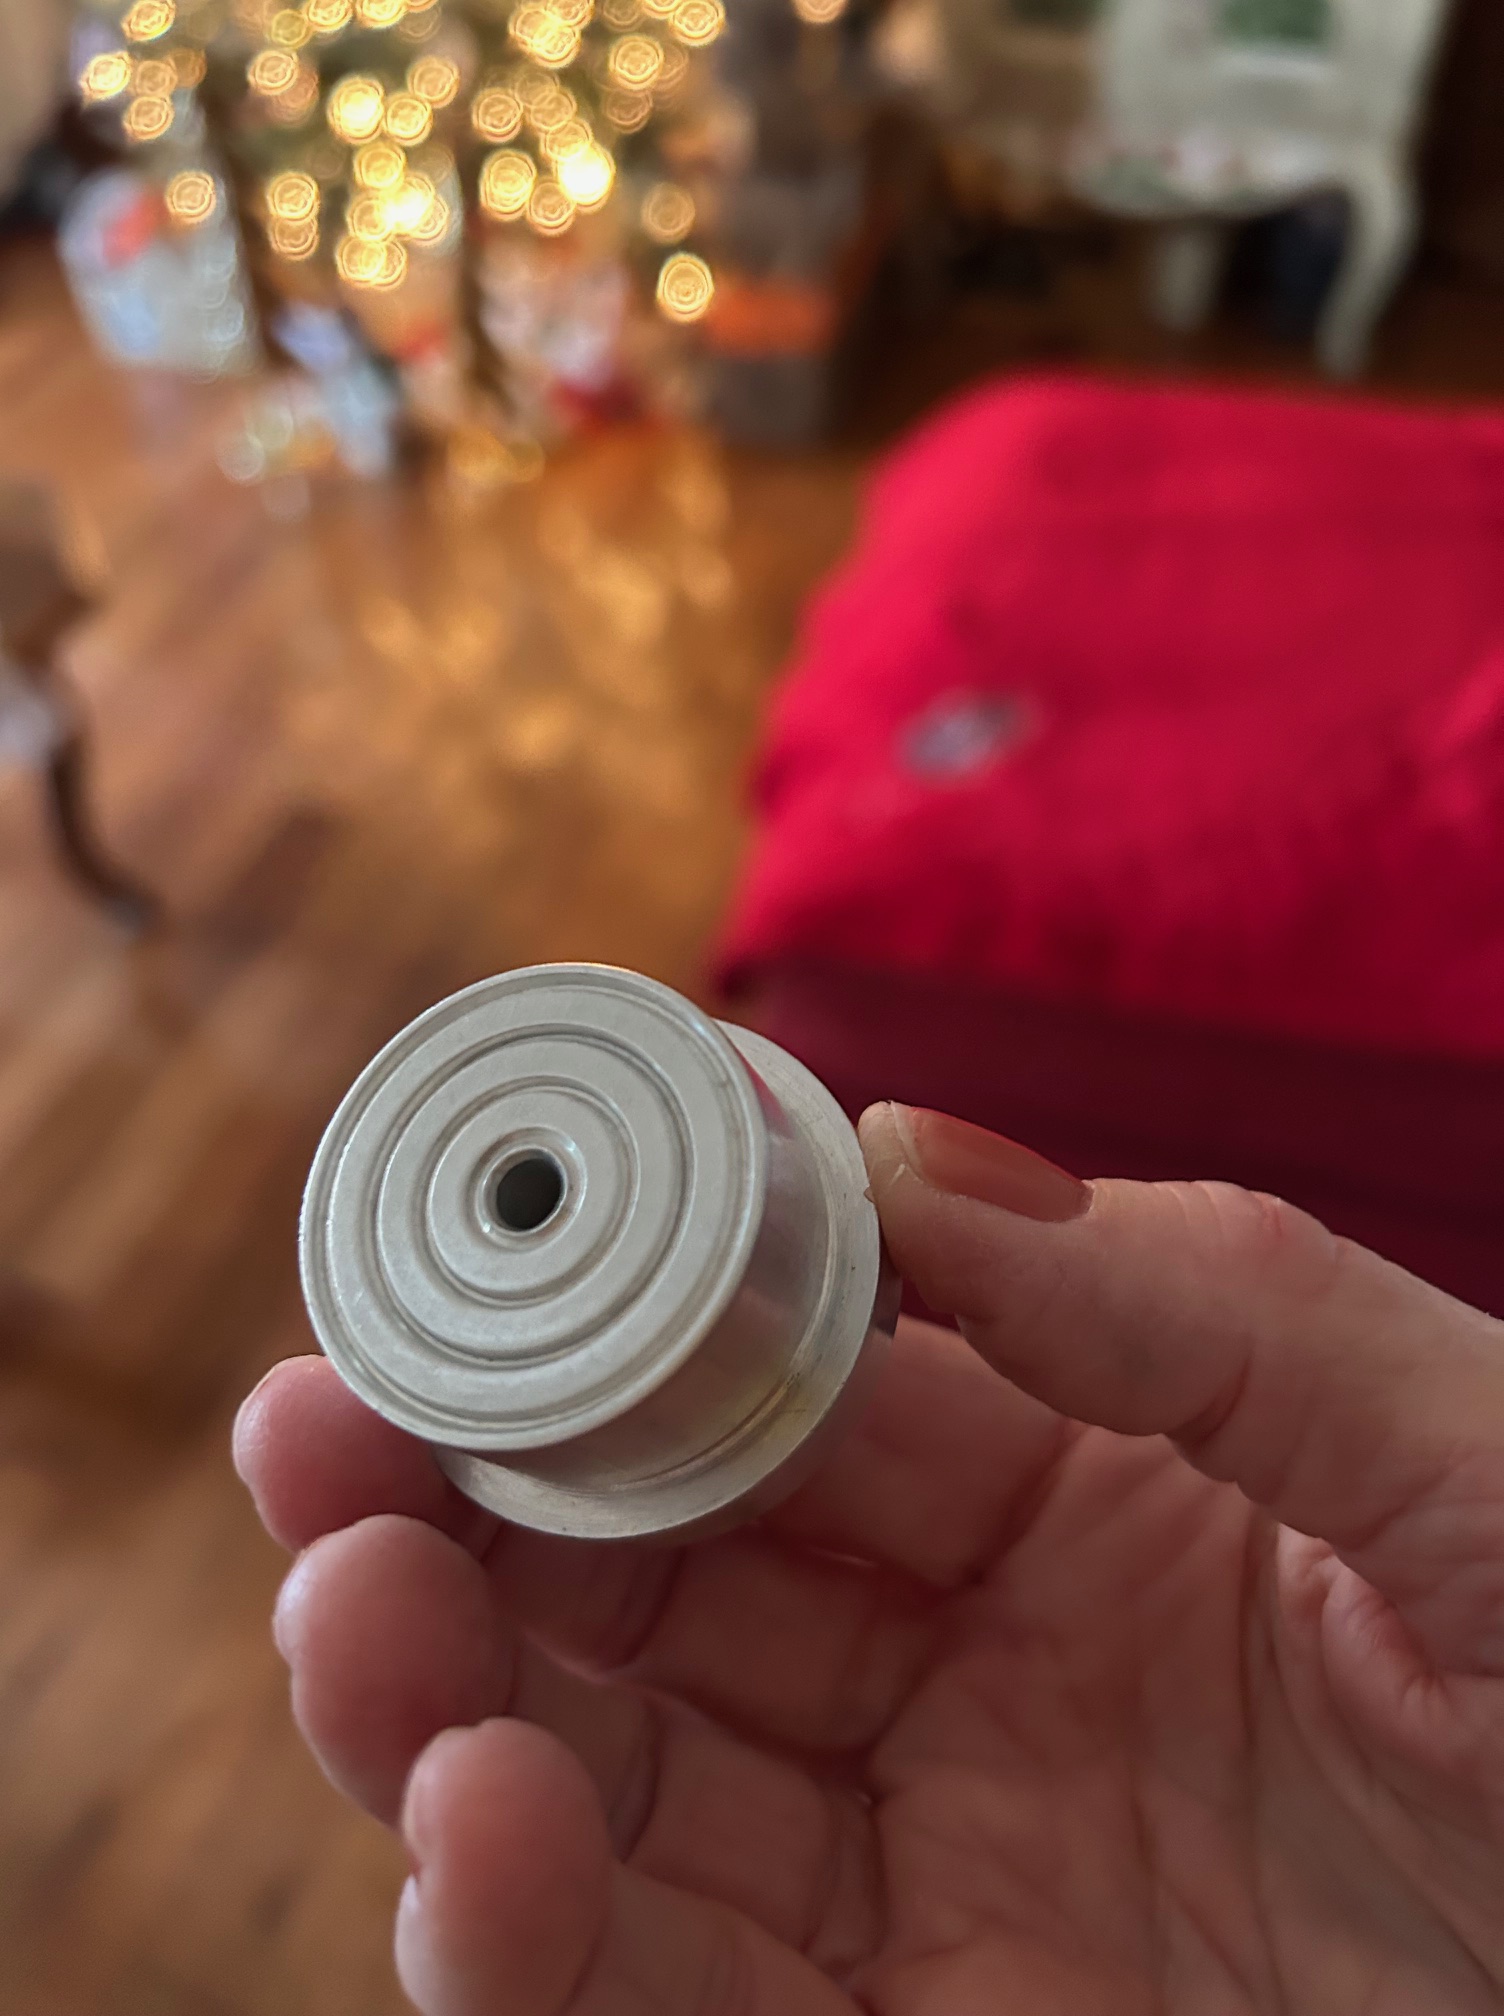
After removing the mirror, take a sheet of notebook paper, lay on the mirror and trace around the outer perimeter. The following is a 4.5-inch mirror which I center-marked earlier this year.
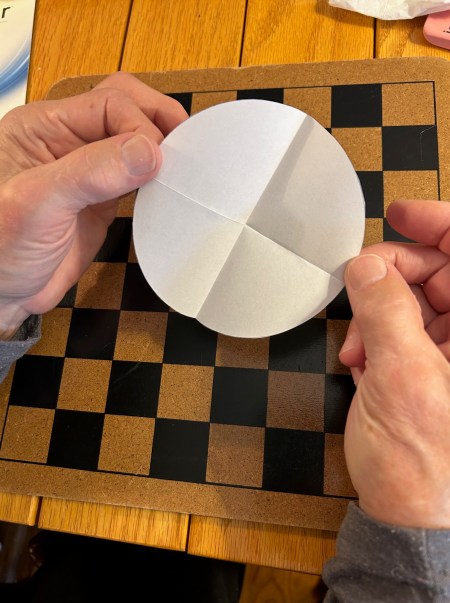
Fold the circle template in half, then quarter and then make a tiny hole in the center with any small sharp object. Now take a black Sharpie and “lightly dot” the center of the mirror, via the tiny hole. Now you are ready to replace the mirror and begin collimation. I’m not going to discuss collimation in this post, but have provided the following link from “High Point Scientific”…which is excellent.
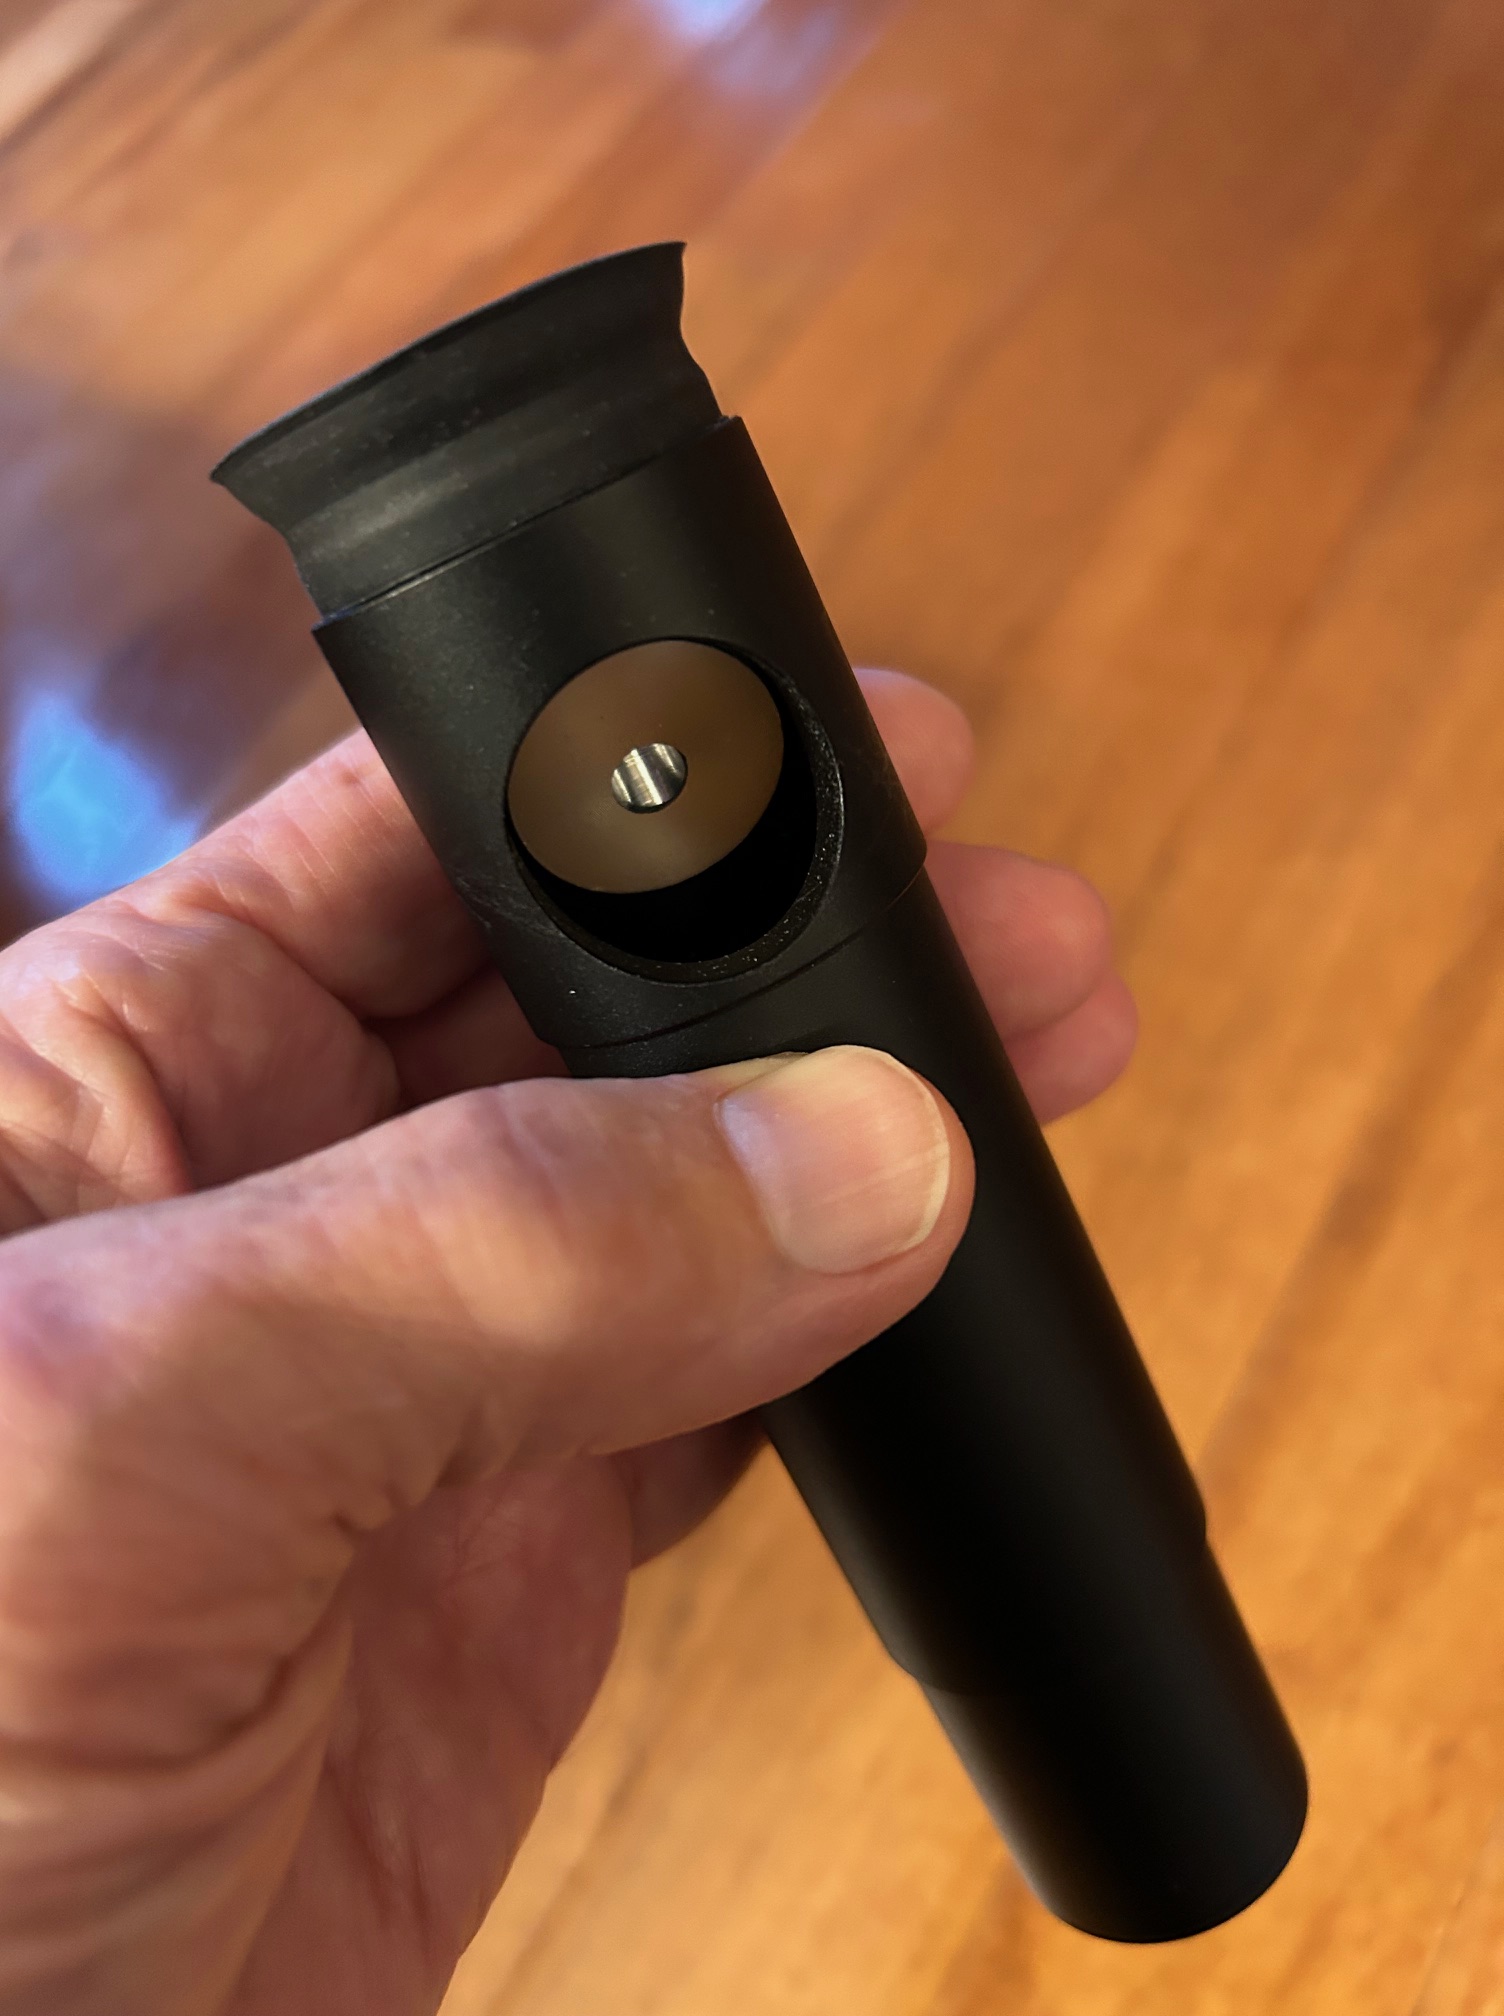
A collimation tool will be needed: I use a homemade machined collimating tool (see below) which works great. However, consider a Cheshire collimating eyepiece which is not very expensive at all. I have a Cheshire eyepiece, but most often find myself using only my homemade tool. A laser collimator is not necessary.
A couple photos of my Cheshire eyepiece as following which I also use on occasion:
While the mirror is out, it’s the perfect time to check if cleaning is needed.
The following procedure has allowed me to clean telescope mirrors with excellent results. It should, however, be noted that your results may vary. And mirrors coatings are very delicate, so be careful and use good common sense and care.
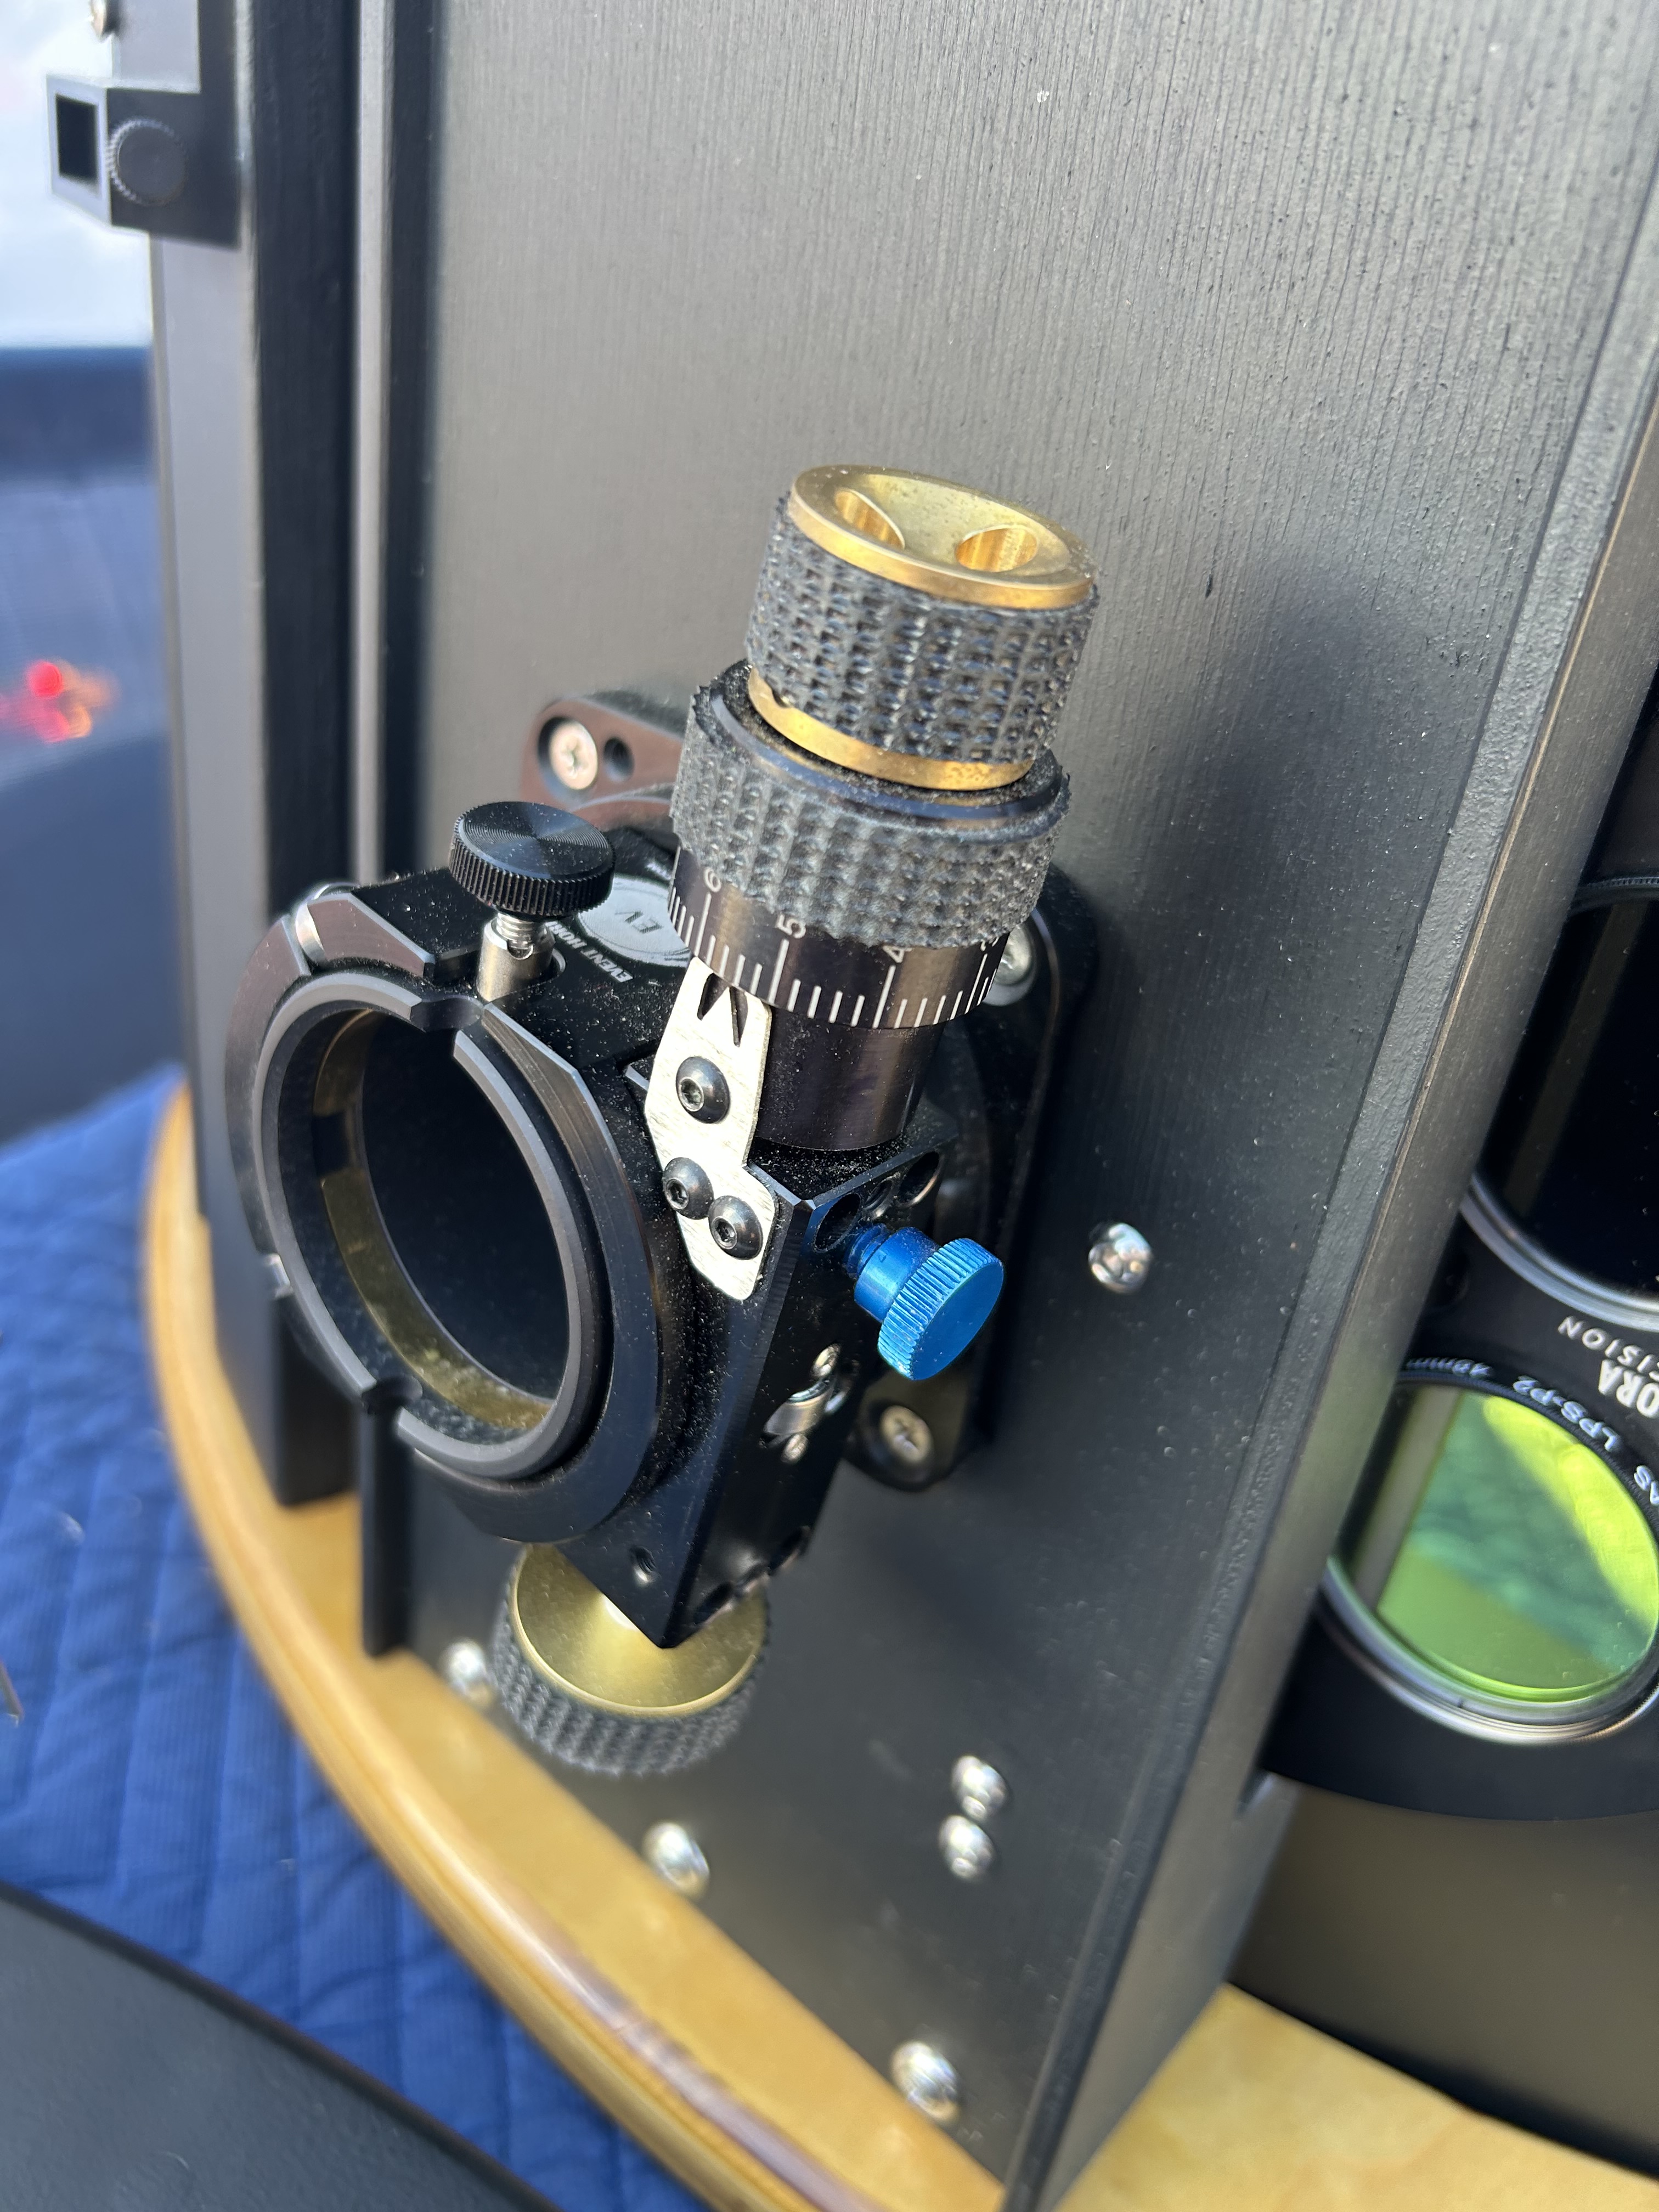
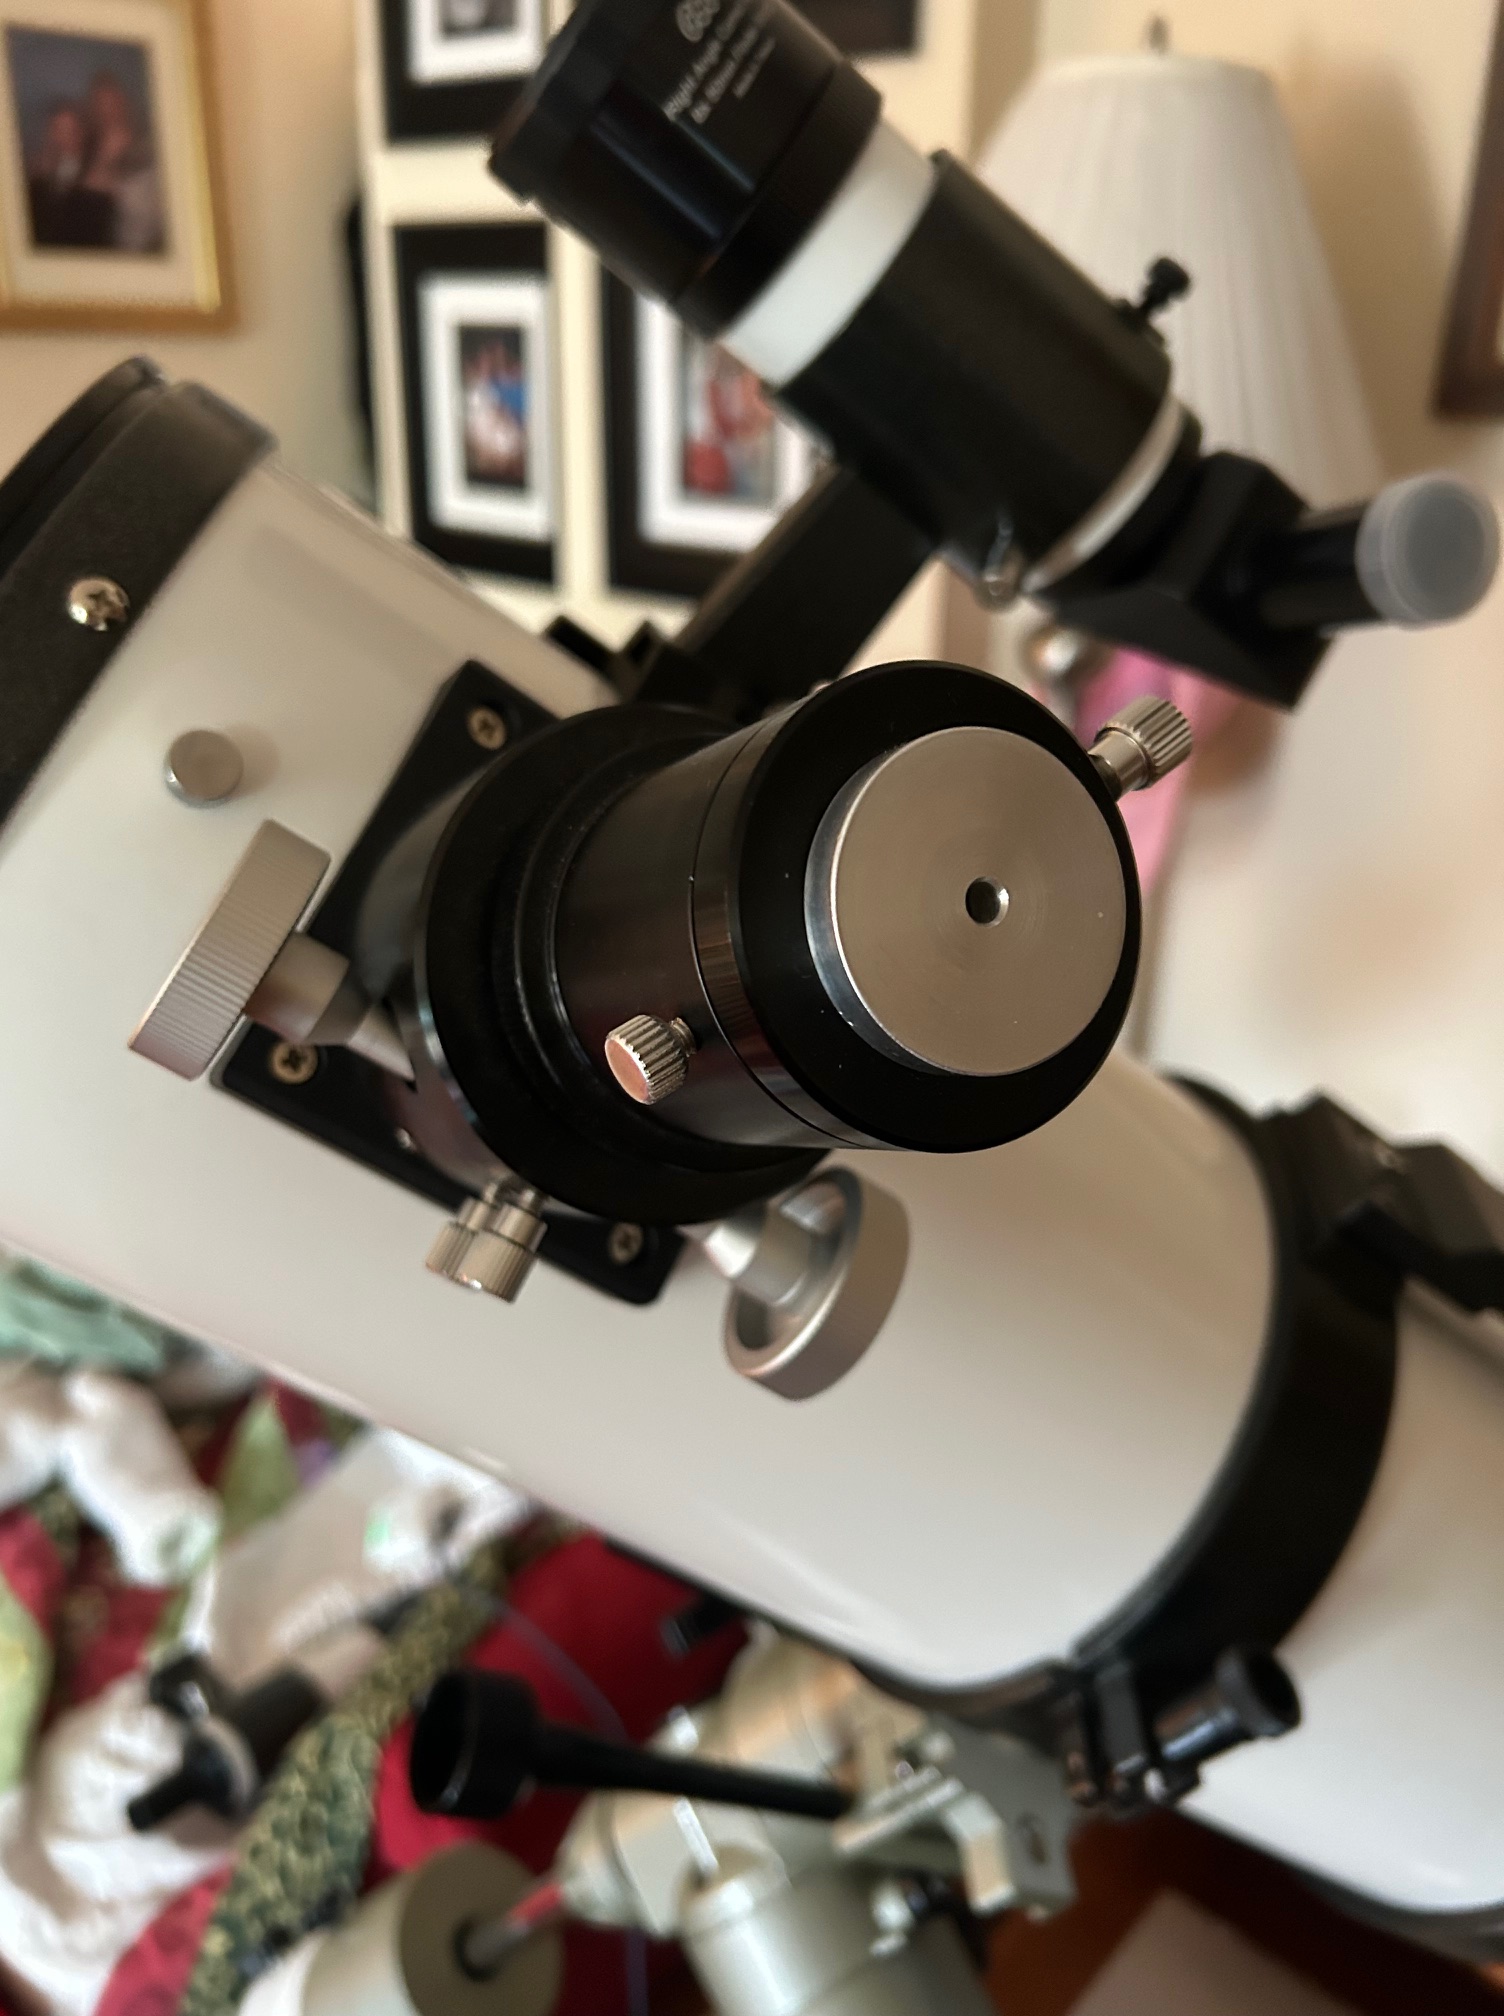
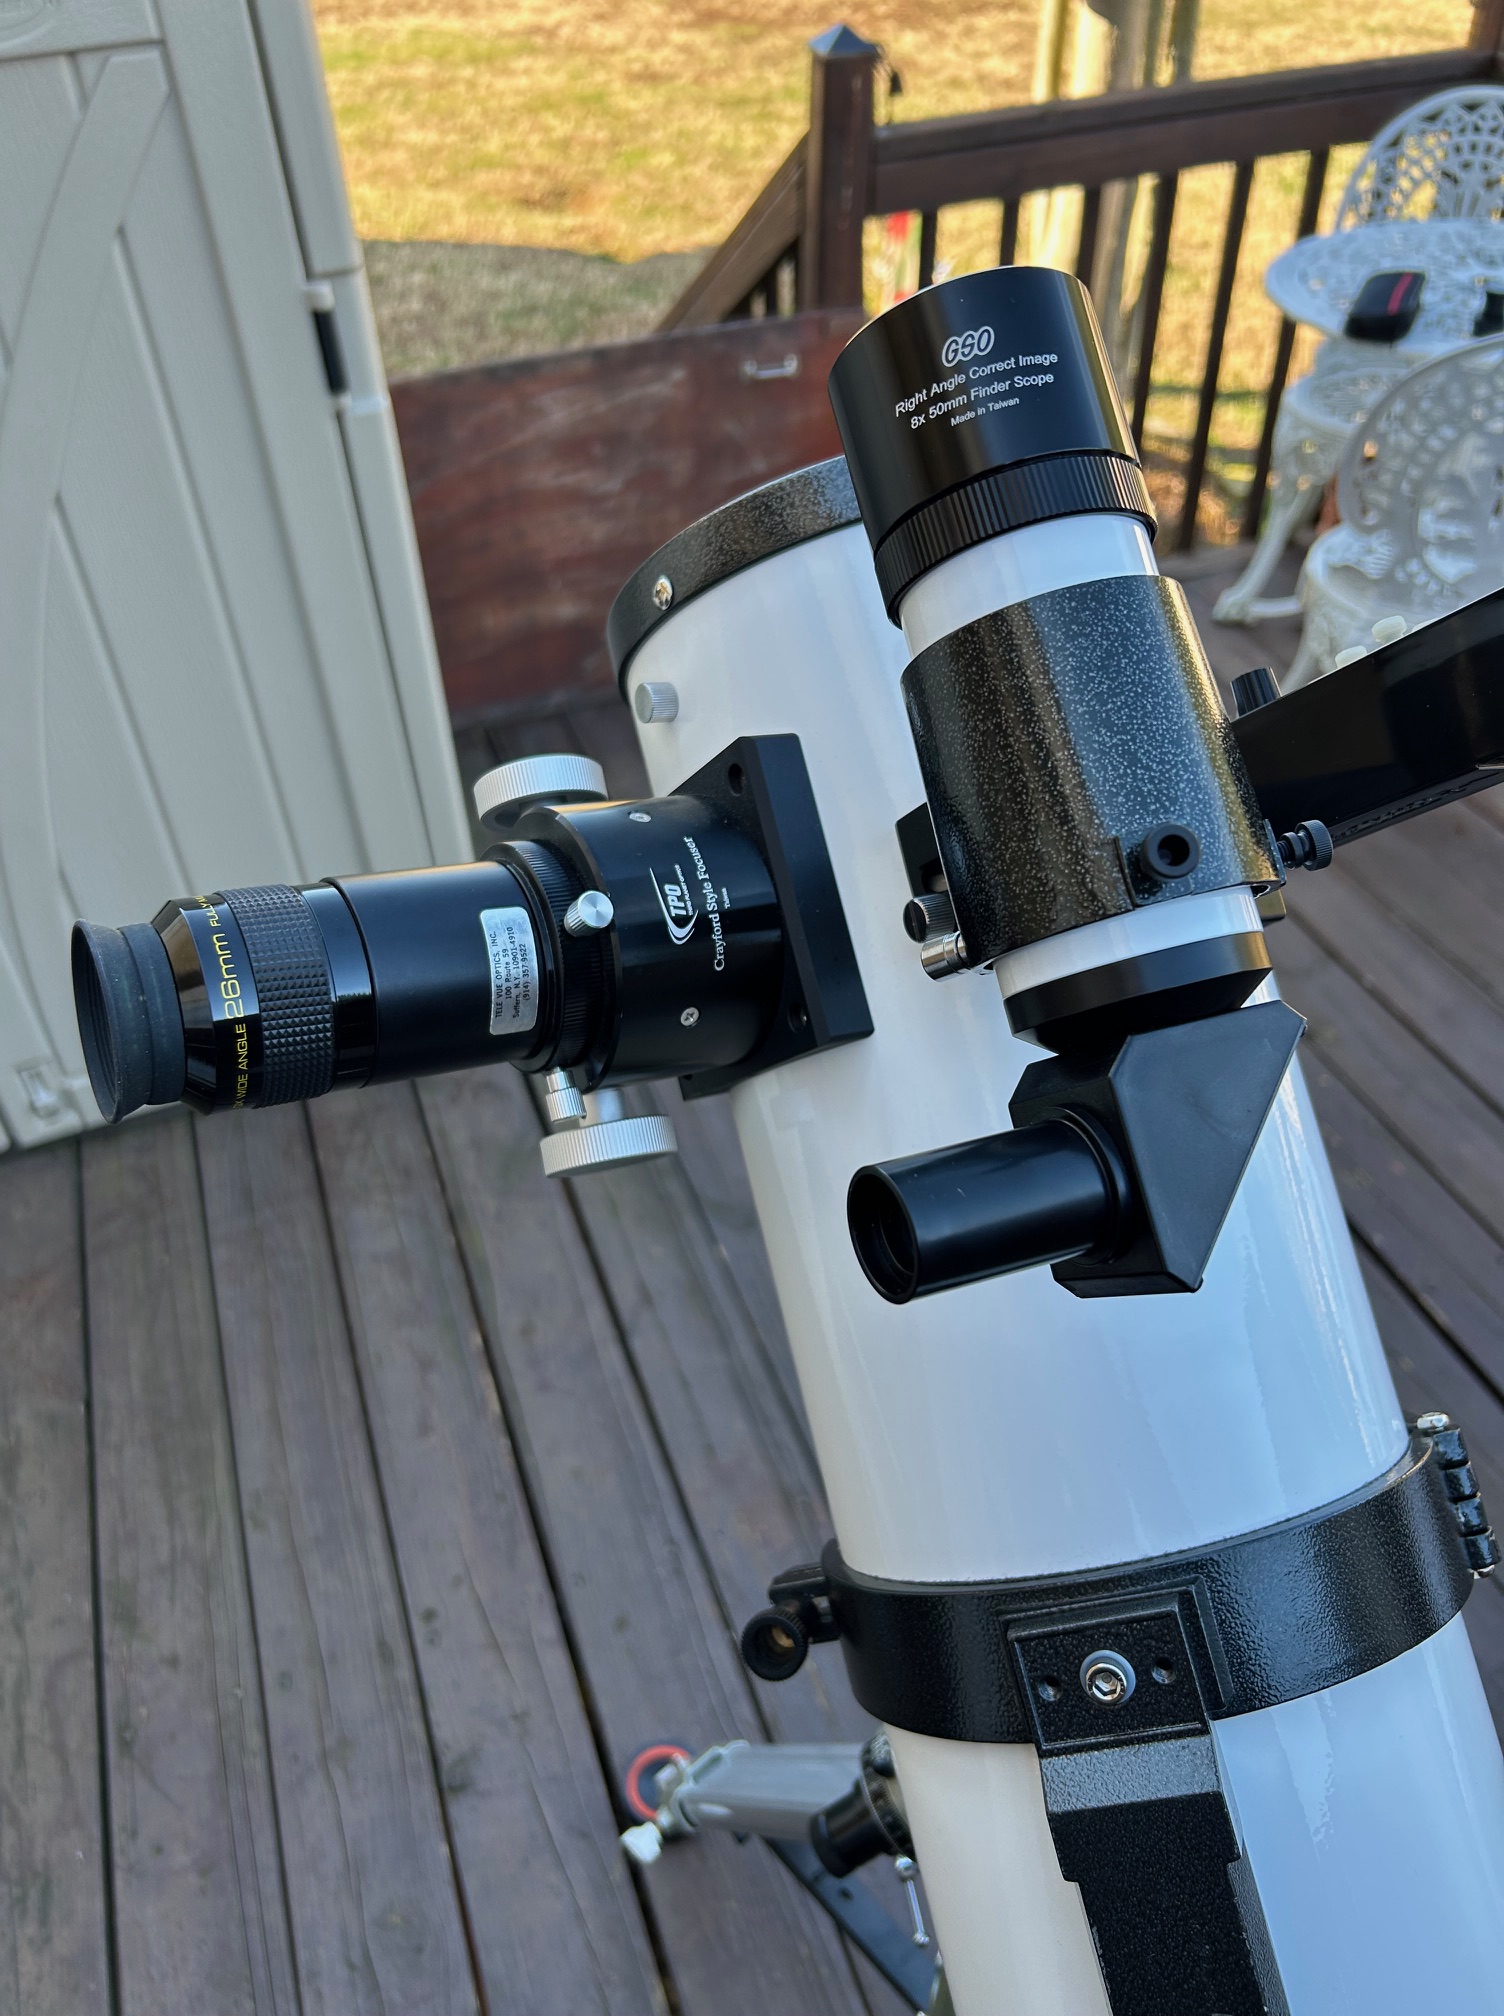
It has become almost impossible for me to now use a standard straight-through finder scope, due to the pain in my neck. Getting under a standard finder and in all types of contorted positions is just now too uncomfortable. So, a 90º RACI (right angle correct image) finder is now essential.
After too many years to many years to count, I’ve always used a straight-through finder, but in recent years, my neck has become the limiting factor, due in-part to growing older.
I have one 90º Antares 7.5 x 50 correct image finder (as pictured below) used with my 10-inch Newtonian, but on other telescopes I still use a standard straight-through finder.
It should be noted that a good quality straight-through finder will present brighter stars, due to the unobstructed light path. However, for me, with neck issues, the RACI finder allows me a view without pain.
I use a “Rigel QuikFinder” in conjunction with my magnified finders:
The Rigel makes for an excellent pointer for the telescope, as it’s much better and easier than attempting to sight along the optical tube. I have two Quikfinders and a QF base on my all my telescopes.
The Rigel finders are fairly small and lightweight…better suited for smaller telescopes than the much larger and heavier Telrad. I also like the “higher profile” of the Rigel for greater ease to sight.
I use a magnified finder in conjunction with my Rigel QuikFinder.
For extremely faint deep-sky objects, of whichever telescope I’m using; a magnified finder is essential.
I first draw a circle on my atlas before going out with the same degree field as my finder. I then attempt to point the magnified finder to match that of my star atlas, with the deep-sky object in the center of the circle.
Consider the following atlas page and circle, despite being so close to bright stars: Yed Prior and Yed Posterior the galaxy was invisible. I used the faint single star just to the north of the galaxy and it could not be seen. I spent hours on this galaxy over many observing sessions and seasons, attempting to see the galaxy. However, during moments of perfect seeing “I saw the galaxy” with averted vision, but not constant and only intermittently.
NGC 6118 is considered by most all amateur astronomers to be the most difficult object in the Herschel-400 list.
My suburban backyard is now averaging a naked-eye limiting magnitude of ~4.8 on my best nights, which indicates my sky is pretty bright; making very faint deep-sky objects very difficult.


Recent Comments